background image

62

GB

MISCELLANEOUS

63

Convenient Functions

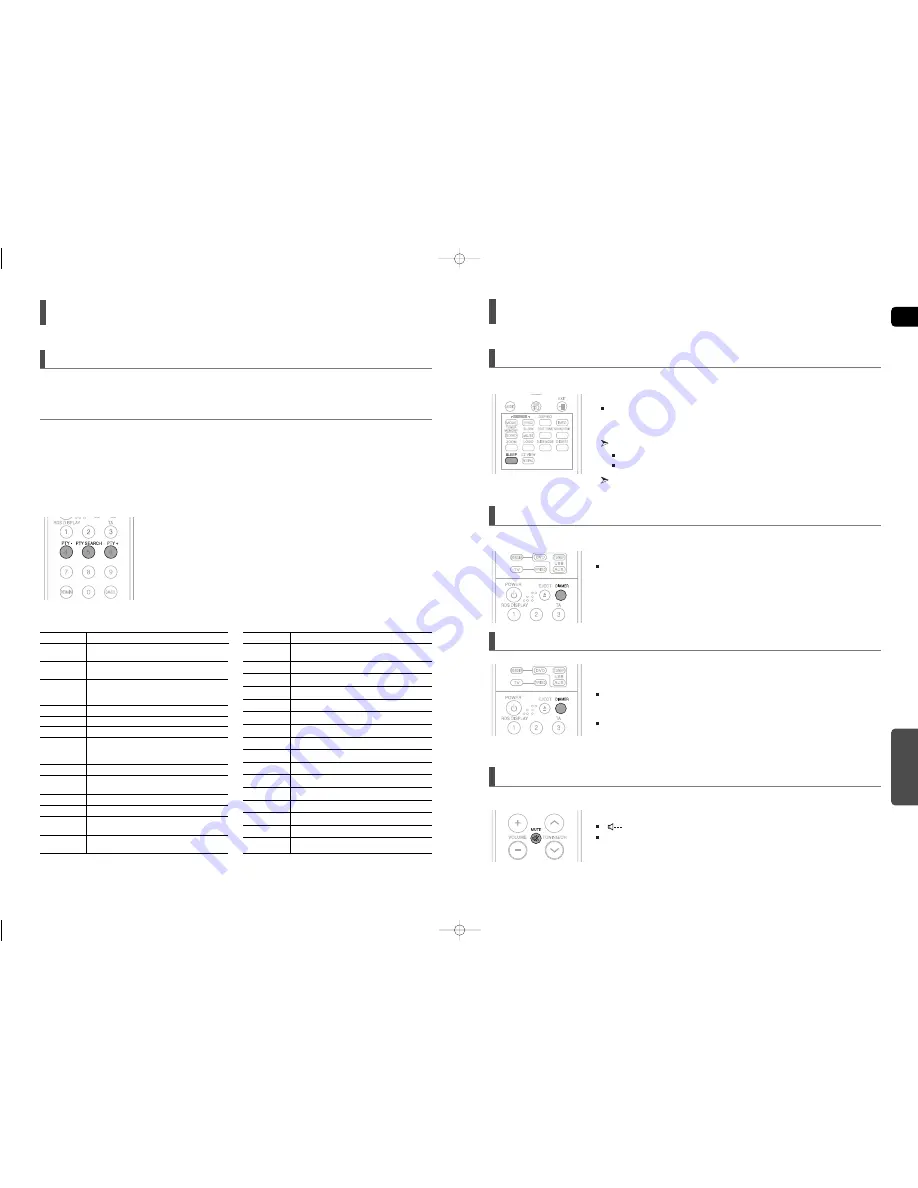
You can set the time that the Home Theater will shut itself off.

Press the SLEEP button.

Each time the button is pressed, the preset time changes as follows : 

10 

20 

30 

60 

90 

120 

150 

OFF.

To confirm the sleep timer setting, press the SLEEP button.

The remaining time before the Home Theater will shut itself off is displayed.

Pressing the button again changes the sleep time from what you have set earlier.

To cancel the sleep timer, press the SLEEP button until <OFF> appears on 

the display.

Sleep Timer Function

Each time you press and hold the DIMMER button for more than 2 seconds,

the following functions are selected in order: BUZZER

HOLD

BUZZER : Turns off the buzzer that rings each time you press any of the top buttons on the main

unit.Each time you press and release the DIMMER but-ton, it toggles between BUZZER
ON 
and OFF.

HOLD : Locks the top buttons on the main unit. Each time you press and release the DIMMER

button, it toggles between HOLD ON and OFF.

Press the DIMMER button.

Each time the button is pressed, the brightness of front display will be adjusted.

You can adjust the brightness of the display on the main unit so it won't interfere with your movie viewing.

B

UZZER

/H

OLD

F

UNCTION

Adjusting Display Brightness

This is useful when answering a doorbell or telephone call.

Press the MUTE button.

” appears in the display.

To restore the sound, press the MUTE button again.

Mute Function

About RDS broadcasting

(Con’t)

One  of the advantages of the RDS service is that you can locate a particular kind of program from the preset channels by
specifying the PTY codes.

PTY (Program Type) indication and PTY-SEARCH function

To search for a program using the PTY codes

Before you start, remember...

• 

The PTY Search is only applicable to preset stations.

• 

To stop searching any time during the process, press PTY SEARCH while searching.

• 

There is a time limit in doing the following steps. If the setting is cancelled before you finish, start from step 1 again.

• 

When pressing the buttons on the primary remote control, make sure that you have selected the FM 

station using the primary remote control.

Display

NEWS

AFFAIRS

INFO

SPORT

EDUCATE

DRAMA

CULTURE

SCIENCE

VARIED

POP M

ROCK M

M.O.R.M

LIGHT M

Program Type

News including an announced opinion and
report

Several matters including a current incident,
documentary, discussion and analysis.

Information including weights and measures,
returns and forecast, matters interesting the cus-
tomer, medical information, etc.

Sports

Education

Drama-Radio serial, etc.

Culture-National or local culture including the
religious problem, social science, language, 
theater, etc.

Natural science and technology

Others-Speech, amusing program (quiz, game),
interview, comedy and satirical play, etc.

Pop music

Rock music

Current contemporary music considered to be
“easy listening.”

Light classical music- Classical music and
instrumental and chorus music

CLASSICS

OTHER M

WEATHER

FINANCE

CHILDREN

SOCIAL A

RELIGION

PHONE IN

TRAVEL

LEISURE

JAZZ

COUNTRY

NATION M

OLDIES

FOLK M

DOCUMENT

Heavy classical  music-Orchestra music, 
symphony, chamber music and opera

Other music - Jazz, R&B country music

Weather

Finance

Children’s programmes

Social affairs

Religion

Phone in

Travel

Leisure

Jazz Music

Country Music

National Music

Oldies Music

Folk Music

Documentary

Display

Program Type

1

Press 

PTY SEARCH

while listening to an FM station.

2

Press the 

PTY-

or 

PTY+

until the PTY code you want appears on the display.

• 

The display gives you the PTY codes described to the right.

3

Press 

PTY SEARCH

again, while the PTY code selected in the previous step

is still on the display.

• 

The center unit searches 15 preset FM stations, stops when it finds the

one you have selected, and tunes in that station.

HT-TX500_GB-(46~71)-1009  10/19/07 3:12 PM  Page 62

Summary of Contents for HT-TX500

Page 1: ...DIGITAL HOME CINEMA SYSTEM HT TX500 COMPACT DIGITAL AUDIO GB Instruction Manual AH68 01660E REV 01 HT TX500_GB 1 45 1009 10 19 07 3 09 PM Page 2 AH68 02013B ...

Page 2: ...nto a main socket A plug and fuse must be used at all times IMPORTANT The wires in the main lead are coloured in accordance with the following code BLUE NEUTRAL BROWN LIVE As these colours may not correspond to the coloured markings identifying the terminals in your plug proceed as follows The wire coloured BLUE must be connected to the terminal marked with the letter N or coloured BLUE or BLACK T...

Page 3: ...ayer to deliver exceptional sound quality in terms of dynamic range low level resolution and high frequency detail Contents PREPARATION Safety Warnings 2 Precautions 3 Features 4 Notes on Discs 6 Description 8 CONNECTIONS Speaker Installation 12 Installing the DVD player 14 Connecting the Speaker 16 Connecting the Optional Wireless Receiving Amplifier 19 Connecting the Video Out to your TV 21 HDMI...

Page 4: ...ent in the multisession disc the disc can be played only up to the blank segment A maximum of 9 999 images can be stored on a single CD When playing a Kodak Fuji Picture CD only the JPEG files in the picture folder can be played Picture discs other than Kodak Fuji Picture CDs may take longer to start playing or may not play at all CD R MP3 Discs Only CD R discs with MP3 files in ISO 9660 or Joliet...

Page 5: ...R 6 Audio Output Jack 7 External Digital Optical Input Jack 1 Use this to connect external equipment capable of digital output 8 External Digital Optical Input Jack 2 Use this to connect external equipment capable of digital output 9 Stand Fix Hole 10 Cooling Fan PREPARATION Description 1 2 3 4 5 7 6 8 1 2 3 9 10 For more information about the speaker system refer to page 12 1 9 10 2 3 4 5 6 7 8 1...

Page 6: ...button 34 SOUND EDIT button 35 DIGEST button 36 TEST TONE button 37 SLIDE MODE button 38 LOGO button 1 Remove the battery cover in the direction of the arrow 2 Insert two 1 5V AAA batteries paying attention to the correct polarities and 3 Replace the battery cover Follow these precautions to avoid leaking or cracking cells Place batteries in the remote control so they match the polarity to and to ...

Page 7: ...tighten 2 Silver on the back of the stand 4 Mount the speaker on the stand 5 Tighten 2 Silver screws on the back of the speaker 6 This is the successfully assembled speaker How to Install the Speaker and the Stand Make sure that the speaker is installed on a flat and stable area Otherwise it may be easily knocked over SPEAKER 4EA STAND 4EA Screw 16EA BLACK Screw 16EA SILVER STAND BASE 4EA Front sp...

Page 8: ...he bottom of the stand and pass the cables through the holder 6 Squeeze the cables into the groove on the holder of the round board 7 Close the holder cover 8 Open a Toroidal Ferrite Core by pulling it upward Wrap it around of the system connection cable so it will be next to the DVD Player Close it back by pressing it all the way down until you hear a clicking sound STAND STAND BASE STAND For the...

Page 9: ... there isn t enough room place these speakers so they face each other Place them about 60 to 90cm 2 to 3feet above your ear facing slightly downward Unlike the front and center speakers the rear speakers are used to handle mainly sound effects and sound will not come from them all the time Sound will be heard from the rear speakers in DVD 5 1 CH or Dolby Pro Logic II mode only Front Speakers Place...

Page 10: ...not insert the TX card upside down or in the reverse direction Insert the TX card when the DVD Player is turned off Inserting the card when it is turned on may cause a problem If the TX Card is inserted sound is not output from the Rear Speaker connectors on the subwoofer Slanted side face up TX card Connecting the Main Unit and Subwoofer POWER ON OFF AUDIO IN CROSS OVER AUDIO IN Rear of Subwoofer...

Page 11: ... unit turned off press and hold the remote control s REMAIN button for 5 seconds The STANDBY LED on the front panel of the wireless receiver module blinks 2 With the wireless receiver module turned on use a ball point pen or a toothpick to press the RESET button on the back of the unit The STANDBY LED on the front panel of the wireless receiver module blinks 2 Times 3 Press and hold the Power butt...

Page 12: ...on your TV See the TV instruction manual for more information You can operate the Home Theater by using the TV remote control Available TV buttons and buttons button Set the Anynet HDMI CEC function to On on your TV Receiver On You can listen to audio through the Home Theater Receiver Off You can listen to audio through the TV Select THEATER to connector and set the option of each items below View...

Page 13: ...l Optical Cable not supplied Audio Cable not supplied If the external analog component has only one Audio Out connect either left or right AUX2 Rear Panel AUX2 Connecting an External Analog Component Analog signal components such as a VCR 1 Connect AUX IN 2 Audio on the Home Theater to the Audio Out of the external analog component Be sure to match connector colors 2 Press the AUX button on the re...

Page 14: ...g the user manual Icon Term Definition DVD CD MP3 JPEG DivX CAUTION NOTE DVD CD MP3 JPEG DivX This involves a function available with DVD or DVD R DVD RW discs that have been recorded and finalized in Video Mode This involves a function available with a data CD CD R or CD RW This involves a function available with CD R RW discs This involves a function available with CD R RW discs This involves a ...

Page 15: ...e playback press the PLAY PAUSE button again DVD CD Before Using Your Home Theater To Operate your Samsung TV and the Home Theater with the HT TX500 s Remote Control 1 Plug the main unit s power cord into the AC power supply Before plugging your system into a main socket you must check the voltage setting If the voltage of the socket does not correspond to the setting on the rear of the unit you m...

Page 16: ...SHOW MODE 1 5 SLIDE SHOW MODE RANDOM SLIDE SHOW MODE NONE Press the button to skip to the next slide Each time the button is pressed the slide moves backward or forward MP3 MP3 WMA CD Playback 1 Load the MP3 WMA disc The MP3 WMA menu screen will appear and playback will start The appearance of the menu depends on the MP3 WMA disc WMA DRM files cannot be played 2 In Stop mode use the Cursor button ...

Page 17: ...an only support up to 6Mbps Aspect Ratio Although the default DivX resolution is 640x480 pixels 4 3 this product supports up to 800x600 pixels 16 9 TV screen resolutions higher than 800 will not be supported When you play a disc whose sampling frequency is higher than 48khz or 320kbps you may experience shaking on the screen during playback Supported Audio Formats Press the SUBTITLE button Each ti...

Page 18: ...CK REMAIN TRACK ELAPSED GROUP ELAPSED GROUP REMAIN TRACK ELAPSED TRACK REMAIN Using the Playback Function Press the INFO button Each time the button is pressed the display changes as follows The information Display disappears from the screen The information Display disappears from the screen The information Display disappears from the screen Screen Display CD display DVD display TITLE display ELAP...

Page 19: ...bum and track repeat Steps 2 and 3 above 4 Press the ENTER button For DivX MP3 and JPEG discs you cannot select Repeat Play from the information display screen To Select a Repeat Playback Mode in the Disc Information Screen Repeat playback allows you to repeatedly play a chapter title track song or directory MP3 file Repeat Playback DVD CD MP3 JPEG DivX DVD CD DVD CD DVD VIDEO DVD AUDIO CD MP3 JPE...

Page 20: ...D SELECT ZOOM POSITION Using the Playback Function Con t A B Repeat Playback The A B Repeat function does not operate with DivX MP3 or JPEG discs Point B cannot be set until 5 seconds of playback has elapsed from point A No sound is heard during step motion playback 1 Press the INFO button twice 2 Press the Cursor button to move to the REPEAT PLAYBACK display 3 Press the Cursor button to select A ...

Page 21: ...iscs have a built in horizontal to vertical ratio This feature is not supported for DivX discs During the EZ View operation some of the left and right sides may be cut slightly Press the EZ VIEW button Each time the button is pressed the zoom function will switch between On and Off When a movie is played in Widescreen format black bars at the top and bottom of the TV screen can be removed by press...

Page 22: ... of each movie Depending on the disc the availability of this feature may vary DVD DVD ENTER MOVE EXIT ENTER MOVE EXIT Using the Playback Function Con t Moving Directly to a Scene Song 1 Press the INFO button 2 Press the Cursor button or numeric buttons to select the desired title track and then press the ENTER button 3 Press the Cursor button to move to the Chapter display 4 Press the Cursor butt...

Page 23: ...nect an auxiliary power cord to the USB HDD for proper operation 5 USB card Reader One slot USB card reader and Multi slot USB card reader Depending on the manufacturer the USB card reader may not be supported If you install multiple memory devices into a multi card reader you may experience problems 6 If you use a USB extension cable the USB device might not be recognized You can enjoy media file...

Page 24: ...nt screen sizes you should adjust the aspect ratio to fit your TV or monitor For a standard TV select either 4 3PS or 4 3LB option according to personal preference Select WIDE HDTV if you have a widescreen TV 1 In Stop mode press the MENU button 2 Press the Cursor button to move to Setup and then press the ENTER button 3 Press the Cursor button to move to TV DISPLAY and then press the ENTER button...

Page 25: ...on the display and all settings will return to the default values Press the POWER button Using the RESET function will erase all stored settings Do not use this unless necessary If you have forgotten the rating level password do the following While watching a DVD or JPEG CD you can set the image you like as background wallpaper 1 During playback press the PLAY PAUSE button when an image you like a...

Page 26: ...SPEAKER If the distance of Dc is equal to or longer than the distance of Df in the figure set the mode as 0ms Otherwise change the setting according to the table Setting REAR SURROUND SPEAKERS If the distance of Df is equal to the distance of Ds in the figure set the mode as 0ms Otherwise change the setting according to the table Setting up the Speaker Delay Time Df The distance from FRONT SPEAKER...

Page 27: ...e to check the speaker connections 1 In Stop mode press the MENU button 2 Press the Cursor button to move to Audio and then press the ENTER button 3 Press the Cursor button to move to TEST TONE and then press the ENTER button The test tone will be sent to L C R SR SL SW in order If the ENTER button is pressed again at this time the test tone will stop Press the RETURN button to return to the previ...

Page 28: ...ursor button is pressed the effect is greater and when the Cursor button is pressed the effect is smaller Press the RETURN button to return to the previous level Press the EXIT button to exit the setup screen Setting the DRC Dynamic Range Compression MOVE ENTER EXIT CHANGE EXIT RETURN RETURN MOVE ENTER EXIT RETURN MOVE SELECT EXIT RETURN The audio signals transmitted over the HDMI Cable can be tog...

Page 29: ...ing in a grand church PASS Select this for normal listening You can select the desired Dolby Pro Logic II audio mode Press the PL II MODE button Each time the button is pressed the mode changes as follows Dolby Pro Logic II Mode PRO LOGIC II MUSIC When listening to music you can experience sound effects as if you are listening to the actual performance CINEMA Adds realism to the movie soundtrack P...

Page 30: ...ts the sound field DSP from the front or rear Dolby Pro Logic II Effect Listening to Radio 1 Press the TUNER button to select the FM band 2 Tune in to the desired station Automatic Tuning 1 When the button is pressed a preset broadcast station is selected Automatic Tuning 2 Press and hold the button to automatically search for active broadcasting stations Manual Tuning Briefly press the button to ...

Page 31: ...er case and lower case letters and always uses upper case letters The display window cannot show accented letters A for instance may stands for accented A s like À Â Ä Á Å and à Using the RDS Radio Data System to receive FM stations TO show the RDS signals RDS may not operate correctly if the station tuned is not transmitting RDS signal properly or if the signal strength is weak If searching finis...

Page 32: ...To stop searching any time during the process press PTY SEARCH while searching There is a time limit in doing the following steps If the setting is cancelled before you finish start from step 1 again When pressing the buttons on the primary remote control make sure that you have selected the FM station using the primary remote control Display NEWS AFFAIRS INFO SPORT EDUCATE DRAMA CULTURE SCIENCE V...

Page 33: ...agnavox Marantz Matsui MGA Mitsubishi MGA No Brand Code 56 57 58 01 15 01 02 03 04 05 06 07 08 09 10 11 12 13 14 01 18 40 48 57 58 81 59 60 18 03 03 18 25 97 03 18 46 15 03 05 61 82 83 84 62 03 59 61 63 03 02 03 04 15 16 17 18 19 20 21 22 23 24 25 26 27 28 29 30 32 34 35 36 48 59 90 40 03 03 15 40 46 59 61 64 82 83 84 85 19 65 03 03 06 40 56 59 66 67 68 40 15 18 50 59 69 45 56 59 67 86 70 59 61 87...

Page 34: ... the problem you are experiencing is not listed below or if the instruction below does not help turn off the unit disconnect the power cord and contact the nearest authorized dealer or Samsung Electronics Service Center Troubleshooting Is the power cord plugged securely into the outlet Turn off the power and then turn it back on Check the region number of the DVD DVD discs purchased from abroad ma...

Page 35: ...mali 1044 Arabic 1196 Guarani 1350 Malayalam 1511 Albanian 1045 Assamese 1203 Gujarati 1352 Mongolian 1512 Serbian 1051 Aymara 1209 Hausa 1353 Moldavian 1513 Siswati 1052 Azerbaijani 1217 Hindi 1356 Marathi 1514 Sesotho 1053 Bashkir 1226 Croatian 1357 Malay 1515 Sundanese 1057 Byelorussian 1229 Hungarian 1358 Maltese 1516 Swedish 1059 Bulgarian 1233 Armenian 1363 Burmese 1517 Swahili 1060 Bihari 1...

Page 36: ...X DRIVE Serotech USB 2 0 32MB AnyDrive A L tech USB 2 0 128MB XTICK LG USB 2 0 128M Micro Mini Iomega USB 2 0 128M iFlash Imation USB 2 0 64M LG XTICK M USB 2 0 64M RiDATA EZDrive USB 2 0 64M Product Company Type USB Flash Disc Creative MuVo NX128M Creative 128 MB MP3 Player Iriver H320 Iriver 20G HDD MP3 Player YH 920 Samsung 20G HDD MP3 Player YP T7 Samsung MP3 Player YP MT6 Samsung MP3 Player Y...

Page 37: ...amsung com hu ITALIA 800 SAMSUNG 726 7864 www samsung com it LUXEMBURG 0035 0 2 261 03 710 www samsung com be NETHERLANDS 0900 20 200 88 0 10 Min www samsung com nl NORWAY 815 56 480 www samsung com no POLAND 0 801 801 881 022 607 93 33 www samsung com pl PORTUGAL 80 8 200 128 www samsung com pt SLOVAKIA 0800 SAMSUNG 726 7864 www samsung com sk SPAIN 902 10 11 30 www samsung com es SWEDEN 0771 400...

Page 38: ...t the BRACKET HOLDER into the BRACKET WALLMOUNT so that 4 holes of the holder fit into the latch of the wall mount Accessories Please check all parts included before assembly and installation BRACKET WALLMOUNT BRACKET HOLDER Cautions Please make sure the product was secured firmly Otherwise it may fall from the wall causing injury or damage to the product Take caution not to allow children pulling...

Reviews: