E
diting
English - 75
Advanced Editing (Playlist)
Creating a Playlist
Follow these instructions to create a new playlist title from a
recorded title.
1.
With the unit in Stop mode, press the
MENU
button.
2.
Press the
▲▼
buttons to select
Playlist
, then press the
ENTER
or
►
button.
3.
Press the
▲▼
buttons to select
New Playlist
, then press the
ENTER
or
►
button.
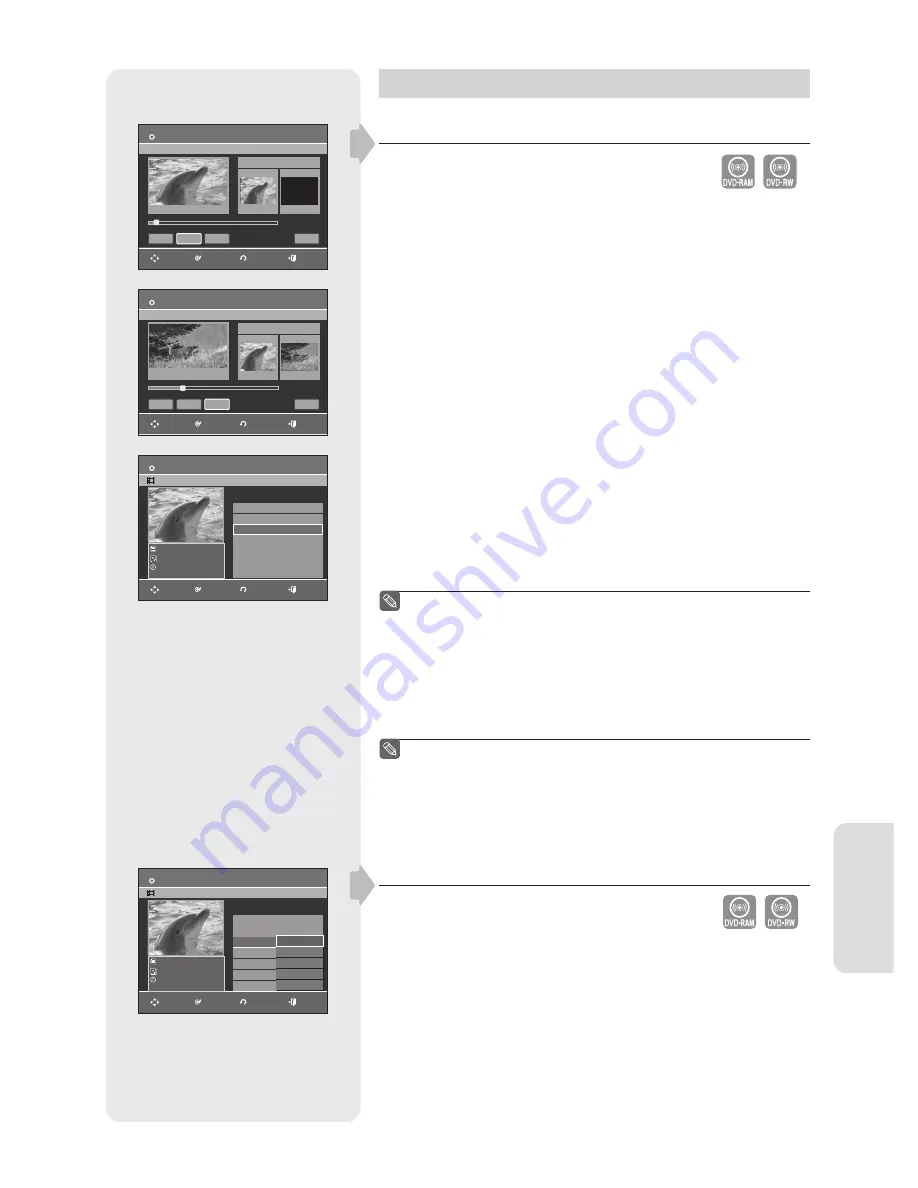
The Make Scene screen is displayed.
4.
Press the
ENTER
button at the start point.
• The image and time at the start point are displayed on the Start window.
• The yellow-colored selection bar moves to the End item.
•
Select the starting point of the section from which you want to create a
new scene using the playback related buttons (
►
II
,
I
◄◄
,
►►
I
,
◄◄
,
►►
).
5.
Press the
ENTER
button at the end point.
• The image and end point time are displayed in the End window.
• The yellow-colored selection bar moves to the Make icon.
- To make a new playlist -
6.
Press the
◄►
buttons to select
Make
, then press the
ENTER
button.
A new Scene will be added to the current Playlist.
A new Make Scene screen is displayed.
You can check and see all the scenes on the Edit Playlist screen.
Repeat steps 1~6 if you want to make a new playlist.
Repeat steps 4~6 if you want to add scenes to the playlist.
- To return to Edit Playlist menu -
7.
Press the
▲▼
buttons to select
Return
, then press the
ENTER
button.
The Edit Playlist screen is displayed.
You can create up to 99 playlist titles.
Depending on the kind of disc, the displayed screen may have a
slight difference.
A disc that is recorded on this unit will not display the playlist
menu if EZ REC MODE is set to 'On'.
Playing Titles in the Playlist
Follow these instructions to play the playlist titles.
1.
Press the
PLAY LIST
button with the disc stopped.
The Edit Playlist screen is displayed.
2.
Press the
▲▼
buttons to select the title you want to play from the
Playlist, then press the
ENTER
or
►
button.
3.
Press the
▲▼
buttons to select
Play
, then press the
ENTER
or
►
button.
The playlist titles will be played back.
4.
Press the
STOP
button to stop playing.
The screen returns to the Edit Playlist screen.
▌
■
■
■
■
■
■
▌
(VR mode)
(VR mode)
Edit Playlist
3/3
DVD-RAM(VR)
JAN/01/2007
MOVE
ENTER
RETURN
EXIT
APR/24/2006 12:00 AM
1 Scene
APR/24/2006 12:00 AM
01 APR/23/2006 12:00 00:00:21
►
02 APR/23/2006 12:3 00:00:03
►
03 APR/24/2006 12:0 00:00:15
►
04 APR/24/2006 12:3 00:00:16
►
05 APR/25/2006 12:0 00:06:32
►
No. Title Length
Edit
Play
Rename
Edit Scene
Copy
Delete
JAN/01/2007 12:00 AM
1 Scene
JAN/01/2007 12:00 AM
01 JAN/01/2007 12:00 00:00:03
►
02 JAN/01/2007 12:30 00:00:25
►
03 JAN/01/2007 01:00 00:00:05
√
Play
Rename
Edit Scene
Copy
Delete
Edit Playlist
3/3
DVD-RAM(VR)
JAN/01/2007
MOVE
ENTER
RETURN
EXIT
JAN/01/2007 12:00 AM
1 Scene
JAN/01/2007 12:00 AM
01 JAN/01/2007 12:00 00:00:03
►
02 JAN/01/2007 12:30 00:00:25
►
03 JAN/01/2007 01:00 00:00:05
►
No. Title Length
Edit
Make Scene
DVD-RAM(VR)
MOVE
ENTER
RETURN
EXIT
Scene No. 003
Start
End
Return
Make
End
Start
00:00:10
00:10:00
00:10:00
Title List : 1/6
II
Make Scene
DVD-RAM(VR)
MOVE
ENTER
RETURN
EXIT
End
Return
Make
End
Start
Scene No. 003
00:00:00
00:00:10
Title List : 1/6
►
Start
00:00:02
01343A-VR355-XAC-ENG.indb 75
01343A-VR355-XAC-ENG.indb 75
2007-03-23 오후 6:52:13
2007-03-23 오후 6:52:13


