


ENG-7
Basic Connections/Auto Setup
ENG-6
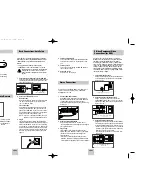
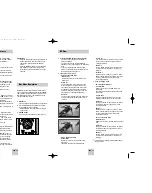
You will need to connect the DVD-VCR to a TV and run
Auto Setup. The Auto Setup will automatically search for
channels and then set your DVD-VCR's internal clock.
NOTES:
• See Appendix A for Advanced Connections.
• Standard RF or Line connection between your TV
and DVD-VCR are required to run DVD+VCR
setup menu, even if you connect S-Video or
Component Video Output for a better picture
quality.
1
Connect the RF Antenna Cable to your DVD-VCR
Connect an external indoor/outdoor antenna or wall
outlet antenna cable to the Ant-In jack on the rear
panel. (RF Through Only)
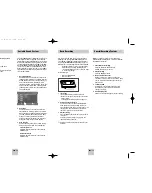
2
Connect your DVD-VCR to a TV
RF Connection
Using the RF antenna cable, connect the OUT jack
(TO TV) on the rear panel of your DVD-VCR to
your TV’s Antenna Input.
Line Connection
Using an RCA-type audio/video cable (red, white,
yellow), connect the LINE OUT jacks on the rear
panel of your DVD-VCR to your TV's Line In jacks.
Use the three cables as follows: red for right audio,
white for left audio, and yellow for video.
NOTE: If your TV is equipped with RCA jacks, it is
better to use the Line Connection method.
3
Plug In
Your DVD-VCR's power should be plugged into a
standard 120V/60Hz wall outlet. Avoid pressing any
buttons on the remote control or on the unit during
an Auto Setup. It would take about 7 minutes. After
Auto Setup is complete Operate your DVD-VCR. In
case Auto Clock set fails to locate a channel to set
the clock, you should set the clock manually. See
page 11.
From Antenna or Cable
1
To TV’s Antenna Input
2
3
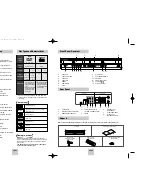
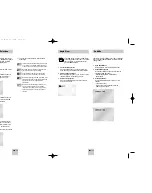
Insert Batteries into Remote
Front Panel LAMP
• Remove the battery cover on the remote
• Insert two 1.5V “AAA” batteries as shown,
making sure of the correct pola/-)
• Slide the cover back onto remote.
DVD
R
VCR
1
When the light is on, DVD is operating.
2
When the light is on, CD is operating.
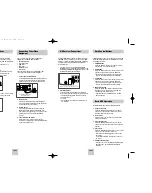
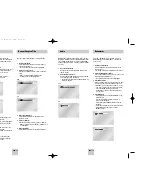
S-Video/Component Video
Connections (for DVD)
Use the S-Video or Component Video connection
method only for the DVD player. The tuner and VCR
can still be viewed through the RF or line inputs.
To activate your alternative (S-Video or Component)
video selection, follow the “Alt Video Out” instructions
on page 18. Keep in mind that you can choose either
S-Video or Component only, but not both. A superior
video quality can be obtained when watching a DVD
on your DVD-VCR if your TV is equipped with S-Video
or Component Video inputs.
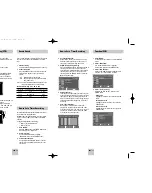
1
Connect S-Video Out to TV
Using an S-Video cable, connect the S-VIDEO OUT
on the rear panel of your DVD-VCR to the S-Video
Input on your TV.
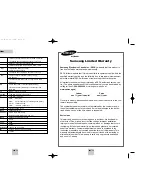
2
Connect Component Video Out to TV
Using a component video cable, connect the
COMPONENT VIDEO OUT (Y, Pb, Pr) on the rear
panel of your DVD-VCR to the Component Video
Input on your TV. .
3
Connect Audio Out (DVD only)
Using RCA audio cables, connect the LEFT/RIGHT
Line Out jacks on the rear panel of your DVD/VCR
to the LEFT/RIGHT Audio Line In jacks on your TV.
• When connecting your DVD-VCR to a TV with the
S-Video or Component Video Output, make sure
that you use these Line Out jacks.
• To activate your connection, see “Alt Video Out”
on page 18.
To S-Video Input on Your TV
To Component Video Input
on Your TV
To Left/Right Audio Inputs
on Your TV
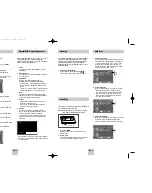
Stereo Connections
You can connect your DVD-VCR to your home stereo
system or stereo TV and enjoy stereo sound when
watching a movie or TV.
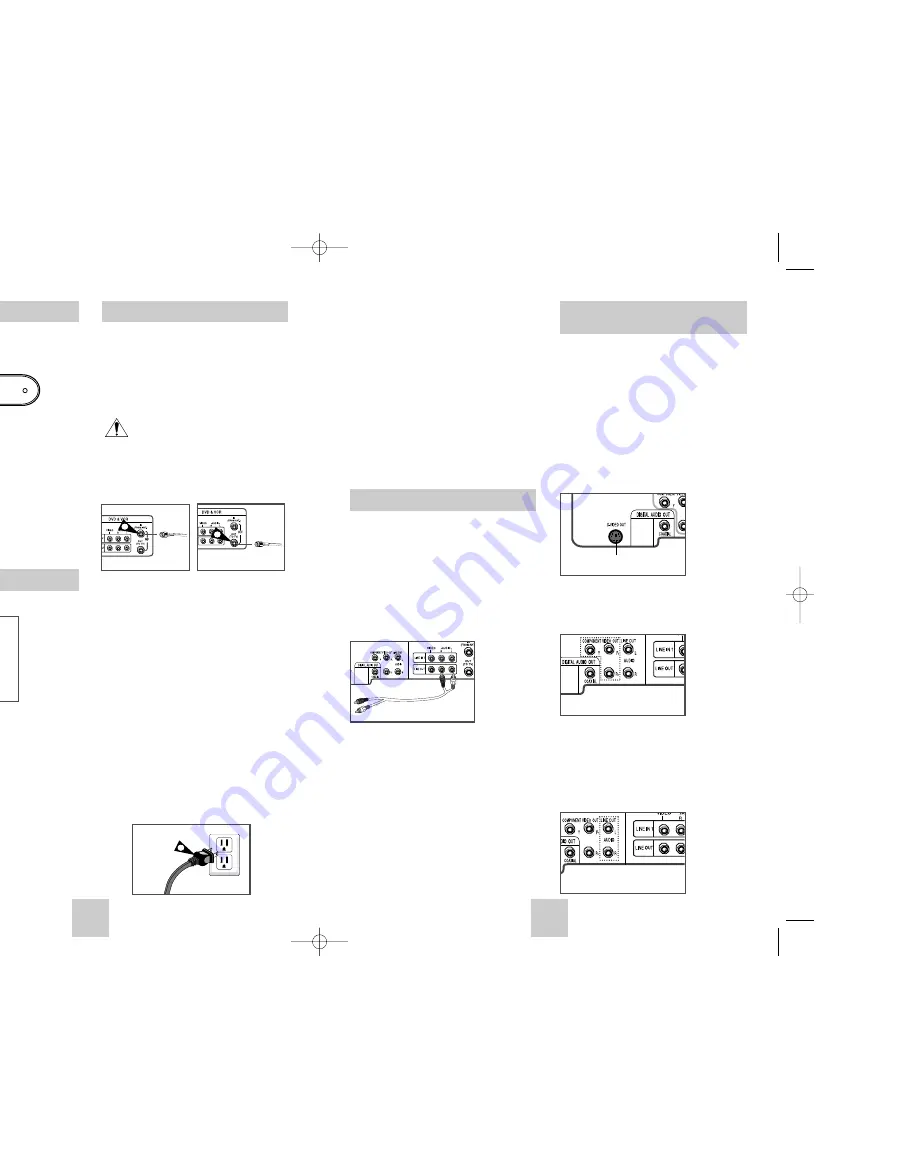
1
Connect DVD-VCR to Stereo
Using RCA cables, connect the Line Out Left and
Right Audio jacks on the rear panel of the DVD-VCR
to the Auxiliary Inputs on your stereo receiver.
Connect the Video Output also in case you are using
a stereo TV.
2
Set Stereo to Auxiliary Mode
Set your stereo receiver or TV to either “Aux” or
“Tape” regardless of which line input you are using for
your particular device.
3
Play a Tape
Insert a DVD or Hi-Fi stereo videotape into your
system. Be sure to adjust the volume on your stereo
receiver or TV. Audio will be heard through your
stereo speakers
• If there is no stereo sound even after you have
inserted a Hi-Fi stereo videotape, press the AUDIO
button until “Hi-Fi” appears on the on-screen display.
4
Turn On your DVD-VCR
Turn on the power by pressing the POWER button
on the remote control or on the front panel of the
unit.
5
Turn On your TV
Turn on the TV by pressing the POWER button on
the TV remote control.
6
Set the TV to Line
Set your TV to its Line Input.
00367A DVD-V4500/XAC-ENG 12/10/03 10:57 AM Page 6