background image

ADV

ANCED

FUNCTIONS

38

39

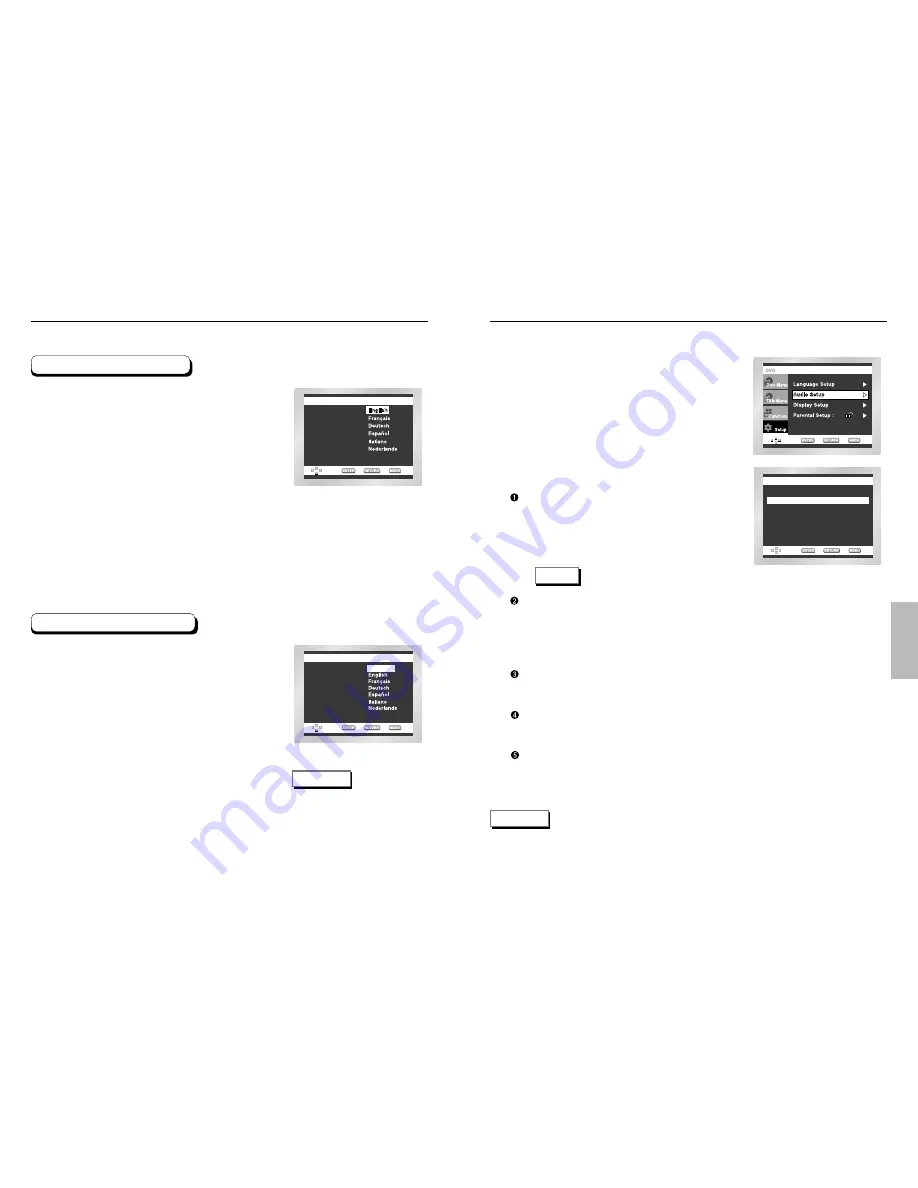
Setting Up the Audio Options

With the unit in Stop mode, press the MENU button.

Select Setup using UP/DOWN buttons, then RIGHT
or ENTER button.

Select Audio Setup using UP/DOWN buttons, then
press the RIGHT or ENTER button.

Use the UP/DOWN buttons to select the desired
item. Then press the RIGHT or ENTER button.

Dolby Digital Output

1. PCM : Converts to PCM(2CH) 48kHz audio Select PCM

when using the Analog Audio Outputs.

2. Bitstream : Converts to Dolby Digital Bitstream (5.1CH).

Select Bitstream when using the Digital
Audio Output.

Be sure to select the correct 
Digital Output or no audio will be heard.

MPEG-2 Digital Out

1. PCM :

Converts to PCM(2CH) audio. Select PCM when using the Analog Audio Outputs.

2. Bitstream 

Converts to MPEG-2 Digital Bitstream (5.1CH or 7.1CH). 
Select Bitstream when using the Digital Audio Output.

DTS

1. Off : Doesn’t output digital signal.
2. On : Outputs DTS Bitstream via digital output only. Select DTS when connecting to a DTS Decoder.

Dynamic Compression

1. On : To select dynamic compression.
2. Off : To select the standard range.

PCM Down Sampling

1. On : Select this when the amplifier connected to the player is not 96KHz compatible. 

In this case, the 96KHz signals will be down converted to 48KHZ.

2. Off : Select this when the amplifier connected to the player is 96KHz compatible. 

In this case, all signals will be output without any changes.

AUDIO SETUP

AUDIO SETUP

DTS

:  Off

MPEG-2 Digital Out

:  Off

Dynamic Compression 

:  On

PCM Down Sampling 

:  On

Dolby Digital Output

:  PCM

NOTE

• How to make the SETUP menu disappear or return to menu screen during set up; 

Press RETURN or LEFT button.

• Manufactured under license from Dolby Laboratories.

“Dolby” and the double-D symbol are trademarks of Dolby Laboratories.

• “DTS” and “DTS Digital Out” are trademarks of Digital Theater Systems, Inc.

1
2

3

4

NOTE

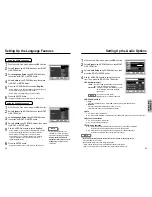
Setting Up the Language Features 

With the unit in Stop mode, press the MENU button.

Select Setup using UP/DOWN buttons, then RIGHT
or ENTER button.   

Select Language Setup using UP/DOWN buttons,
then press the RIGHT or ENTER button. 

Select Audio using UP/DOWN buttons, then press
the RIGHT or ENTER button.

Press the UP/DOWN buttons to select ‘English’.

- Select “Original” if you want the default soundtrack language to

be the original language the disc is recorded in.

- Select “Others” if the language you want is not listed.

Press the ENTER button.

- English is selected and the screen returns to SETUP menu.

With the unit in Stop mode, press the MENU button.

Select Setup using UP/DOWN buttons, then RIGHT
or ENTER button.  

Select Language Setup using UP/DOWN buttons,
then press the RIGHT or ENTER button. 

Select Subtitle using UP/DOWN buttons, then press
the RIGHT or ENTER button.

Use the UP/DOWN buttons to select ‘English’.

- Select “Automatic” if you want the subtitle language to be the

same as the language selected as the audio preference.

- Select “Others” if the language you want is not listed. 

Some discs may not contain the language you  select as 
your initial language; in that case the disc will use its     
original language setting.

Press the ENTER button.

- English is selected and the screen returns to SETUP menu.

AUDIO LANGU

UDIO LANGUAGE

GE

   Original
   Others

Audio

SUBTITLE LANGU

SUBTITLE LANGUAGE

GE

   Others

Subtitle

   Automatic

NOTE

• If the selected language is not

recorded on the disc, the original
pre-recorded language is selected.

• How to make the SETUP menu

disappear or return to menu screen
during set up; 
Press RETURN or
LEFT button.

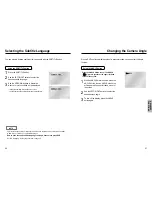
Using the Audio Language

Using the Subtitle Language

1
2
3

5

4

6

1
2

3
4

5

6

Summary of Contents for DVD-C637

Page 1: ...5 Disc DVD Changer DVD C637 AK68 00148D AU ...

Page 2: ...on since circular scratches are likely to occur and could cause noise during playback Batteries The battery used in this product contains chemicals that are harmful to the environment Do not dispose of batteries in the general domestic waste It is recommended that the replacement of the battery should be done by a technician Disposal of old equipment and packaging Old equipment and packaging shoul...

Page 3: ...a Connection 12 Basic Functions Playing a Disc 14 Operating the Disc Changer 16 Using the Search Skip Functions 17 Using the Display Function 18 Using the Disc and Title Menu 19 Using the Function Menu 20 Repeat Play 21 Advanced Functions Adjusting the Aspect Ratio EZ View 22 Slow Repeat play 24 Selecting the Audio Language 25 Selecting the Subtitle Language 26 Changing the Camera Angle 27 Using t...

Page 4: ...y that is protected by methods claims of certain U S patents and other intellectual property rights owned by Macrovision Corporation and other rights owners Use of this copyright protection technology must be authorized by Macrovision Corporation and is intended for home and other limited viewing uses only unless otherwise authorized by Macrovision Corporation Reverse engineering or disassembly is...

Page 5: ...n 5 Disc indicator Indicates which numbered disc is playing 1 2 3 4 5 S VIDEO VIDEO OUT SELECT COMPONENT 1 2 3 4 5 6 Rear Panel 1 DIGITAL AUDIO OUT JACKS Use either an optical or coaxial digital cable to connect to a compatible Dolby Digital receiver Use to connect to an A V Amplifier that contains a Dolby Digital or DTS decoder 2 ANALOG AUDIO OUT JACKS Connect to the Audio input jacks of your tel...

Page 6: ...remove menus or status displays from the screen 11 BOOKMARK Button 12 MENU Button Brings up the DVD player s setup menu 13 OPEN CLOSE Button To open and close the disc tray 14 3D Button 15 I SKIP Button This function skips playback ahead 10 seconds 16 PLAY PAUSE Button Begin Pause disc play 17 SKIP Buttons Use to skip the title chapter or track 18 RETURN Button Returns to a previous menu 19 INFO B...

Page 7: ...Out Digital Audio Out 2ch Amplifier Audio Input Jacks Dolby Digital Decoder Digital Audio Input Jack OR NOTE DVD Player TV with Video Input Jack The VIDEO OUT SELECT switch must be set to the S VIDEO position DVD Player TV with S Video Input Jack The VIDEO OUT SELECT switch must be set to the S VIDEO position DVD Player TV with Component Video Jacks The VIDEO OUT SELECT switch must be set to the C...

Page 8: ...ou stop disc play the player remembers where you stopped so when you press PLAY again it will pick up where you left off unless the disc is removed the STOP button is pressed twice or the player is unplugged If the player is left for 5 minutes in pause mode it will stop If the player is left in the stop mode for more than 30 minutes the power will automatically shut off Automatic Power Off Functio...

Page 9: ... press the button it moves to the beginning of the track One more press makes it move to the beginning of the previous track If a track exceeds 15 minutes when playing a VCD and you press the button it moves forward 5 minutes If you press the button it moves backward 5 minutes 1 1 Operating the Disc Changer Disc Exchange Using the DISC SKIP function Exchanging Discs Exchange allows you to change u...

Page 10: ...le chapter or to start the playback from the desired time To make the screen disappear press the INFO button again Most DVD discs are recorded in chapters so that you can quickly find a specific passage similar to tracks on an audio CD Allows playback of the film from a desired time You must enter the starting time as a reference Refers to the language of the film soundtrack In the example the sou...

Page 11: ...ff Press ENTER then press the PLAY PAUSE button Off Off Chapter Title A B ENTER Off Track Disc A B ENTER NOTE DVD repeats play by chapter or title CD repeat play by disc or track Depending on the disc the Repeat function may not work When in VCD 2 0 mode MENU ON mode this function does not work DVD VCD CD 1 2 3 4 20 21 Repeat Play Using the Function Menu Press the MENU button during playback Use t...

Page 12: ...n The screen size changes when the button is pressed repeatedly The screen zoom mode operates differently depending on the screen setting in the initial setup menu To ensure correct operation of the EZ VIEW button you should set the correct aspect ratio in the initial setup See page 41 For 16 9 aspect ratio discs Wide Screen Displays the content of the DVD title in 16 9 aspect ratio Screen Fit The...

Page 13: ...ws you slowly repeat scenes containing sports dancing musical instruments being played etc so you can study them more closely When playing a DVD During play press the PLAY PAUSE button Press the button to choose the play speed between 1 8X 1 4X and 1 2X of normal Press the REPEAT button on the remote Repeat screen appears Select Chapter Title or A B using the LEFT RIGHT buttons REPEAT A B Press th...

Page 14: ...disc and may not work with all DVDs A DVD disc can contain up to 32 subtitle languages How to have the same subtitle language come up whenever you play a DVD Refer to Setting Up the Language Features on page 38 1 2 3 26 27 Changing the Camera Angle Press the ANGLE button to see if an ANGLE mark is present at the upper left hand corner of the screen When an ANGLE mark is shown press the ANGLE butto...

Page 15: ...kmark During play press the BOOKMARK button on the remote Use the LEFT RIGHT buttons to select the bookmark number you want to delete Press the CLEAR button to delete a bookmark number Press the BOOKMARK button to turn off the display ENTER 1 CLEAR NOTE Up to three scenes may be marked at a time When in VCD 2 0 mode MENU ON mode this function does not work Depending on the disc the Bookmark functi...

Page 16: ...em will be played Press the MODE button to switch between the RANDOM and PROGRAM modes See page 32 for more information on these modes Program Random playback MP3 WMA Play Function 1 2 Using the Zoom 3D Sound Functions Using the Zoom Function DVD During play or pause mode press the ZOOM button on the remote A zoom mark will be displayed on screen Use the UP DOWN or LEFT RIGHT buttons to select the...

Page 17: ...e and avoid the use of special characters including Use a decompression transfer rate of at least 128 Kbps when recording MP3 files Sound quality with MP3 files basically depends on the rate of compression decompression you choose Getting audio CD quality sound requires an analog digital sampling rate that is conversion to MP3 format of at least 128 Kbps and up to 160 Kbps However choosing higher ...

Page 18: ...G in the menu to view a Photo CD Use the UP DOWN or LEFT RIGHT buttons on the remote controller to select the picture you want to view and then press the ENTER button Press the PLAY PAUSE button if you want to play it in the Slide Show mode To see the next 6 pictures press the button To see the previous 6 pictures press the button Return to the Album Screen Press the UP DOWN or LEFT RIGHT buttons ...

Page 19: ...WN buttons then press the RIGHT or ENTER button Select Disc Menu using UP DOWN buttons then press the RIGHT or ENTER button Use the UP DOWN buttons to select English Select Others if the language you want is not listed Press the ENTER button English is selected and the screen returns to SETUP menu 1 2 3 4 5 6 1 2 3 4 5 6 Using the Setup Menu The Setup menu lets you customize your DVD player by all...

Page 20: ...oratories Dolby and the double D symbol are trademarks of Dolby Laboratories DTS and DTS Digital Out are trademarks of Digital Theater Systems Inc 1 2 3 4 NOTE Setting Up the Language Features With the unit in Stop mode press the MENU button Select Setup using UP DOWN buttons then RIGHT or ENTER button Select Language Setup using UP DOWN buttons then press the RIGHT or ENTER button Select Audio us...

Page 21: ... top and bottom of the screen 2 4 3 Pan Scan Select this for conventional size TVs when you want to see the central portion of the 16 9 screen Extreme left and right side of movie picture will be cut off 3 16 9 Wide You can view the full 16 9 picture on your widescreen TV Still Mode These options will help prevent picture shake in still mode and display small text clearer 1 Auto When selecting Aut...

Page 22: ...dicated on the display Press the DOWN button to select Parental Press ENTER and the Create Password display will appear You can now set your rating level and change your password to a new number Go to the contents and find the section of the instruction book that contains the explanations regarding the current problem and follow the procedure once again If the problem still cannot be solved please...

Page 23: ...c Distortion AC 110 240V 50 60 Hz 12 W 4 3 Kg 430mm W X 400mm D X 68 5mm H 5 C to 35 C 10 to 75 Reading Speed 3 49 m sec Approx Play Time Single Sided Single Layer Disc 135 min Reading Speed 1 2 to 1 4 m sec Maximum Play Time 74 min Reading Speed 1 2 to 1 4 m sec Maximum Play Time 20 min Reading Speed 1 2 to 1 4 m sec Maximum Play Time 74 min Video Audio 1 channel 1 0 Vp p 75 Ω load Y 1 0 Vp p 75 ...

Reviews: