background image

2

3

Precautions

Precautions

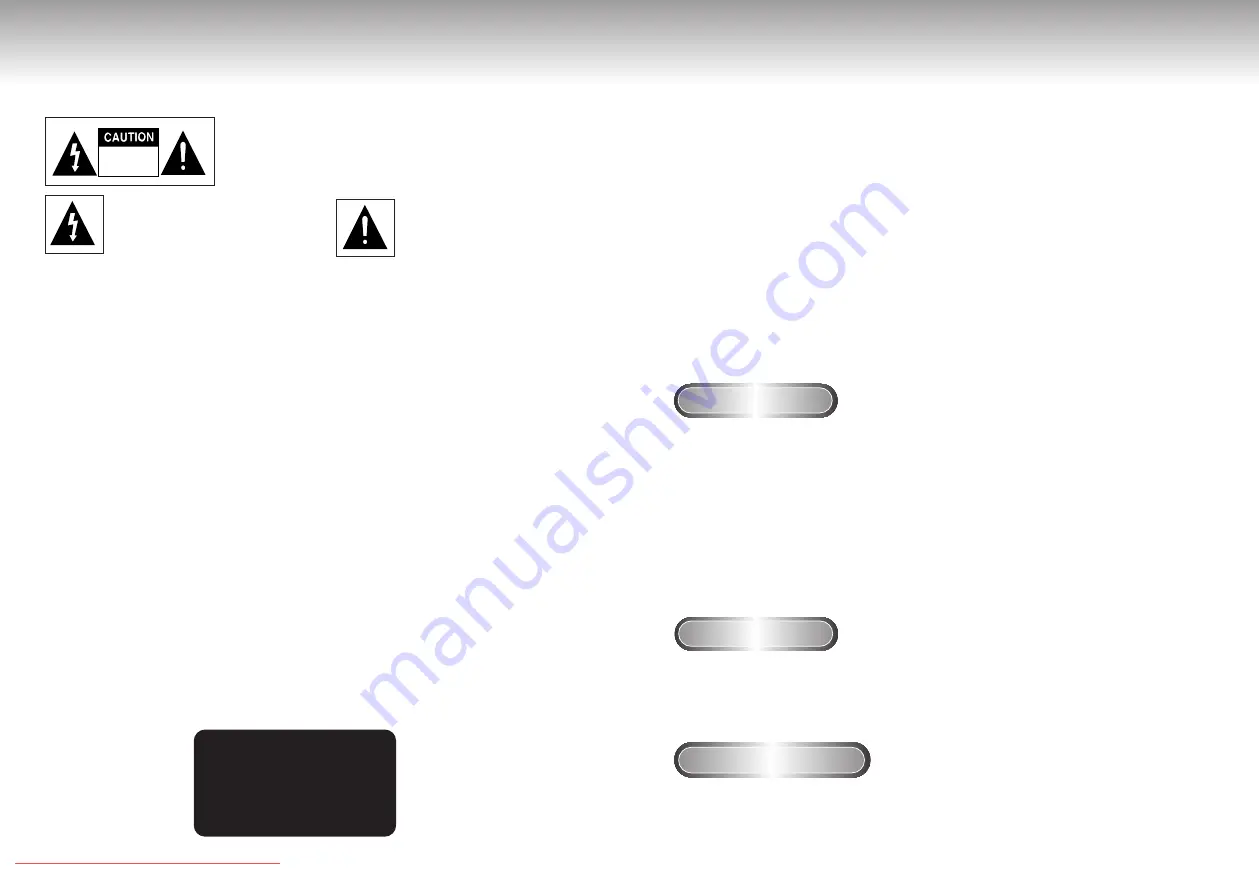
TO REDUCE THE RISK OF ELECTRIC SHOCK, DO NOT REMOVE THE
COVER(OR BACK). 
NO USER-SERVICEABLE PARTS ARE INSIDE. REFER SERVICING TO
QUALIFIED SERVICE PERSONNEL.

This symbol indicates “dangerous voltage”
inside the product that presents a risk of
electric shock or personal injury.

This symbol indicates important
instructions accompanying the
product.

RISK OF ELECTRIC SHOCK

DO NOT OPEN

CAUTION: DVD PLAYERS USE AN INVISIBLE LASER BEAM WHICH CAN

CAUSE HAZARDOUS RADIATION EXPOSURE IF DIRECTED. 

BE SURE TO OPERATE PLAYER CORRECTLY AS INSTRUCTED.

CAUTIONS

Caution: 

To prevent electric shock, match wide blade of plug to wide slot, fully insert.

Attention:

Pour éviter les chocs électriques, introduíre la lame la plus large de la fiche dans la borne correspondante 

de la prise et pousser jusqu au fond.

This product satisfies FCC regulations when shielded cables and connectors are used to connect the unit to                
other equipment. To prevent electromagnetic interference with electric appliances, such as radios and televisions, 
use shielded cables and connectors for connections.

FCC NOTE (for U.S.A):

This equipment has been tested and found to comply with the limits for a Class B digital device, pursuant to Part 15 of
the FCC rules. These limits are designed to provide reasonable protection against harmful interference in a residential
installation. This equipment generates, uses and can radiate radio frequency energy and, if not installed and used in
accordance with the instructions, may cause harmful interference to radio or television reception, which can be
determined by turning the equipment off and on, the user is encouraged to try to correct the interference by one or
more of the following measures.
• Reorient or relocate the receiving antenna.
• Increase the separation between the equipment and receiver.
• Connect this equipment into an outlet on a circuit different from that to which the receiver is connected.
• Consult the dealer or an experienced radio/TV technician for help.

This class B digital apparatus meets all requirements of the Canadian Interference --
Causing Equipment Regulations

.

WARNING

To reduce the risk of fire
or shock hazard, do not
expose this DVD player
to rain or moisture.

CAUTION

THIS PRODUCT UTILIZES A LASER. USE OF CONTROLS OR ADJUSTMENTS
OR PERFORMANCE OF PROCEDURES OTHER THAN THOSE SPECIFIED
HEREIN MAY RESULT IN HAZARDOUS RADIATION EXPOSURE. DO NOT
OPEN COVER AND DO NOT REPAIR YOURSELF. REFER SERVICING TO
QUALIFIED PERSONNEL.

Note:

• This unit can be used only where the power supply is AC 120V, 60Hz. It cannot be used elsewhere.

• This DVD player is designed and manufactured to respond to the Region Management Information.

If the Region number of a DVD disc does not correspond to the Region number of this DVD player,

the DVD player cannot play the disc.

Handling Cautions

Disc Storage

Maintenance of Cabinet

• Before connecting other components to this player, be sure to turn them all off.

• Do not move the player while a disc is being played, or the disc may be scratched or broken, and the player’s

internal parts may be damaged.

• Do not put a flower vase filled with water or any small metal objects on the player.

• Be careful not to put your hand into the disc tray.

• Do not place anything other than the disc in the disc tray.

• Exterior interference such as lightning and static electricity can affect normal operation of this player. If this

occurs, turn the player off and on again with the POWER button, or disconnect and then reconnect the 

AC power cord to the AC power outlet. The player will operate normally.

• Be sure to remove the disc and turn off the player after use.

• Disconnect the AC power cord from the AC outlet when you don’t intend to use the player for long 

periods of time.

• Clean the disc by wiping in a straight line from the inside to the outside of the disc.

Be careful not to harm the disc because the data on these discs is highly vulnerable to the environment.

• Do not keep under direct sunlight.

• Keep in a cool ventilated area.

• Store vertically.

• Keep in a clean protection jacket.

For safety reasons, be sure to disconnect the AC power cord from the AC outlet.

• Do not use benzene, thinner, or other solvents for cleaning.

• Wipe the cabinet with a soft cloth.

CLASS 1 LASER PRODUCT
KLASSE 1 LASER PRODUKT 
LUOKAN 1 LASER LAITE
KLASS 1 LASER APPARAT
PRODUCTO LÁSER CLASE 1

DVD-C621  7/19/02 10:44 AM  Page 2

Downloaded From Disc-Player.com Samsung Manuals

Summary of Contents for DVD-C621

Page 1: ...PLAYER YER DVD C621 SAMSUNG ELECTRONICS AMERICA INC 105 CHALLENGER ROAD RIDGEFIELD PARK NJ 07660 U S A FOR YOUR NEAREST SAMSUNG SERVICE CENTER DIAL 1 800 SAMSUNG AK68 00029A Downloaded From Disc Player com Samsung Manuals ...

Page 2: ...ing Equipment Regulations WARNING To reduce the risk of fire or shock hazard do not expose this DVD player to rain or moisture CAUTION THIS PRODUCT UTILIZES A LASER USE OF CONTROLS OR ADJUSTMENTS OR PERFORMANCE OF PROCEDURES OTHER THAN THOSE SPECIFIED HEREIN MAY RESULT IN HAZARDOUS RADIATION EXPOSURE DO NOT OPEN COVER AND DO NOT REPAIR YOURSELF REFER SERVICING TO QUALIFIED PERSONNEL Note This unit...

Page 3: ... so that they are not likely to be walked on or pinched by items placed upon or against them paying particular attention to cords at plugs convenience receptacles and the point where they exit from the product 14 Lightning For added protection for this product during a lightning storm or when it is left unattended and unused for long periods of time unplug it from the wall outlet and disconnect th...

Page 4: ...nctions 19 Using the Display Function 20 Repeat Play 21 Program Play Random Play 22 S FIT Play 23 Digest Play 24 Using the Disc View Function 25 Slow Repeat play 26 Selecting the Audio Language 27 Selecting the Subtitle Language 28 Changing the Camera Angle 29 Using the Instant Replay Function 30 Using the Bookmark Function 31 Using the Zoom 3D Sound Functions 32 MP3 Play 33 Using the Setup Menu 3...

Page 5: ...owners Use of this copyright protection technology must be authorized by Macrovision Corporation and is intended for home and other limited viewing uses only unless otherwise authorized by Macrovision Corporation Reverse engineering or disassembly is prohibited This DVD player is capable of playing the following types of discs with the corresponding logos 5 31 2 Single sided 240 min Double sided 4...

Page 6: ...irst plugged in the indicator lights When power is pressed on the lamp goes out EXCHANGE Press this button when you want to change a disc without stopping playback of the current disc DISC SKIP Use to skip a disc in order HEADPHONES JACK You can attach headphones here for private listening VOLUME LEVEL Use to adjust headphones volume level DVD CHANGER TRAY Press OPEN CLOSE to open and close the di...

Page 7: ...tton TV POWER Button 3D Button OPEN CLOSE Button CHANNEL Buttons DIGEST Button PLAY PAUSE Button Begin Pause disc play SKIP Buttons Use to skip the title chapter or track BOOKMARK Button DISPLAY Button Displays the current disc mode AUDIO Button Use this button to access various audio functions on a disc ENTER DIRECTION Button UP DOWN or LEFT RIGHT Button This button functions as a toggle switch T...

Page 8: ...ch Amplifier Audio Input Jacks Dolby Digital Decoder Digital Audio Input Jack AUDIO DVD TV Normal Widescreen Projection etc Good picture Basic Audio Better picture Best picture Method 1 Method 2 Method 3 Audio Output Jacks OR OR OR AV Cable S Video Cable Video Cables Video Output Jack S Video Jack Component Video Jacks DVD TV Method 1 DVD Player TV with Video Input Jack Method 2 DVD Player TV with...

Page 9: ...emoved the STOP button is pressed twice or the player is unplugged If the player is left for 5 minutes in pause mode it will stop If the player is left in left in the stop mode for more than 30 minutes the power will autonatically shut off Automatic Power Off Function If the player is left in the stop mode for more than one minute without any user interaction a screen saver will be activated and t...

Page 10: ...BACK SKIP button it moves to the previous MENU or the previous Track View display See page 25 19 18 DVD VCD CD 2X 4X 8X 16X 32X 128X 4X 8X 2X 4X 8X Depending on the disc audio may not be heard when a disc is in 2X play mode Operating the Disc Changer The DVD Changer holds 5 discs and provides full random play with fast disc changes Exchange allows you to change up to 4 discs except the disc curren...

Page 11: ...appear on screen A 1 DVD T 01 C 02 0 01 09 ENG 5 1CH ENG 64 1 VCD T 01 0 01 09 64 1 CD T 01 0 01 09 64 What is a Chapter Each Title on a DVD is usually divided into chapters similar to tracks on an audio CD What is a Title A DVD may contain several different titles For example if a disc contains four different movies each might be considered a title NOTE VCD CD Repeat Play Repeat the current track...

Page 12: ...ton Random Play can only operate when the discs are the same type Program Play DVD VCD CD Random Play DVD VCD CD 1 1 Press the MODE button 2 2 Use the LEFT RIGHT buttons to select PROGRAM Press the ENTER button All discs in the unit will be read first 3 3 Use the LEFT RIGHT buttons to select the first chapter or track to add to the program Press the ENTER button The selection numbers appear in the...

Page 13: ...e TOP MENU button 2 2 Press the UP DOWN buttons to select TRACK VIEW Press the ENTER button 3 3 Select the desired view by pressing the UP DOWN or LEFT RIGHT buttons Press the SKIP button for the next 9 tracks if the movie has more than 9 4 4 Press the ENTER button This function is available with the VCD Menu mode off Displays the equally divided 9 views of the current playing track 1 1 During pla...

Page 14: ...hen playing a DVD 1 1 During play press the PLAY PAUSE button 2 2 Press the F SEARCH button to choose the play speed between 1 8X 1 4X and 1 2X of normal 3 3 Press the REPEAT A B button to select the point where the function starts A 4 4 Press the REPEAT A B button to select the point where the function ends B 26 NOTE The disc will play from A to B repeatedly at the speed you chose To terminate th...

Page 15: ...elect a desired subtitle quickly and easily with the SUBTITLE button Using the SUBTITLE button 1 1 Press the SUBTITLE button 2 2 Use the UP DOWN buttons to select the desired subtitle language 3 3 Use the LEFT RIGHT buttons to determine whether or not the subtitle will be displayed Initially the subtitling will not appear on screen The subtitle languages are represented by abbreviations A A NOTE T...

Page 16: ...ns to skip to the marked scene Clearing a Bookmark 1 1 During play press the BOOKMARK button on the remote 2 2 Use the LEFT RIGHT buttons to select the bookmark number you want to delete 3 3 Press the CLEAR button to delete a bookmark number Press the BOOKMARK button to turn off display NOTE Up to three scenes may be marked at a time When in VCD 2 0 mode MENU ON mode this function does not work De...

Page 17: ...s the ZOOM button on the remote A square will be displayed on screen 2 2 Use the UP DOWN or LEFT RIGHT buttons to select the part of the screen you want to zoom in on 3 3 Press the ENTER button During DVD play press ENTER to zoom in 2X 4X 2X normal in order During VCD play press ENTER to zoom in 2X normal in order Using the 3D Sound Function The simulated surround effect depends on the disc conten...

Page 18: ...xceed 8 characters and place mp3 as the file extension General name format of Title mp3 When composing your title make sure that you use 8 characters or less have no spaces in the name and avoid the use of special characters including Use a decompression transfer rate of at least 128 Kbps when recording MP3 files Sound quality with MP3 files basically depends on the rate of compression decompressi...

Page 19: ...uage is not recorded on the disc the original pre recorded language is selected Howto make the SETUP MENU disappear or return to menu screen during set up Press RETURN button CHANGING SETUP MENU 36 37 Setting Up the Language Features Using the Player Menu Language Using the Disc Menu Language If you set the player menu disc menu audio and subtitle language in advance they will come up automaticall...

Page 20: ... Parental Control The Parental Control function works in conjunction with DVDs that have been assigned a rating which helps you control the types of DVDs that your family watches There are up to 8 rating levels on a disc 1 1 With the unit in Stop mode press SETUP button The Setup Menu screen appears 2 2 Use UP DOWN to select Parental Press ENTER The Parental Control screen appears 3 3 Use LEFT RIG...

Page 21: ... on screen messages On or Off Front Display Adjust the brightness of the unit s front panel display 1 Bright Makes the Front Panel Display bright 2 Dim Makes the Front Panel Display dim 3 Auto Dim Makes the Front Panel Display dim automatically when playing a DVD Black Level Adjusts the brightness of the screen On Off NOTE How to make the SETUP MENU disappear or return to menu screen during set up...

Page 22: ...y on the front panel for three seconds The Select Menu Language display will appear Select the desired language button Press the SETUP button on the remote control to select the Parental Mode The Parental Mode is now unlocked as indicated on the display Press the DOWN button to select Parental Press ENTER and the Create Password display will appear You can now set your rating level and change your...

Page 23: ...problem determination and service procedures SAMSUNG does not warrant uninterrupted or error free operation of the product All replaced parts and products become the property of SAMSUNG and must be returned to SAMSUNG Replacement parts and products assume the remaining original warranty or ninety 90 days whichever is longer This limited warranty covers manufacturing defects in materials and workma...

Reviews: