48
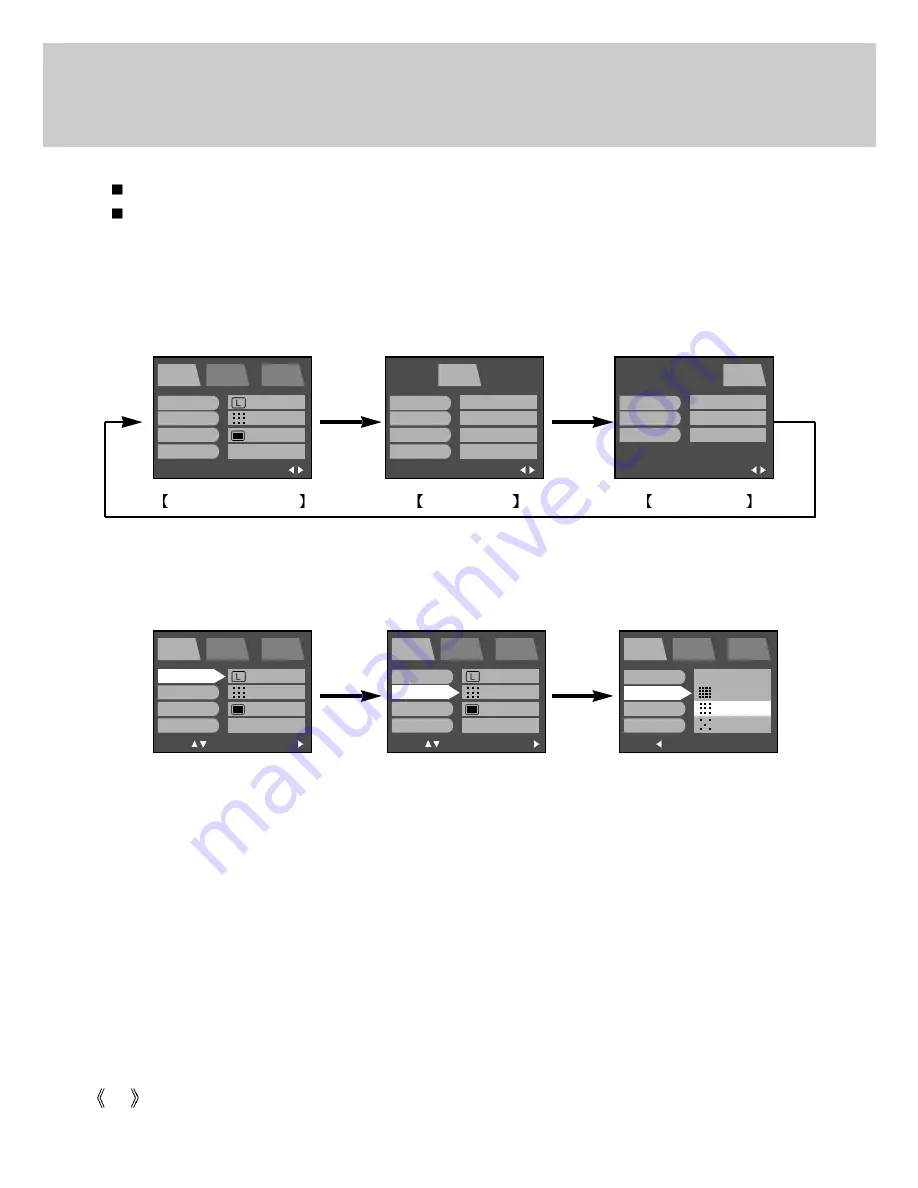
How to use the menu
Every camera working mode has [SETUP] and [MyCAM] tabs in their own menu.
The main menus of the first tab are changed by different camera working modes.
1. Turn the camera power on and press the menu button. There are 3 tabs related to each camera
mode in the menu. There is no menu available when the VOICE RECORDING mode is selected.
2. Shift the tab cursor by pressing the LEFT/ RIGHT button.
3. Select a menu by pressing the UP/ DOWN button.
4. Shift the cursor to the sub menu by pressing the RIGHT button. To shift the cursor to the main menu,
press the LEFT button.
5. Select the desired sub menu by pressing the UP/ DOWN button. If there is another menu under the
sub menu, press the RIGHT or OK button and the cursor shifts to another sub menu.
To shift the cursor to the previous menu or cancel the menu setting, press the LEFT button.
6. Press the OK button to confirm the setting.
Press the menu button twice and the menu display will disappear.
RECORDING mode
EXIT:MENU
PROG
SETUP
MyCAM
PAGE:
SIZE
QUALITY
METERING
SHOOTING
2272x1704
FINE
MULTI
SINGLE
SETUP mode
MyCAM mode
Pressing the
LEFT / RIGHT button
Pressing the
LEFT / RIGHT button
MOVE:
PROG
SETUP
MyCAM
CHANGE:
SIZE
QUALITY
METERING
SHOOTING
2272x1704
FINE
MULTI
SINGLE
Pressing the
UP/ DOWN button
Pressing the
LEFT/ RIGHT button
MOVE:
PROG
SETUP
MyCAM
CHANGE:
SIZE
QUALITY
METERING
SHOOTING
2272x1704
FINE
MULTI
SINGLE
BACK:
PROG
SETUP
MyCAM
SET:OK
SIZE
QUALITY
METERING
SHOOTING
TIFF
S.FINE
FINE
NORMAL
EXIT:MENU
PROG
SETUP
MyCAM
PAGE:
FILE
PWR OFF
LANGUAGE
FORMAT
SERIES
OFF
ENGLISH
NO
EXIT:MENU
PROG
SETUP
MyCAM
PAGE:
S.IMAGE
S.SOUND
SH.SOUND
IMAGE1
SOUND1
SH.SOUND1
Summary of Contents for DIGIMAX V4000
Page 26: ...26 Recording mode ...
Page 61: ...61 PLAY Play mode ...
Page 126: ...126 MEMO ...
Page 127: ...127 MEMO SOFTWARE ...


