background image

ADV

ANCED

SETTING UP THE CAMERA SYSTEM
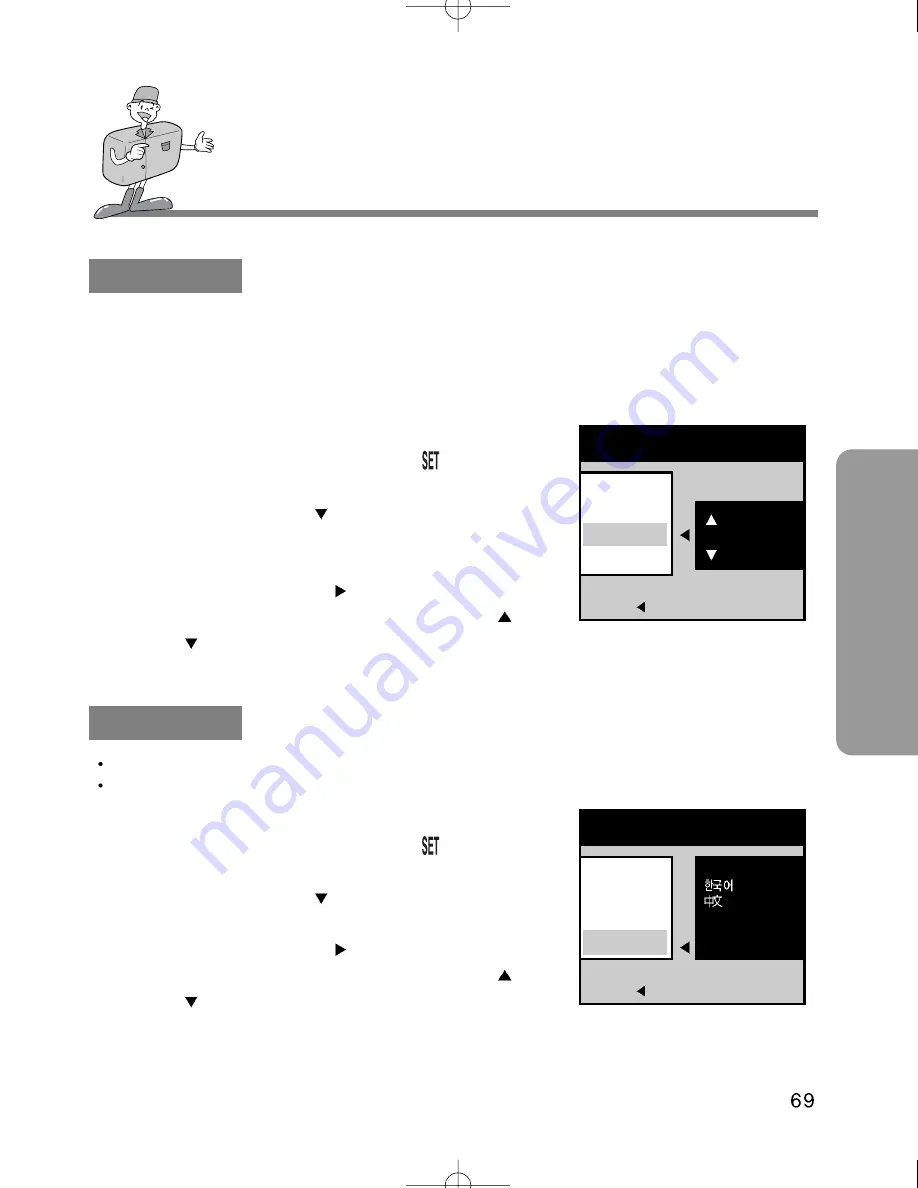
LANGUAGE

There is a choice of languages that can be displayed on the LCD monitor.
ENGLISH, GERMAN,FRENCH,SPANISH,CHINESE and KOREAN are available.

1. Turn the camera on.

2. Rotate the mode dial to SET UP mode (      ).

3. A menu will display on the LCD monitor.

4. Press the DOWN button ( 

) and select [LANGUAGE].

5. Shiftt the cursor to the [LANGUAGE] sub menu by

pressing the RIGHT button ( 

6. Select the desired sub menu by pressing the UP ( 

) /

DOWN ( 

) buttons.

7. After selecting the desired sub menu, press the OK

button to confirm the setting.

POWER OFF

- This function switches the camera off after a set amount of time in order to prevent unnecessary

battery drainage.

- You can set the power to switch off at any time between one and ten minutes from the last operation.
- Setting this function to OFF means that the camera will not switch off automatically.

Note that the automatic power off does not operate if the camera is in slide show or PC mode.

1. Turn the camera on.

2. Rotate the mode dial to SET UP mode (      ).

3. A menu will display on the LCD monitor.

4. Press the DOWN button ( 

) and select [POWER

OFF].

5. Shift the cursor to the [POWER OFF] sub menu by

pressing the RIGHT button ( 

6. Select the desired sub menu by pressing the UP ( 

) /

DOWN ( 

) buttons. The default is 3 minutes.

7. After selecting the desired sub menu, press the OK button to confirm the setting.

SETUP

1/3

BACK : 

SET : OK

03  MIN

FORMAT
FILE NAME
POWER OFF
LANGUAGE

SETUP

1/3

BACK : 

SET : OK

FORMAT
FILE NAME
POWER OFF
LANGUAGE

ENGLISH

DEUTSCH
FRANÇAIS
ESPAÑOL

Summary of Contents for DIGIMAX 350SE

Page 1: ... a Samsung Camera This manual will guide you through using the Digimax 350SE including taking images downloading images and using MGI PhotoSuite III SE software Please read this manual before using your new camera ENGLISH ...

Page 2: ...ful interference in commercial installation This equipment generates absorbs and can emit radio frequency energy If it is not installed and used in accordance with the instructions it may cause harmful interference to radio communication There is however no guarantee that interference will not occur in a some situations Should any interference occur when this device is in operation please try one ...

Page 3: ...at you have the correct contents before using this product READY AC Adapter Digital camera CompactFlashTM card CF CARD 4 AA Alkaline Batteries Pouch User manual Accessories optional Product warranty Applications S W Driver CD ROM USB cable Video cable Camera strap ...

Page 4: ...THIS DIGITAL CAMERA CAN BE USED FOR Editing images on a PC Recording images onto CD Printing images Viewing images on TV ...

Page 5: ...OR Inserting images directly into any electronic document Taking a self portrait and using the image to personalize name cards You can even create your own unique gift wrap paper by using your digital images Creation of a digital photo album ...

Page 6: ...ing Set up mode 67 Connecting to an external monitor 78 PC mode 79 Important notes 80 Caution 80 Warning indicator 82 Before contacting service center 83 Specification 86 Setting up shooting function 29 Movie clip shot 29 Using the camera buttons to adjust the camera 30 Using the LCD monitor to adjust the camera 40 Setting up play back functions 52 Starting play mode 52 Software Software manual 88...

Page 7: ...ons on using this camera that will help you to use this camera safely and correctly This will help prevent danger and injury to others READY Warning This is a descriptive statement warning of the result if the instructions are ignored or not understood Note This explains use of the camera please refer to this Reference This should assist further in the operation of the camera ...

Page 8: ...isk of explosion For safety reasons keep this product and accessories out of reach of children or animals to prevent accidents e g Swallowing batteries or small camera accessories In case of accidents please consult a doctor immediately There is a risk of permanent eye damage if the flash is operated at a distance of less than one meter from a person s eyes There is a possibility of injury from th...

Page 9: ...itioned correctly with regard to polarity When the camera is not in use for long periods always unplug the camera from its power source batteries or AC Power Adapter for safety purposes Leaking batteries can cause fire and pollution to the environment Allowing dust to accumulate in the camera over a long period is hazardous as extreme circumstances may cause a fire It is best to clean your camera ...

Page 10: ...duct Exterior Front Top Bottom Flash Shutter button page 30 Microphone Mode dial page 25 Strap eyelet Lens Self timer lamp Viewfinder Flash fading control sensor Speaker Mode dial Lamp Battery chamber cover Card cover Tripod socket ...

Page 11: ...ton MENU button page 31 page 55 LCD button page 31 page 55 Zoom W Thumbnail button page 33 page 53 Zoom T button page 33 page 54 Power button page 30 FOCUS DELETE button page 32 page 56 FLASH LEFT button page 35 METERING PLAY PAUSE DOWN button page 39 page 57 OK button page 35 page 55 SELFTIMER RIGHT button page 37 MIC UP button page 38 page 57 II ...

Page 12: ...erior side Viewfinder Close range picture area mark Picture area frame Optimum picture area over 1 5m Autofocus frame Optimum picture area within 0 8m 1 5m DC input connection point DC IN 6V USB connection terminal Video connection terminal ...

Page 13: ...oid obstructing the lens or the flash when you take a picture Note As there can be some differences between what is seen through the Viewfinder and the resulting image when taken at a range closer than 1 5m it is recommended that you use the LCD monitor to compose the shot Horizontal grip Vertical grip ...

Page 14: ...ver you press the LCD button the LCD monitor will change in the following order Image Status Image only LCD Off 1 Shot mode indicators 2 Battery indicator page 19 3 Camera shake warning page 28 4 Flash page 35 5 Self timer page 37 6 Macro Fixed focus page 32 7 White Balance page 50 8 Metering methods page 39 2 5M 1 0M Image Status ...

Page 15: ... 1 60 AV F 2 8 DATE 2002 03 01 Battery condition indicator Movie clip shot indicator Image Status Sound recording indicator page 57 WhenyoupresstheMICbutton thisindicatorwilldisplay thatasoundsignalhasbeenrecorded Thissound recordingislinkedtotheimagethathasbeentaken PROTECT indicator page 60 This indicator will display when you set PROTECT DPOF indicator page 64 This indicator will display when y...

Page 16: ...gle Continuous page 45 EXPOSURE select E V page 47 ISO select ISO page 49 W BALANCE select White Balance page 50 STILL IMAGE mode Menu Sub menu STILL IMAGE 1 2 EXIT MENU MOVE PAGE SIZE QUALITY SHARPNESS EFFECT 2048X1536 FINE NORMAL NORMAL SIZE select image size page 41 QUALITY select image quality page 42 SCENE select night shot mode page 51 NIGHT SCENE mode NIGHT SCENE EXIT MENU SIZE QUALITY SCEN...

Page 17: ...red images continuously page 59 PROTECT protect stored image page 60 DELETE ALL delete all stored images page 62 FORMAT format CF CARD page 63 STANDARD set DPOF as STANDARD page 64 INDEX set DPOF as INDEX page 65 CANCEL cancel DPOF setting page 66 REVIEW review DPOF setting page 66 PLAY mode PLAY 1 2 EXIT MENU MOVE PAGE SLIDE SHOW PROTECT DELETE ALL FORMAT 03 SEC UNLOCK NO NO PLAY DPOF 2 2 EXIT ME...

Page 18: ...nt Date Time on stored image page 71 DATE TYPE select Date Time type page 72 USER SET set the camera to the user s preferences page 73 SOUND select SOUND page 76 LCD select LCD brightness page 76 VIDEO OUT select VIDEO OUT type page 77 QUICK VIEW view a stored image for a short time page 77 SETUP 1 3 MOVE PAGE FORMAT FILE NAME POWER OFF LANGUAGE NO SERIES 03 MIN ENGLISH SETUP 2 3 MOVE PAGE DATE SE...

Page 19: ...pacity ALKALINE batteries 2000mAh as manganese batteries cannot deliver sufficient power Note Important information about battery usage Please remove the batteries if the camera will not be used for long periods Batteries can lose power over time and are prone to leaking if kept inside the camera Low temperatures below O C can affect the performance of the batteries and you may experience reduced ...

Page 20: ...6V on the camera Please ensure that you use an AC adapter with the correct specification for the camera 6v 2 0A Failure to do so may affect your warranty To prevent accidental damage to the camera always use the strap Refer to the illustrations below WARNING Always turn off the power before taking the AC adapter out of the mains supply As with all mains powered devices safety is important Ensure t...

Page 21: ...until you hear a click Removing the CF CARD 1Turn the power off using the power button 2Push the Card eject lever down 3Remove CF CARD as shown in the image CompactFlashTM card is the registered trademark of Sandisk Note Repeated use of a CF CARD will eventually reduce the card s performance Should this be the case you will need to purchase a new CF CARD Wear and tear on the card is not covered by...

Page 22: ...image capacities can be affected by variables such as card performance and subject matter Number of shots 16MB 32MB Super Fine 9 19 Fine 19 39 Normal 29 59 Super Fine 10 22 Fine 22 45 Normal 32 66 Super Fine 38 77 Fine 75 153 Normal 110 225 Super Fine 163 333 Fine 269 547 Normal 377 767 2048 x 1536 Large Recorded image size Recorded image quality 2048 x 1360 Photo 1024 x 768 Medium 512 x 384 Small...

Page 23: ...sponsible for lost data Important information on the use of the CF CARD If you switch off this camera while it is reading initializing or playing the information on the CF CARD may be corrupted The CF CARD is an electronic precision device Do not bend drop or subject the card to any heavy impact Do not store the CF CARD in an environment with strong electronic or magnetic fields e g near loud spea...

Page 24: ...n the 5 function button 5Move to the DATE SETUP by using the DOWN button on the 5 function button and press the RIGHT button A menu will then be displayed on the LCD monitor as shown alongside 6Select correct Date Time by using the 5 function button and press the OK button to update Date Time SETUP 2 3 menu will be displayed on the LCD monitor 7The setting is completed The camera can now be used w...

Page 25: ...ash is changed to FLASH OFF when this mode is selected PLAY mode In this mode the stored images on the CF CARD can be viewed on the LCD monitor on the back of the camera or on an external monitor using a video output terminal If you view a shot which has additional sound recording the sound will play back whilst the image is viewed You can select single image play back 9 thumbnail screen slide sho...

Page 26: ...e appropriate settings image quality image size etc Refer to pages 29 77 for information on camera setting 4Decide the image composition that you want to achieve by using the optical viewfinder or the LCD monitor 5When taking images squeeze the shutter button gently to avoid camera shake Pressing the shutter button down halfway activates the autofocus and checks the condition of the flash Pressing...

Page 27: ...ou take an image An image can be spoiled when a finger hair or camera strap is in front of the Flash control sensor Using the LCD monitor extensively will drain the batteries We recommend using the optical viewfinder as often as possible in order to extend battery life If the LCD monitor is more appropriate switching it off between shots will also help to extend the battery life Reference If there...

Page 28: ... that has little contrast If the subject is highly reflective or shiny If the subject is moving at high speed When the subject matter has only horizontal lines or the subject is very narrow such as a stick or flagpole When there is strong reflected light or when the background is very bright Camera shake warning When the Flash Off mode is selected the camera shake warning indicator may appear on t...

Page 29: ...e recorded if the shutter button is released If you wish to stop recording press the shutter button again The self timer lamp red on the front of the camera will illuminate during the recording Image size and type are listed below Image size QVGA 320 x 240 File type AVI When the movie clip is being recorded to the CF CARD the Green lamp blinks Please Wait message will be displayed on the LCD monit...

Page 30: ...cene Movie clip Pressing the shutter button down halfway activates the autofocus and checks the condition of the flash Note that releasing the button will de select the autofocus and the camera will re focus when the button is depressed for the second time Pressing the shutter down fully takes the image and stores the relevant data regarding the shot SETTING UP THE SHOOTING FUNCTION Using the came...

Page 31: ...menu option can be displayed when the following are selected STILL IMAGE mode NIGHT SCENE mode MOVIE CLIP mode PLAY mode and SETUP mode There is no menu available when PC mode is selected LCD button Pressing the LCD button in the shot STILL IMAGE NIGHT SCENE MOVIE CLIP mode will change the display as shown below If the LCD monitor is turned off the mode dial lamp is turned on at the same time Imag...

Page 32: ...mode No indicator Macro Fixed focus mode Holding the FOCUS button down over two seconds will select Fixed focus and indicator will be displayed on the LCD monitor indicator is changed as shown below by pressing the FOCUS button 2 5 M 1 0 M Pressing the FOCUS button over two seconds again the focus mode is changed to Auto focus mode Selecting Macro Selecting 2 5M Reference The default of the FOCUS ...

Page 33: ...es the digital zoom software Releasing zoom button T stops the digital zooming at the required setting Once the maximum digital zoom 2 X is achieved pressing the zoom button T will have no effect 2 Digital WIDE When the digital zoom is in operation pressing the zoom button W will reduce the digital zooming in steps Releasing zoom button W stops the digital zooming Pressing the W button will reduce...

Page 34: ...Take care not to touch the lens during the zoom operation as this may make the image be dim If the image is dim turn the camera power off and turn on again to modify the lens position Reference Images taken using the digital zoom may take a little longer for the camera to process Allow time for this to take place the green viewfinder LED will indicate when the operation is complete The digital zoo...

Page 35: ...n the camera power on 2 Rotate the mode dial to the STILL IMAGE mode or NIGHT SCENE mode 3 Do not turn the LCD monitor off 4 Press the FLASH button until the desired FLASH mode indicator displays on the LCD monitor 5 Take a picture Selecting Auto flash Note Photograph within the flash range The flash ranges are listed below The image quality is not guaranteed if the subject is too close or highly ...

Page 36: ...h If the subject or background is dark the camera flash will operate automatically Auto flash and Red eye reduction If a subject or background is dark the camera flash will work automatically and will reduce the red eye effect by using the red eye reduction function Slow synchro The flash will operate in conjunction with a slow shutter speed in order to obtain the correct exposure We recommend usi...

Page 37: ... indicator is displayed on the LCD monitor by pressing the SELF TIMER button the setting is completed 5 Pressing the shutter button will allow an interval of ten seconds before the image is taken After that the self timer is canceled Selecting Self Timer Reference The default is OFF The self timer LED lamp red and Self timer indicator on the LCD monitor will blink for 10 seconds after the SELF TIM...

Page 38: ...2 Rotate the mode dial to the STILL IMAGE mode or NIGHT SCENE mode 3 Do not turn the LCD monitor off 4 If the MIC indicator is displayed on the LCD monitor when pressing the MIC button the camera is ready for recording sound 5 Sound will be recorded for ten seconds from the moment the shutter button is pressed RECORDING is displayed during the recording as shown beside 6 In the middle of the sound...

Page 39: ...isplayed on the LCD monitor when pressing the METERING button the function is ready for recording 5 Take a picture Selecting CENTER metering METERING mode indicator Center Weighted Average metering Exposure will be calculated based on an average of the light available in the image area However the calculation will be biased towards the centre of the image area CENTER metering Use this function whe...

Page 40: ...ery capacity Explanation of the 5 function button UP button Pressing the UP button makes the cursor move up DOWN button Pressing the DOWN button makes the cursor move down LEFT button Pressing the LEFT button makes the cursor move to the left RIGHT button Pressing the RIGHT button makes the cursor move to the right OK button Pressing the OK button confirms the selection When the menu is showing on...

Page 41: ... display the menu on the LCD monitor 5 Press the DOWN button and select SIZE 6 The cursor can be moved by pressing the RIGHT button to the SIZE sub menu 7 Select the desired sub menu by pressing the UP DOWN buttons The default is 2048x1536 8 After selecting the desired sub menu press the OK button to confirm the setting 9 Press the MENU button to cancel the menu display 2048x1536 2048x1360 1024x76...

Page 42: ...de 3 Do not turn the LCD monitor off 4 Press the MENU button to display the menu on the LCD monitor 5 Press the DOWN button and select QUALITY 6 Shift the cursor to the QUALITY sub menu by pressing the RIGHT button 7 Select the desired sub menu by pressing the UP DOWN buttons The default is FINE 8 After selecting desired sub menu press the OK button to confirm the setting 9 Press the MENU button t...

Page 43: ...ursor by pressing the RIGHT button to the SHARPNESS sub menu 7 Select the desired sub menu by pressing the UP DOWN buttons The default is NORMAL 8 After selecting the desired sub menu press OK button to confirm the setting 9 Press the MENU button to cancel the menu display STILL IMAGE mode STILL IMAGE 1 2 BACK SET OK SOFT NORMAL HARD SIZE QUALITY SHARPNESS EFFECT Reference Explanation of SHARPNESS...

Page 44: ...the RIGHT button 7 Select the desired sub menu by pressing the UP DOWN buttons The default is NORMAL 8 After selecting the desired sub menu press the OK button to confirm the setting 9 Press the MENU button to cancel the menu display Reference EFFECT sub menu explained NORMAL No effect is added to the image B W Converts the image to black and white sRGB sRGB is device independent standard color mo...

Page 45: ... monitor 5 Select STILL IMAGE 2 2 menu by pressing the LEFT RIGHT buttons 6 Press the DOWN button and select SHOOTING 7 Shift the cursor to the SHOOTING sub menu by pressing the RIGHT button 8 Select the desired sub menu by pressing the UP DOWN buttons The default is SINGLE 9 After selecting the desired sub menu press the OK button to confirm the setting The number of shots in the continuous seque...

Page 46: ...t will continue until the selected number of shots has been taken Releasing the shutter button will not interrupt this funtion The maximum number of shots in a sequence is governed by the image settings Using a 16 32MB CF CARD the specified shooting capacity will be as follows These figures are intended as an indication of expected performance These figures are approximate as image capacities can ...

Page 47: ...re value the image will be darker 1 Turn the camera power on 2 Rotate the mode dial to STILL IMAGE or MOVIE CLIP mode 3 Do not turn the LCD monitor off 4 Press the MENU button to display the menu on the LCD monitor In STILL IMAGE mode press the LEFT or RIGHT button to select STILL IMAGE 2 2 menu 5 Press the DOWN button and select EXPOSURE 6 Shift to the EXPOSURE sub menu by pressing the RIGHT butt...

Page 48: ...e compensation setting range 2 0 2 0 EV 0 5 EV steps This change to the exposure will remain until the camera is switched off When the camera is turned on again the exposure compensation setting returns to 0 0EV discarding the exposure compensation When you have selected a change in exposure value the value is displayed on the LCD Decreasing or increasing the exposure value may lead to images bein...

Page 49: ...ss condition 1 Turn the camera on 2 Rotate the mode dial to STILL IMAGE mode or MOVIE CLIP mode 3 Do not turn the LCD monitor off 4 Press the MENU button to display the menu on the LCD monitor In STILL IMAGE mode press the LEFT or RIGHT button to select the STILL IMAGE 2 2 menu 5 Press the DOWN button and select ISO 6 Shift to the ISO sub menu by pressing the RIGHT button 7 Select the desired sub ...

Page 50: ...W BALANCE sub menu by pressing the RIGHT button 7 Select the desired sub menu by pressing the UP DOWN buttons The default is AUTO 8 After selecting the desired sub menu press the OK button to confirm the setting 9 Press the MENU button to cancel the menu display STILL IMAGE mode STILL IMAGE 2 2 BACK SET OK AUTO DAYLIGHT FLUORESCENT TUNGSTEN SHOOTING EXPOSURE ISO W BALANCE MOVIE CLIP mode MOVIE CLI...

Page 51: ...e DOWN button and select SCENE 6 Shift the cursor to the SCENE sub menu by pressing the RIGHT button 7 Select the desired sub menu by pressing the UP DOWN buttons The default is PORTRAIT 8 After selecting the desired sub menu press the OK button to confirm the setting 9 Press the MENU button to cancel the menu display NIGHT SCENE BACK SET OK SIZE QUALITY SCENE Reference In NIGHT SCENE mode don t m...

Page 52: ...listed below THUMBNAIL ZOOM DELETE VOICE RECORDING PLAY PAUSE SLIDE SHOW PROTECT DELETE ALL FORMAT STANDARD INDEX CANCEL REVIEW Camerabutton LCD monitor Play back Print setting Reference The last image stored on CF CARD will be displayed on the LCD monitor The LCD monitor will remain in operation until the camera is switched off The menu will not display on the LCD monitor under following circumst...

Page 53: ...ght the image that had been showing at the time the thumbnail mode was selected 5 Press the buttons to move to desired image Selected image is highlighted Icons are displayed to indicate the type of file selected Movie clip file DPOF indicator Sound recorded file Image protect indicator 6 When viewing a thumbnail image press the zoom T button and the selected shot will show in single display mode ...

Page 54: ...e scale of enlargements is listed below Image size is LARGE or PHOTO 1 5 X 5 X 0 5 step Image size is MEDIUM 1 5 X 3 X 0 5 step Image size is SMALL 1 5 X 5 Different parts of the image can be viewed by pressing the buttons 6 Pressing the ZOOM W button will zoom back to the original full sized image Selecting 2 5 X X2 5 99 Reference If an image is enlarged the ratio indicator will display on the ce...

Page 55: ...100 TV 1 250 SEC Shutter speed AV F2 8 Aperture value DATE 2002 03 01 MENU button Pressing the MENU button will display the PLAY mode menu Pressing the MENU button again will cancel the menu display PLAY mode allows you to view either the PLAY menu or the DPOF Digital Print Order Format menu OK button When the LCD monitor is turned on pressing this button allows the changed sub menu by using butto...

Page 56: ...tons to select image that you wish to delete 4 When you press the DELETE button a message will be displayed on the LCD monitor 5 Select YES or NO Selecting YES Press OK button Once an image has been deleted the next image in the sequence will appear on the LCD display Selecting NO Press the LEFT button The image will be displayed on the LCD monitor DELETE IMAGE NO YES OK 13 ...

Page 57: ...be displayed on the LCD monitor as shown and sound is recorded to the still image 6 The sound will record for ten seconds Recording can be stopped by pressing the shutter button again When you press the shutter button to stop the sound recording press the shutter button halfway and the buzzer sound will not be recorded 40cm between you and the camera microphone is the best distance to record a sou...

Page 58: ...Y PAUSE button to play the sound clip or to start the movie clip If the image is playing The progress is paused If the PLAY PAUSE button is pressed when the image is paused the sound or movment will resume A sound recorded still image A movie clip A sound recorded still image A movie clip Slide show Reference When an image is being played back you can use the PAUSE button POWER button and the mode...

Page 59: ...utton and select SLIDE SHOW 5 Shift the cursor to the SLIDE SHOW sub menu by pressing RIGHT button 6 Select the desired sub menu by pressing the UP DOWN buttons The default is 3 seconds 7 After selecting the desired sub menu press the OK button to start the slide show 8 To stop the slide show press the MENU button twice Press the MENU button and the initial menu will be displayed Press the MENU bu...

Page 60: ...MENU button to display the menu on the LCD monitor 4 Press the DOWN button and select PROTECT At this point a sub menu will be displayed as shown below The display will show that the image will not be protected 5 Shift the cursor to the PROTECT sub menu by pressing the RIGHT button PLAY 1 2 EXIT MENU CHANGE 03 SEC UNLOCK NO NO SLIDE SHOW PROTECT DELETE ALL FORMAT PLAY 1 2 BACK SET OK ONE IMAGE ALL...

Page 61: ...PROTECT function UNLOCK Discards the protect function 8 If you select ONE IMAGE in step 6 the other image can be protected by pressing the LEFT RIGHT button The process of setting up is same as step 7 9 Pressing the MENU button clears the menu display and the LOCK indicator will show on the LCD monitor as shown below PROTECT MOVE IMAGE EXIT MENU SET OK UNLOCK LOCK indicator There is no indicator w...

Page 62: ...D monitor 4 Press the DOWN button and select DELETE ALL 5 Shift the cursor to the DELETE ALL sub menu by pressing the RIGHT button 6 Select the desired sub menu by pressing the UP DOWN buttons and then press the OK button 7 Select YES or NO Selecting YES After deleting all images NO IMAGE message will show Protected images are not deleted Selecting NO The display is returned to initial menu and DE...

Page 63: ...he RIGHT button 6 Select the desired sub menu by pressing the UP DOWN buttons and then press the OK button 7 Select YES or NO Selecting YES After formatting the CF CARD FORMAT OK message will show in the LCD monitor and the display is returned to initial menu Press the MENU button and the NO IMAGE message will show in the LCD monitor Selecting NO The display returns to the initial menu and the FOR...

Page 64: ...ARD sub menu by pressing the RIGHT button 7 Select ONE IMAGE or ALL IMAGES ONE IMAGE Specifying the number of copies from a selected image ALL IMAGES Specifying the number of copies from all images except for movie clips 8 Press the OK button and a menu confirming the number of copies will be displayed Select desired number of copies by pressing the UP DOWN buttons and press OK button The maximum ...

Page 65: ... 2 menu by pressing the LEFT RIGHT buttons 5 Press the DOWN button and select INDEX 6 Shift the cursor to the INDEX sub menu by pressing RIGHT button 7 Select desired sub menu by pressing the UP DOWN buttons The maximum number of copies is 10 8 After selecting the desired sub menu press the OK button to confirm the setting 9 The display is returned to PLAY DPOF 2 2 menu and the sub menu is highlig...

Page 66: ...e 3 Press the MENU button to display PLAY 1 2 menu on the LCD monitor 4 Select PLAY DPOF 2 2 menu by pressing the LEFT RIGHT buttons 5 Press the DOWN button and select CANCEL 6 Shift the cursor to the CANCEL sub menu by pressing the RIGHT button 7 Select the desired sub menu by pressing the UP DOWN buttons 8 After selecting the desired sub menu press the OK button to confirm the setting The displa...

Page 67: ...ing the CF CARD 1 Turn the camera on 2 Rotate the mode dial to SET UP mode 3 A menu will display on the LCD monitor 4 Press the DOWN button and select FORMAT 5 Shift the cursor to the FORMAT sub menu by pressing the RIGHT button 6 Select YES to format the CF CARD 7 Press the OK button to format the CF CARD After formatting the CF CARD FORMAT OK message will show in the LCD monitor and the display ...

Page 68: ...ed sub menu press the OK button to confirm the setting SETUP 1 3 BACK SET OK RESET SERIES FORMAT FILE NAME POWER OFF LANGUAGE Reference The first stored folder name is 100SSCAM and first name is S3500001 Whenever you store an image the file number is increased by 1 The file number is named from S3500001 to S3509999 automatically 9999 files will be stored in a folder Using SERIES the sequence start...

Page 69: ...essary battery drainage You can set the power to switch off at any time between one and ten minutes from the last operation Setting this function to OFF means that the camera will not switch off automatically Note that the automatic power off does not operate if the camera is in slide show or PC mode 1 Turn the camera on 2 Rotate the mode dial to SET UP mode 3 A menu will display on the LCD monito...

Page 70: ...TUP 2 3 menu by pressing the LEFT RIGHT buttons 5 Press the DOWN button and select DATE SETUP 6 Shift the cursor to the DATE SETUP sub menu by pressing the RIGHT button 7 Press to select correct time 8 Press OK button to confirm the setting SETUP 2 3 BACK SET OK 2002 03 01 00 00 DATE SETUP IMPRINT DATE TYPE USER SET Note If the battery is removed the date and time settings will remain for approxim...

Page 71: ...1 3 menu will display on the LCD monitor 4 Select SETUP 2 3 menu by pressing the LEFT RIGHT buttons 5 Press the DOWN button and select IMPRINT 6 Shift the cursor to the IMPRINT sub menu by pressing the RIGHT button 7 Select the desired sub menu by pressing the UP DOWN buttons The default is OFF 8 After selecting the desired sub menu press the OK button to confirm the setting SETUP 2 3 BACK SET OK ...

Page 72: ...TE TYPE 6 Shift the cursor to the DATE TYPE sub menu by pressing the RIGHT button 7 Select the desired sub menu by pressing the UP DOWN buttons The default is YYYY MM DD 8 After selecting the desired sub menu press the OK button to confirm the setting SETUP 2 3 BACK SET OK YYYY MM DD DD MM YYYY MM DD YYYY DATE SETUP IMPRINT DATE TYPE USER SET Reference Date will be imprinted as DATE TYPE setting T...

Page 73: ... Select SETUP 2 3 menu by pressing the LEFT RIGHT buttons 5 Press the DOWN button and select USER SET 6 Shift the cursor to the USER SET sub menu by pressing the RIGHT button 7 Select the desired sub menu by pressing the UP DOWN button and press the OK button The default is NO 8 Select YES or NO Selecting YES The sub menu setting will be saved even if the camera is switched off Selecting NO If NO ...

Page 74: ...mpleted SINGLE x x x x CONTINUOUS x x x x x AUTO x x x x AUTO Red x x x x FLASH SLOW SYNCHRO x x x x Fill in x x x x OFF x x x Large x x x x Medium x x x x Small x x x x Photo x x x x Super Fine x x x x Fine x x x x Normal x x x x Soft x x x x x SHARPNESS Normal x x x x x Hard x x x x x Normal x x x B W x x x x sRGB x x x x Sunset x x x x 2 0EV x x x x EXPOSURE 0 0EV x x x 2 0EV x x x x Auto x x x...

Page 75: ... x Index x x x x x Cancel x x x x x Review x x x x x Series x x x x x Reset x x x x x ON x x x x x OFF x x x x x ENGLISH x x x x x DEUTSCH x x x x x FRANÇAIS ESPAÑOL x x x x x x x x x x Off x x x x x Date x x x x x Date Time x x x x x On x x x x x Off x x x x x x x x x x NTSC x x x x x PAL x x x x x x x x x x SELF TIMER METERING SCENE Protect DPOF File Name Auto Power off LANGUAGE Imprint Sound Vi...

Page 76: ...ng the desired sub menu press the OK button to confirm the setting SETUP 3 3 BACK SET OK SOUND LCD VIDEO OUT QUICK VIEW SOUND A beep will sound when you press the camera button 1 Turn the camera on 2 Rotate the mode dial to SET UP mode 3 SETUP 1 3 menu will display on the LCD monitor 4 Select SETUP 3 3 menu by pressing the LEFT RIGHT buttons 5 Press the DOWN button and select SOUND 6 Shift the cur...

Page 77: ... After selecting the desired sub menu press the OK button to confirm the setting SETUP 3 3 BACK SET OK NTSC PAL SOUND LCD VIDEO OUT QUICK VIEW QUICK VIEW With QUICK VIEW you can pre set the camera to briefly review the last image captured It is possible to vary the time the image is visible according to your particular requirements 1 Turn the camera on 2 Rotate the mode dial to SET UP mode 3 SETUP...

Page 78: ...e on the external monitor and the working of the menu is same as the LCD monitor Selecting the Video output type You can select an NTSC or PAL video output signal depending on the external equipment monitor or TV that you wish to connect to Refer to page 77 VIDEO OUT about selecting the video output from the camera Reference When using a TV as an external monitor you will need to select the extern...

Page 79: ... click Removable Disk The image files will then be displayed Use the COPY or MOVE function to download the images to your PC 4 By using Digimax Viewer you can see the stored images in the CF CARD directly on the PC monitor and you can copy or move the image files 5 If you wish to edit downloaded images you can use MGI PhotoSuite SE Refer to the software manual regarding editing software installati...

Page 80: ... with high explosives or highly flammable materials Pesticides etc Sand can be particularly troublesome to cameras Sand or other small particulates can cause severe malfunctions Ensure that there is no contact with sand or similar particles Extremes in temperature may cause problems If the camera is transferred from a cold to a warm and humid environment condensation can form on the delicate elect...

Page 81: ...era contact with solvent materials such as benzol insecticide thinners etc This may damage the body shell of the camera and also affect its performance Rough handling can damage the LCD monitor Take care to avoid damage and keep the camera in its protective carry case at all times DO NOT attempt to disassemble or modify the camera It contains delicate parts and there are high voltage circuits that...

Page 82: ... no images stored on the CF CARD There is insufficient memory capacity to take an image There is a malfunction in the CF CARD There is low battery capacity Insert a CF CARD Remove and re insert the CF CARD Turn the camera off wait a few seconds and turn it on again Take images Insert a CF CARD that is holding some images Insert a new CF CARD or delete stored images to free up some memory Insert a ...

Page 83: ...d and new batteries or battery types CF CARD is not inserted The CF CARD has not been formatted The CF CARD is full The camera power is off The batteries are exhausted The mode dial is positioned incorrectly After turning the camera off insert card Format the card Insert new CF CARD Turn the camera power on Insert fresh batteries Rotate the mode dial to shot mode Insert fresh batteries Connect AC ...

Page 84: ... Camera malfunction If the subject is closer than 0 8m select macro shot mode Use Fixed focus when you cannot use auto focus mode Dis engage FLASH OFF mode Reset the date and time correctly Refer to page 24 Remove re insert batteries and switch camera on Remedy CF CARD error Color of image different to original scene Images are too bright Incorrect CF CARD format W BALANCE setting is incorrect Exp...

Page 85: ...g function Refer to page 71 Check the connection cables Insert CF CARD that have correct files Remedy When using the PC s explorer Removable Disk file does not show Cable connection is incorrect The camera is off There are no batteries the batteries are exhausted or the AC adapter is not connected The operating system is not Windows 98 2000 ME XP Alternatively the PC does not support USB USB drive...

Page 86: ...sh off Wide 0 2 3 0m Tele 0 2 2 0m Approx 7 sec Soft Normal Hard Normal B W sRGB Sunset Auto Daylight Fluorescent Tungsten Modes Single Continuous Portrait Landscape With Voice Size 320x240 10 sec CompactFlashTM card up to 512MB guaranteed Still Image JPEG DCF DPOF Movie Clip AVI MJPEG Large 2048x1536 pixels Photo 2048x1360 pixels Medium 1024x768 pixels Small 512x384 pixels Image Sensor Lens Viewf...

Page 87: ... 114x70x49 9mm 4 5x2 8x2 0in 240g 9 0oz without batteries and card Storage Driver Windows98 98SE 2000 ME XP Mac OS 9 x or later MGI PhotoSuite Digimax Viewer Image Play Interface Power Source Dimensions WxHxD Weight Software Capacity 16 32MB Camera Driver Application System Requirements For Windows For Macintosh Digimax 350SE PCwithprocessorbetterthanMMXPentium233MHz XP PentiumII300MHz Windows98 9...

Page 88: ...mage For Windows only SOFTWARE MANUAL Please ensure that you read the instruction manual carefully before using Software Notes The attached software is a camera driver and image editing software tool for Windows Under no circumstances should all or part of either the software or the user manual be reproduced Copyright for both software is licensed only for use with a camera In the unlikely event o...

Page 89: ...age Viewer Digimax Viewer Refer to page 92 3 Application MGI PhotoSuite SE image editing program Refer to page 94 4 Internet link You can visit the Samsung web site through the internet http www samsungcamera com English http www samsungcamera co kr Korean Reference Check the system requirements 87 page before setting up the driver You should allow 5 10 seconds for running the automatic setup prog...

Page 90: ... Window will open Click Next 2 Storage Driver installation has started 3Installation is complete Click Yes I want to restart my computer now to restart your computer To use this camera with a PC first install the Camera Driver After this has been done the stored images in the camera can be moved to the PC and can be edited by an image editing program ...

Page 91: ...nected to PC before Driver installation Found New Hardware Wizard will appear In this case cancel Found New Hardware Wizard and disconnect camera from PC Install the camera driver first and connect the camera to PC again Refer to page 97 about connecting the camera to PC After driver installation you have to restart the computer Should the computer not find the Camera Driver after installation ple...

Page 92: ...max Viewer on the Autorun frame 2Installation window will display as shown alongside Click Next 3The Software License Agreement window will display If you agree to it click Yes This will take you to the next step If you disagree click No and the installation program will be canceled 4Select destination folder and click Next ...

Page 93: ...imax Viewer 5 Select Program folder and click Next 6 Setup status window will display 7 Installation is completed If you wish to open this program automatically whenever the camera connects to PC click I would like to launch Digimax Viewer Checkbox And click Finish ...

Page 94: ...dow will be displayed Click Next to move to the next step 4The Software License Agreement window will be displayed If you agree to this click Yes the window will then move to the next step If you disagree click No and the install program will be canceled 1Click the MGI PhotoSuite lll SE menu on autorun frame ...

Page 95: ...l the options Custom you can choose what you would like to install 6Start Copying Files window will display Click Next to start installation 7The MGI Registration window will be displayed before completing installation Register send your personal informatiion to MGI for registration Cancel postpone registration ...

Page 96: ...HOW TO SET UP THE SOFTWARES FOR WINDOWS 8Installation is completed If installation is completed correctly Autoplay is registered automatically into the start menu program as shown alongside ...

Page 97: ... other end of the USB cable to the USB connection terminal of the camera 3Set the mode dial to 4Switch the camera on Removable Disk To use this camera as a Removable Disk install the USB Driver 1Before turning the camera power on connect the camera to the PC with the USB cable and rotate the mode dial to PC mode 2Click Removable Disk under My computer or Windows Explorer 3Image files stored in the...

Page 98: ...layed on the LCD monitor in PLAY mode and nothing is displayed in THUMBNAIL mode The green lamp next to the viewfinder will blink when a file is transferred copy or deletion between the PC and camera Do not remove the USB cable or rotate the mode dial until the lamp stops blinking To remove the USB cable use the Unplug or Eject Hardware icon on the task bar In Windows 2000 take extra care as the f...

Page 99: ... Windows Explorer and double click JPEG_Decorder folder in CD ROM Driver folder 3 Select Jpegcode inf in JPEG_Decoder folder and click right button of mouse Then click Install and the movie compression code is automatically set up Solution 2 Install QuickTime QuickTime is a trademark of Apple Computer Inc and can be downloaded from http www apple com quicktime download for free ...

Page 100: ...max Viewer 1 0 Digimax Viewer 1 0 and Digimax Viewer 1 0 will then open The stored images will display as thumbnail image You can easily copy move and delete the stored images If the Auto Launch option is selected this program will be executed automatically with recognizing the camera Refer to Help menu in Digimax viewer about futher information ...

Page 101: ...E THE SOFTWARES MGI PhotoSuite SE This software is only compatible with Windows To open MGI PhotoSuite lll SE click the Start Programs MGI PhotoSuite lll SE MGI PhotoSuite lll SE and MGI PhotoSuite lll SE will then open ...

Page 102: ...re A number of photo editing activities can be performed within this module Compose Use your photos in a variety of fun creative and interesting ways Organize Organize your photos and other media files into albums Share Save your results to show to others Print Print hard copies of photos and projects ...

Page 103: ...window Get Get images Prepare A number of photo editing activities can be performed within this module Compose Use your photos in a variety of fun and interesting ways Organize Organize your photos and other media files into albums Share Save your results to show to others Print Print hard copies of photos and projects Browse Browse the web site ...

Page 104: ... Get button on the Welcome screen or the Get button on the Navigation bar Click Computer from the list of options displayed on the activity panel 2The Open file selector is displayed Now select the image file and click open 3The Welcome screen will change to the next work step with the selected image displayed Get images ...

Page 105: ...Click Computer from the list of options displayed on the activity panel 2The Open file selector is displayed Click Look in to choose Removable Disk and click open for the open file window to be displayed Note When you connect a PC to the Camera use the following sequence 1 Turn the Mode dial to PC mode 2 Turn the power on 3 Connect the USB cable Refer to page 97 for more information about connecti...

Page 106: ...d click Open 4The Welcome screen will change to the next work step with the selected image displayed Reference When you use the Digimax camera only Computer and Album from the list of options displayed are available You will be able to obtain images from the digital camera Computer and Album Only ...

Page 107: ...vigation bar Click Album from the list of options displayed on the activity panel 2After selecting Album on the Choose a photo album click an image in the album and click Open 3The Welcome screen will change to the next work step with the selected image displayed Acquiring images from an Album Refer to page 111 for more information about creating an Album ...

Page 108: ...atically Menu of PREPARE step Rotate Crop You can rotate flip or crop images along with a host of others Touchup Remove Red eye Remove Scratches etc are available in this menu Special Effects A number of special effects can be applied Stitching Join a series of photos together to create a sweeping panoramic effect ...

Page 109: ...Photo Layouts The Photo Layouts activity includes many collage and layout options Cards tags Use your photos to create items such as Gift Tags Greeting Cards Invitations Postcards and Sports Cards Calendars Use your photos to create a variety of calendars monthly quarterly seasonal yearly Collections Photos can also be used to create a variety of items for business purposes Add frames and boarder ...

Page 110: ...d choose an action below Open Open selected image Delete Delete selected image Properties view image information Choose an action to manage your album Add click Add to add an image to an Album Sort click Sort to Sort saved images Search click Search to Search saved images Reset click Reset to reset the setting Update click Update to update images Create Slide Show click Create Slide Show to create...

Page 111: ...ick the large Organize button on the Welcome screen or the Organize button on the Navigation bar 2Click Album in Choose a photo album to view or edit 3The Master Album window will be displayed then click New 4Put a new Album name in the New Album window and click OK A new album will now be created ...

Page 112: ...RE step Save To save the active file according to its current name and path Save As To assign a new name or path to the file Send E mail e mailing images Slide Show Viewing images as a slide show 2 Click SAVE and the Save Project window will be displayed Enter the file name and click Save to save an image ...

Page 113: ...NT Printing images 1 You can print images Menu of PRINT step Print Printing images Print Multiples Print multiple copies of a photo or project or one copy of each of the photos included in an album according to a predefined template 2 Choose a printer choose an orientation choose the print size choose the number of copies You can then print the images ...

Page 114: ...DOWS Removing USB Driver for Windows 1Click Add Remove programs in Controller 2After selecting Samsung Digimax 350SE Camera click Add Remove and the following window will display 3Click OK and USB driver will be removed automatically ...

Page 115: ...igimax 350SE Camera in Add Remove programs 3 Click Unplug or Eject Hardware icon on the task bar Click Stop on the Unplug or Eject Hardware window and click Ok on the next window 4 Click System on Control Panel Trace Device Manager Universal serial bus controller Samsung USB Mass Storage Device and click the right mouse button Then the following window will be displayed Click Remove to remove the ...

Page 116: ...able to camera for macintosh The USB port has to be in the Macintosh or keyboard 1Connect the USB cable to the USB port on the Macintosh 2Connect the other end of the USB cable to the USB port of the camera 3Set the mode dial 4Switch the camera on ...

Page 117: ...S 9 X or later 3Connect the camera to the Macintosh and turn the camera power on in PC mode 4A new icon Untitled will be displayed on the desktop after connecting camera to MAC Using USB Driver for MAC 1Double click a new icon Untitled on the desktop and the folder in the CF CARD will be displayed 2Select image file and copy or move it to MAC Note Before connecting camera to MAC check that CF CARD...

Page 118: ...rrectly Install the USB Driver correctly Refer to page 90 Case 4 The USB cable is not connected or you are using a cable with an incorrect specification Use a USB cable with the correct specification Case 5 The CF CARD is not inserted or the camera can t recognize the CF CARD Turn the camera power off and insert the CF CARD again Case 6 Occasionally the computer recognizes the USB as another devic...

Page 119: ... Device Manager Universal serial bus controller Win XP Trace start Control Panel Performance and Maintenance system Hardware Device Manager Universal Serial Bus controller There must be USB Host Controller and USB root hub under Universal serial bus controller When all the conditions mentioned above are met the computer can support the USB interface Case 9 When using USB hub There may be a problem...

Page 120: ...SEX TW8 9RE U K TEL 44 20 8232 3280 FAX 44 20 8569 8385 SAMSUNG OPTO ELECTRONICS GMBH SAMSUNG HAUS AM KRONBERGER HANG 6 65824 SCHWALBACH GERMANY TEL 49 6196 66 53 03 FAX 49 6196 66 53 66 SAMSUNG FRANCE S A R L BP 51 TOUR MAINE MONTPARNASSE 33 AV DU MAINE 75755 PARIS CEDEX 15 FRANCE TEL 33 1 4279 2282 5 FAX 33 1 4320 4510 SAMSUNG TECHWIN MOSCOW OFFICE KORP 14 37 A LENNINGRADSKY PRO KT MOSCOW 125167...

Reviews: