✤
AV In/Out function works only in Player mode.
✤
AV In/Out setting enables you to record signal from external sources and display it on
LCD screen.
Also, you can direct your video or image to external devices to record or play back.
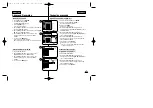
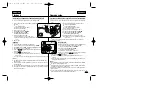
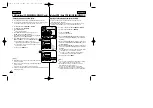
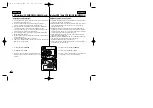
1. Connect the Camcorder to your VCR or TV with the
Multi-AV cable. (See pages 70~71)
2. Set the
Power
switch to
PLAYER
.
3. Set the
Mode
switch to
TAPE
.
(VP-D453i/D454i/D455i only)
4. Turn on the VCR or TV.
5. Insert the blank tape with protection tab closed into the
Camcorder.
■
If you want to record from a connected VCR, insert a
recorded VHS tape into the VCR.
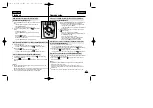
6. Press the
MENU
button.
■
The menu list will appear.
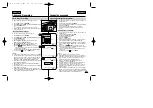
7. Move the
Menu selector
to the left or right to select
Record
, then press the
Menu selector
.
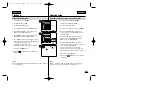
8. Move the
Menu selector
to the left or right to select
AV
In/Out
, then press the
Menu selector
.
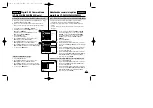
9. Move the
Menu selector
to the left or right to select
Out
,
AV In
or
S-Video In
, then press the
Menu selector
.
■
If you want to see the Camcorder picture with a TV, set
AV In/Out menu to Out.
10. To exit, press the
MENU
button.
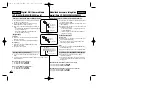
11. Press the
Start/Stop
button to set the Camcorder to
REC PAUSE
mode.
■
PAUSE
appears on the LCD screen.
12. Select the TV programme or play back the VHS tape.
13. Press the
Start/Stop
button to start recording.
■
If you want to temporarily pause a recording, press the
Start/Stop
button.
14. To stop recording, press the
(STOP) button.
[ Note ]
When you record the images being played back on an analog VCR, if they are
not being played back at normal speed, (for example, more than double speed
or slow playback), only a gray image appears on the Camcorder.
ESPAÑOL
ENGLISH
75
75
Reproducción
✤
La función AV In/Out sólo está operativa en la modalidad Player.
✤
El ajuste de AV in/out permite grabar la señal de fuentes externas y la
muestra en la pantalla LCD.
Asimismo, puede dirigir su vídeo o la imagen a dispositivos externos para
grabarlos o reproducirlos.
1. Conecte la videocámara al aparato de vídeo o al televisor
mediante el cable de audio/vídeo.
(Consulte las páginas 70 y 71.)
2. Coloque el interruptor
Power
en
PLAYER
.
3. Coloque el interruptor
Mode
en
TAPE
.
(Sólo VP-D453i/D454i/D455i)
4. Encienda el aparato de vídeo o el televisor.
5. Introduzca una cinta virgen en la cámara con la pestaña
de protección cerrada.
■
Si desea grabar desde el aparato de vídeo conectado,
introduzca en el aparato de vídeo una cinta VHS
grabada.
6. Pulse el botón
MENU
.
■
Aparece la lista del menú.
7. Mueva el
Selector de menú
a la izquierda o a la derecha
hasta seleccionar
Record <Grabar>
y pulse el
Selector de menú
.
8. Mueva el
Selector de menú
a la izquierda o a la derecha
hasta seleccionar
AV In/Out <Ent/Sal AV>
y pulse el
Selector de menú
.
9. Mueva el
Selector de menú
a la izquierda o a la derecha
hasta seleccionar
In <Entrada>
y pulse el
Selector de menú
.
■
Si desea ver las imágenes de la videocámara en un
televisor, ajuste el menú AV In/Out <Ent/Sal AV> en Out
<Salida>.
10. Para salir, pulse el botón
MENU
.
11. Pulse el botón
Start/Stop
para colocar la videocámara en
la modalidad
REC PAUSE
.
■
PAUSE
en la pantalla LCD.
12. Seleccione el canal de televisión o ponga en marcha la
cinta VHS.
13. Pulse el botón
Start/Stop
para comenzar la grabación.
■
Si desea detener momentáneamente la grabación,
pulse de nuevo el botón
Start/Stop
.
14. Para detener la grabación, pulse el botón
(STOP).
[ Nota ]
Cuando grabe imágenes reproducidas en un aparato de vídeo analógico, si no
se han reproducido a velocidad normal (por ejemplo, más de la velocidad doble
o a cámara lenta), sólo aparecerán imágenes en gris en la videocámara.
Entrada y salida de AV (Sólo VP-D451i/D453i/D454i/D455i)
√
SP
√
12Bit
√
Off
√
Out
Move
Select
Exit
MENU
Player Mode
√
Record
Rec Mode
Audio Mode
Wind Cut
AV In/Out
Move
Select
Exit
MENU
1
7
9
Player Mode
Back
Rec Mode
Audio Mode
Wind Cut
AV In/Out
Out
AV In
S-Video In
Playback
AV In/Out (VP-D451i/D453i/D454i/D455i only)
00840J VP-D451 UK+ESP ~085 4/8/05 9:21 AM Page 75


