Installation
)),2+1"!6-"9@M:<S89@M8:<MT
6
Hand-tighten the flare nuts to make sure that they do not
become stripped.
Liquid service port
<High pressure>
Gas service port
<Low pressure>
7
Torque the flare connections to the following values:
Outer diameter
(inch (mm))
Torque
̷࣑ɵ˙࡛˙ϩ࣑Ę࡛͔࣒࣒
ƟͱθαЇʪ̧࣑˝˙࡛ʀ͔࣒
Ø 1/4” (6.35)
10.3 to 13.3 (14 to 18)
140~180
Ø 3/8” (9.52)
25.1 to 31.0 (34 to 42)
350~430
Ø 1/2” (12.70)
36.1 to 45.0 (49 to 61)
500~620
Ø 5/8” (15.88)
50.2 to 60.5 (68 to 82)
690~830
CAUTION
࡛
Tighten the flare nuts only to the specified torque. If
a flare nut is overtightened, the flare face may crack,
causing refrigerant leakage.
8
Do not box in or cover the pipe connections. Make sure
that the connections are accessible for testing later in the
installation process and for future servicing.
9
Tape over the end of the pipes so that debris will not enter
the piping when it is passed through the wall. The pipes
will be insulated later in the installation process.
Connecting the drain hose
1
In Step 4 you determined the exit position for the piping
bundle. If using the right, bottom, or right rear exit,
change the drain hose connection from the right to the
left so that the drain hose will lie along the inside of the
unit and exit to the right.
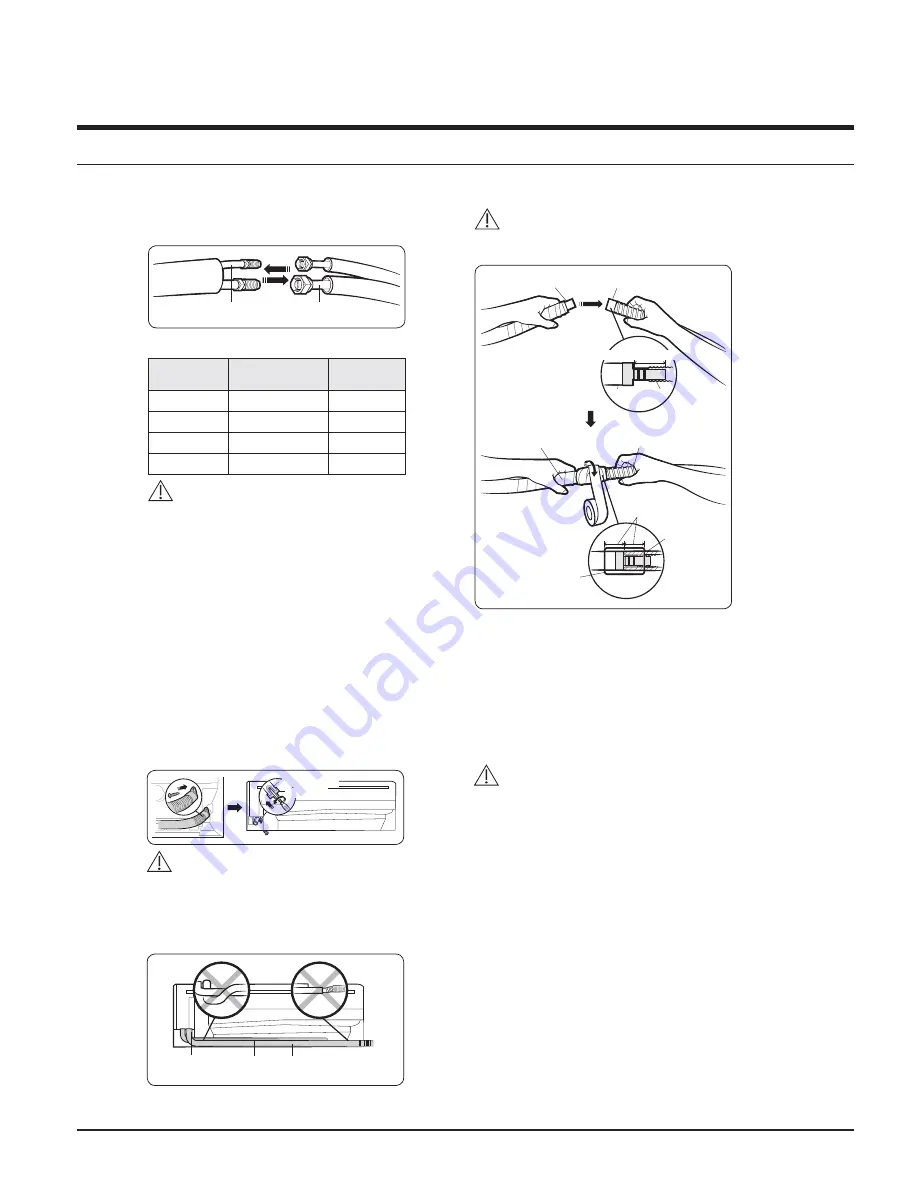
Drain pan outlet
Rubber cap
CAUTION
࡛
Be careful not to puncture the plug with the
screwdriver when installing it.
2
If using the left, right, or bottom exit, pass the drain hose
through the selected knockout.
Refrigerant pipes
(assembly pipe)
Drain hose
Connection hose
3
Connect a 0.63inch (15.88mm) ID extension drain hose to
the main drain hose.
CAUTION
࡛
If the diameter of the connection hose is smaller than
the product’s drain hose, leakage may occur.
(A)
(B)
40~45 mm
Drain hose (A)
Drain hose
Extension drain hose
1.57~1.97inch(40~45mm)
0.79inch (20mm) or more
Vinyl tape
Foam insulation
Extension drain hose (B)
4
Do not box in or cover the drain hose connection. It must
be accessible for testing later in the installation process
and for future servicing.
5
If the drain hose is routed inside the room, insulate the
hose so that dripping condensation does not damage the
furniture or floors.
Connecting the power and
communication cables
CAUTION
࡛
Always remember to connect the refrigerant pipes
before performing the electric connections.
When disconnecting the system, always disconnect the
electric cables before disconnecting the refrigerant
pipes.
࡛
Always remember to connect the air conditioner to
the grounding system before performing the electric
connections. Use a crimp ring terminal at the end of
each wire.
The indoor unit is powered through the outdoor unit by means
of a H05 RN-F connection cable (or a more power model), with
insulation in synthetic rubber and a jacket in polychloroprene
(neoprene), in accordance with the requirements specified in
the standard EN 60335-2-40.
1
Remove the screw on the electrical component box and
remove the cover plate.
2
Route the connection cord through the side of the indoor
unit and connect the cable to the terminals refer to the
figure below.
3
Route the other end of the cable to the outdoor unit
through the ceiling & the hole on the wall.
4
Reassemble the electrical component box cover, carefully
tightening the screw.


