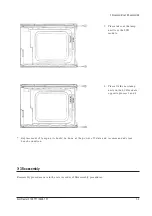
4. Remove the Stand Rear from the Stand
assembly.
5. Remove the Stand Front from the Stand
assembly.
6. Remove the Neck Rear from the Stand
assembly.
7.
Remove the 4 Rubbers on the four corner of
the Stand Bottom and the 4 screws on the four
corner of the Stand Bottom.
8. Remove the 5 stopper hings from the Bracket
Bottom.
9. Remove the Stand Base from the Stand
Assembly.
3-1-6 Wire frame stand Disassembly (option)
1. Carefully pull the cover hinge.
2. Remove the cover vesa from the Stand
assembly.
3. Remove 4 screws on the assembly Bracket
assembly.
3 Disassembly and Reassembly
3-2
SyncMaster 570B TFT / 580B TFT
1. After confirm there is nothing
on the disk
Turn the LCD module over
and put it on a flat desk set to
the ground.
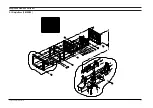
3-2 Replacement Order of Lamp Assemblies (CN15MSS/CN15MOS : Samsung Panel)
2. Push down the stopper and
slide the lamp unit.
Summary of Contents for CN15MO series
Page 11: ...MEMO 3 Disassembly and Reassembly 3 4 SyncMaster 570B TFT 580B TFT ...
Page 17: ...SyncMaster 570B TFT 580B TFT 5 1 5 Exploded View and Parts List 5 1 Simple Base CN15MSS ...
Page 18: ...5 Exploded View Parts List 5 2 SyncMaster 570B TFT 580B TFT 5 2 MultiMedia Base CN15MSS ...
Page 19: ...6 Exploded View Parts List SyncMaster 570B TFT 580B TFT 5 3 5 3 Pivot MultiMedia Base CN15MSS ...
Page 20: ...5 Exploded View Parts List 5 4 SyncMaster 570B TFT 580B TFT 5 4 Angle Pivot Base CN15MSS ...
Page 21: ...6 Exploded View Parts List SyncMaster 570B TFT 580B TFT 5 5 5 5 Wire Frame Base CN15MSS ...
Page 32: ...SyncMaster 570B TFT 580B TFT 8 1 8 Wiring Diagram ...
Page 38: ...Samsung Electronics Co Ltd July 2000 Printed in Korea P N BN68 00097D 01 ...

