background image

15


Ğ

Wired - manual

If you have a static IP address or 

the Automatic procedure does not 

work, you'll need to set the Network 

Settings values manually.
Follow Steps 1 and 2 in Wired - 

Automatic, and then follow these steps:

1. 

Select 

Network Status

. The player 

searches for a network, and then 

displays the connection failed 

message.

2. 

On the bottom of the screen, 

select 

Ip Settings

, and then press 

the 

v

 button. 

The IP Settings screen appears.

3. 

Select the IP Setting field, and 

then press the 

v

 button.

4. 

Select 

Enter manually

 in the IP 

Setting field, and then press the 

v

 button.

5. 

Select a value to enter (

Ip Address

for example), and then press the 

v

 button. 

Use the number keypad on your 

remote control to enter the numbers 

for the value. Use the◀▶ buttons 

on the remote control to move from 

entry field to entry field within a 

value. When done with one value, 

press the 

v

 button.

6. 

Press the ▲ or ▼ button to move to 

another value, and then enter the 

numbers for that value following 

the instructions in Step 5. 

7. 

Repeat Steps 5 and 6 until you 

have filled in all values.


NOTES


You can get the Network values 
from your Internet provider.

8. 

When finished entering all the 
values, press the 

RETURN

 or 

EXIT


button. The player verifies the 
network connection and then 
connects to the network.

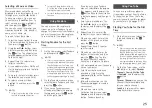
Wireless Network

You can setup a wireless network 
connection in four ways: 


- Wireless Automatic 


- Wireless Manual 


- WPS(PBC)


- WPS(PIN)
When you configure the wireless 
network connection, any wireless 
network devices currently connected 
through the player or, if applicable, 
the player's current wired 
connection, will be disconnected.


Ğ

Wireless - Automatic

1. 

In the Home screen, select 

Settings

and then press the 

v

 button.

2. 

Select 

Network

, and then press 

the 

v

 button.

3. 

Select 

Network Settings

, and then 

press the 

v

 button.

4. 

Select 

Wireless

 in the Network 

Settings screen, and then press the 

v

 button. The player searches 

for and then displays a list of the 

available networks.

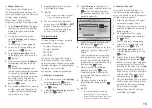
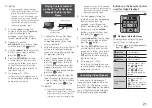
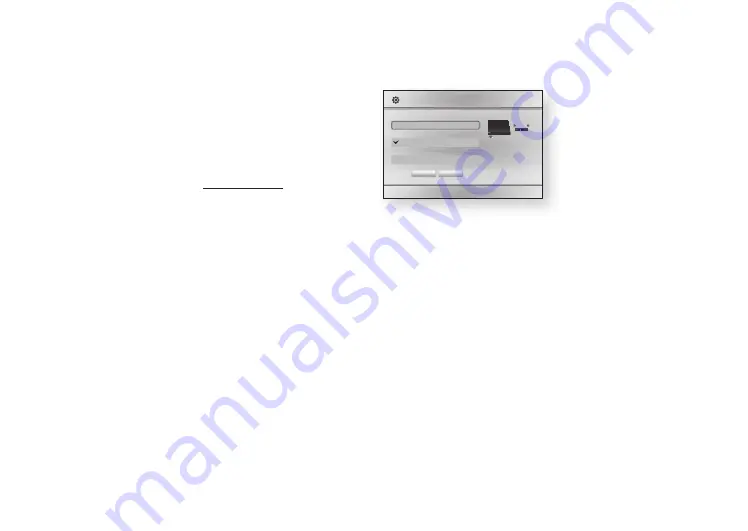
                                                          m

 move   

"

 Select   

'

 Return

Network Settings

Select your network type.

Network type                         Wireless

Wireless network

Add Network

you can connect your 
Blu-ray player to the 
internet. please select 
which wireless network 
to use.

   WpS(pBC)         Search 

5. 

Select the desired network, and 

then press the 

v

 button.

6. 

On the Security screen, enter your 

network's Security Code or Pass 

Phrase. 

Enter numbers directly using the 

number buttons on your remote 

control. Enter letters by selecting 

a letter with an arrow button, and 

then pressing 

v

 button.

7. 

When finished, select 

done 

and then press the 

v

 button. 

The player verifies the network 

connection and then connects to 

the network.

8. 

When verification is complete, 

select 

OK

, and then press the 

v


button.


NOTES


You should be able to find the 
Security Code or Pass Phrase on 
one of the set up screens you used 
to set up your router or modem

.


Ğ

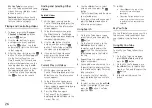
Wireless - manual

If you have a static IP address or 

the Automatic procedure does not 

work, you'll need to set the Network 

Settings values manually.

1. 

Follow the directions in Wireless - 

Automatic through Step 5.

2. 

The player searches for a network, 

and then displays the connection 

failed message.

3. 

On the bottom of the screen, 

select 

Ip Settings

, and then press 

the 

v

 button. 

The IP Settings screen appears.

4. 

Select the IP Setting field, and 

then press the 

v

 button.

5. 

Select 

Enter manually

 in the IP 

Setting field, and then press the 

v

 button.

6. 

Select a value to enter (

Ip Address

for example), and then press 

button. Use the number keypad on 

your remote control to enter the 

numbers for the value. Use the◀▶ 

buttons on the remote control to 

move from entry field to entry field 

within a value. When done with 

one value, press the 

v

 button.

7. 

Press the ▲ or ▼ button to move to 

another value, and then enter the 

numbers for that value following 

the instructions in Step 6.

8. 

Repeat Steps 6 and 7 until you 

have filled in all values.

Summary of Contents for BD-HM57C

Page 1: ...ine the possibilities Thank you for purchasing this Samsung product To receive more complete service please register your product at www samsung com register Blu ray Disc Player user manual BD HM57C ENGLISH ...

Page 2: ...ch the inside of this apparatus Only a qualified technician should open this apparatus Make sure to plug the power cord in until it is firmly seated When unplugging the power cord from a wall outlet always pull on the power cord s plug Never unplug by pulling on the power cord Do not touch the power cord with wet hands If this apparatus does not operate normally in particular if there are any unus...

Page 3: ...1040 10 except for deviations pursuant to Laser Notice No 50 dated June 24 2007 DANGER VISIBLE AND INVISIBLE LASER RADIATION WHEN OPEN AVOID DIRECT EXPOSURE TO BEAM FDA 21 CFR CAUTION CLASS 3B VISIBLE AND INVISIBLE LASER RADIATION WHEN OPEN AVOID EXPOSURE TO THE BEAM IEC 60825 1 THIS PRODUCT UTILIZES A LASER USE OF CONTROLS OR ADJUSTMENTS OR PERFORMANCE OF PROCEDURES OTHER THAN THOSE SPECIFIED HER...

Page 4: ...DEO DVD RW DVD R DVD RW DVD R DVD VIDEO recorded DVD RW DVD RW V DVD R R that have been recorded and finalized or a USB storage media containing MKV or MP4 contents MUSIC CD RW R DVD RW R BD RE R Music recorded on CD RW R DVD RW R BD RE R or a USB storage media containing MP3 or WMA contents PHOTO CD RW R DVD RW R BD RE R Photos recorded on CD RW R DVD RW R BD RE R or a USB storage media containin...

Page 5: ...one memory device into a multi card reader may cause the reader to operate improperly The player does not support the PTP protocol Do not disconnect a USB device while it is transferring playing or recording files The bigger the image resolution the longer the image takes to display This player cannot play MP3 files with DRM Digital Rights Management downloaded from commercial sites Your player on...

Page 6: ... rates All bit rates from 5kbps to 355kbps Picture File Support File Extension Type Resolution jpg jpeg jpe JPEG 15360x8640 png PNG 15360x8640 AVCHD Advanced Video Codec High Definition This player can play back AVCHD format discs These discs are normally recorded and used in camcorders The AVCHD format is a high definition digital video camera format The MPEG 4 AVC H 264 format compresses images ...

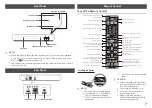
Page 7: ...s on a disc Blu ray Disc DVD Press to stop a disc Press to move to the Home screen Turn the TV on and off TV volume adjustment Press to pause a disc Press to play a disc Allows you to repeat a title chapter track or disc Press to use the Tools menu Use to display the playback information when playing a Blu ray Disc DVDs Use to select menu items and change menu values Press to exit the menu Use to ...

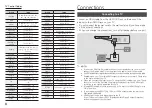
Page 8: ...R 57 SONY TV POWER 35 48 TELEAVA TV POWER 73 TELEFUNKEN TV POWER 67 73 75 76 THOMSON TV POWER 72 73 75 THOMSON ASIA TV POWER 80 81 TOSHIBA TV POWER 47 48 49 50 51 52 WEGA TV POWER 57 YOKO TV POWER 06 ZENITH TV POWER 63 Connections Connecting to a TV Connect an HDMI cable from the HDMI OUT jack on the back of the product to the HDMI IN jack on your TV Do not connect the power cord to the wall outle...

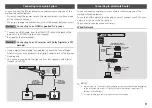
Page 9: ...jack on the product to the Digital Coaxial In jack of the receiver Good quality You will hear sound only through the front two speakers with Digital Output set to PCM Audio Audio Method 2 Method 1 Connecting to a Network Router You can connect your player to your network router using one of the methods illustrated below To use the DLNA network functionality you must connect your PC to your network...

Page 10: ... After the initial settings process is complete you can then operate the panel buttons and remote control After you have connected the player to your TV turn on the TV and player When you turn on the player the first time the player s Initial Settings screen appears on the TV The Initial Setting procedure lets you set the On Screen Display OSD and menu languages the aspect ratio screen size the ne...

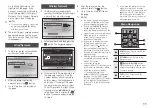
Page 11: ...tters If you want to display the password as you enter it select Show Password on the right When finished use the buttons to select Done and then press the v button If you have no password go to Step 4 4 After the player verifies the network press the v button 5 Go to Step 6 on the left side of the page NOTES The Home screen will not appear if you do not configure the initial settings except as no...

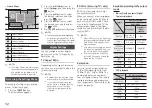
Page 12: ...ifferent than the aspect ratio of your TV screen the picture might appear to be distorted BD Wise Samsung TVs only BD Wise is Samsung s latest inter connectivity feature When you connect a Samsung player and a Samsung TV with BD Wise to each other via HDMI and BD Wise is on in both the player and TV the player outputs video at the video resolution and frame rate of the Blu ray Disc DVDs NOTES When...

Page 13: ...2ch PCM PCM 2ch Re encoded DTS Re encoded Dolby Digital Dolby Digital PCM 2ch PCM 2ch Dolby Digital Dolby Digital Re encoded DTS Re encoded Dolby Digital Dolby Digital Plus PCM 2ch PCM 2ch Dolby Digital Plus Dolby Digital Re encoded DTS Re encoded Dolby Digital Dolby TrueHD PCM 2ch PCM 2ch Dolby TrueHD Dolby Digital Re encoded DTS Re encoded Dolby Digital DTS PCM 2ch PCM 2ch DTS DTS Re encoded DTS...

Page 14: ...nel downmix method that is compatible with your stereo system You can choose to have the player downmix to normal stereo or to surround compatible stereo Network Settings When you connect this player to a network you can use network based applications and functions such as BD LIVE and upgrade the player s software through the network connection For more information see pages 24 26 Instructions for...

Page 15: ...e Network Settings screen and then press the v button The player searches for and then displays a list of the available networks m Move Select Return Network Settings Select your network type Network type Wireless Wireless network Add Network You can connect your Blu ray player to the internet Please select which wireless network to use WPS PBC Search 5 Select the desired network and then press th...

Page 16: ...PIN and then press the v button The PIN pop up appears 7 Enter the PIN into the WPS PIN entry field in the router s Set Up screen and then save the the screen NOTES Contact the manufacturer of the router for instructions explaining how to access the router s Set Up screens or refer to the router s user s manual For WPS connection set your wireless router s security encryption to AES WPS does not s...

Page 17: ...VE service Allow All The Internet connection is allowed for all BD LIVE contents Allow Valid Only The Internet connection is allowed only for BD LIVE contents containing a valid certificate Prohibit No Internet connection is allowed for any BD LIVE content NOTES What is a valid certificate When the player uses BD LIVE to send the disc data and a request to the server to certify the disc the server...

Page 18: ...rns on automatically to re establish the Anynet connection After about 15 seconds it turns off again automatically Some Samsung TVs when connected to this product using the Anynet function will when you turn them on display a warning popup message saying no connection has been found Never the less the Anynet connection is properly established and available to use BD Data Management Enables you to ...

Page 19: ...t of the player 6 In the player s menu go to Settings Support Software Upgrade 7 Select By USB NOTES No disc should be in the product when you upgrade the software using the USB Host jack When the software upgrade is done check the software details in the software Upgrade menu Do not turn off the player during the software upgrade It may cause the player to malfunction Software upgrades using the ...

Page 20: ...explain how to control playback of videos music and pictures on a USB device Method 2 1 Turn the player on 2 Connect the USB device to the USB port on the front panel of the player Select Change Device and then press to select USB Press the v button App 1 App 2 App 3 App 4 App 5 More Change Device Settings Play Disc Photos Videos Music Empty disc tray Change Device No Disc 123 a Close 3 Use the bu...

Page 21: ...nt to view or play Videos Photos or Music and then press the v button NOTES Even though the player will display folders for all content types it will only display files of the Content Type you selected in Step 4 For example if you selected music you will only be able to see music files You can change this selection by returning to the Home screen and repeating Step 4 5 A screen appears listing the...

Page 22: ...P3 1 During Playlist playback press the TOOLS button Pause c Select Tools Return 00 08 05 57 1 6 TRACK 001 05 57 TRACK 002 04 27 TRACK 003 04 07 TRACK 004 03 41 TRACK 005 03 17 TRACK 006 03 35 Playlist TRACK 001 CD Tools Repeat Mode Off Rip Move Adjust Return 2 Press the buttons to select Track All Shuffle or Off 3 Press the v button Off Songs are played in the order in which they were recorded Tr...

Page 23: ...the tray Insert a USB device into the USB jack on the front of the product The new device pop up appears 2 Press the button and then press the to select Blu ray DVD or CD 3 Use the buttons to select Photos Videos or Music and then press the v button The Photos Videos Music screen appears listing the content of the device Depending on how the contents is arranged you will see either folders individ...

Page 24: ...l field and then press the v button 4 Enter your e mail address by selecting character number or symbol keys on the screen using the buttons and then pressing the v button 5 When done move the cursor to Enter at the bottom of the screen and then press the v button 6 Repeat the same process for the Password field 7 After you have entered your password select Continue at the bottom of the screen and...

Page 25: ...andora and then press the v button 3 If you have a Pandora account already select Yes in the pop up that appears press the v button and then go to Step 4 If you do not have a Pandora account select No in the pop up that appears and then press the v button Record the activation code that appears and then go to Step 9 4 Enter your e mail address Use the buttons to select a character and then press t...

Page 26: ... to the list of matches press the button one or more times 6 To select a video use the buttons to highlight it and then press the v button You Tube plays the video Finding and Selecting Other Videos Related Videos 1 With a video running and the Control Panel displayed press the button once The Information screen appears 2 In the Information screen press the button once The Related Videos category ...

Page 27: ...ctory settings When the factory default settings are restored all stored user BD data is deleted PROBLEM SOLUTION Forgot password Press the button on the front panel for more than 5 seconds with no disc inside All settings including the password will revert to the factory settings Don t use this unless absolutely necessary When the factory default settings are restored all stored user BD data is d...

Page 28: ...tatus Check whether the USB memory device is connected to the player The memory device must have at least 1GB of free space to accommodate the BD LIVE service You can check the available size in BD Data Management Check whether the BD LIVE Internet Connection menu is set to Allow All If all above fails contact the contents provider or update the player to the latest firmware When using the BD LIVE...

Page 29: ...ITION TELEVISION SETS ARE FULLY COMPATIBLE WITH THIS product AND MAY CAUSE ARTIFACTS TO BE DISPLAYED IN THE PICTURE IN CASE OF PROGRESSIVE SCAN PICTURE PROBLEMS IT IS RECOMMENDED THAT THE USER SWITCH THE CONNECTION TO THE STANDARD DEFINITION OUTPUT IF THERE ARE QUESTIONS REGARDING OUR TV SET COMPATIBILITY WITH THIS product PLEASE CONTACT OUR CUSTOMER SERVICE CENTER Copy Protection Because AACS Adv...

Page 30: ...d post transmit translate sell create derivative works exploit or distribute in any manner or medium any content or services displayed through this device THIRD PARTY CONTENT AND SERVICES ARE PROVIDED AS IS SAMSUNG DOES NOT WARRANT CONTENT OR SERVICES SO PROVIDED EITHER EXPRESSLY OR IMPLIEDLY FOR ANY PURPOSE SAMSUNG EXPRESSLY DISCLAIMS ANY IMPLIED WARRANTIES INCLUDING BUT NOT LIMITED TO WARRANTIES...

Page 31: ...oblems incorrect electrical line voltage fluctuations and surges customer adjustments and failure to follow operating instructions cleaning maintenance and environmental instructions that are covered and prescribed in the instruction book product removal or reinstallation reception problems and distortion related to noise echo interference or other signal transmission and delivery problems SAMSUNG...

Page 32: ...ung Electronics Co Ltd All rights reserved QUESTIONS OR COMMENTS COUNTRY CALL OR VISIT US ONLINE AT WRITE IN THE US 1 800 SAMSUNG 726 7864 www samsung com us support Samsung Electronics America Inc 85 Challenger Road Ridgefield Park NJ 07660 ...

Reviews: