background image

42

Terms & Conditions, Privacy Policy

You must review and agree to both the Terms & conditions and the privacy policy 
in order to enjoy App services.

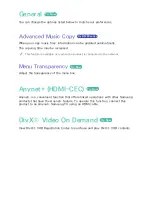
Reset Smart Hub

Reset your App services and Samsung account settings stored on your device.

System

Setup 

 Try Now 

Sets the channels and the time when setting up this product for the first time or 
when resetting it.

Language 

 Try Now 

You can select the language you prefer for the On-screen menu, disc menu, etc.


The selected language will only appear if it is supported.

Device Manager 

 Try Now 

Setup input devices to use with this product. You can check your device list and 
adjust the settings in this menu.

Summary of Contents for BD-F6900

Page 1: ...00N F8900N BD F8500A F8900A BD F8509S F8909S BD F6900 F6909S E MANUAL Thank you for purchasing this Samsung product To receive more complete service please register your product at www samsung com register imagine the possibilities E MANUAL ...

Page 2: ...2 Dynamic Range Control 23 Downmixing Mode 23 DTS Neo 6 Mode 23 Audio Sync 24 Connected Device Broadcasting 25 Auto Tuning 25 Auto Tuning 25 Cable Search 25 Aerial 25 Channel List 26 Guide 26 Schedule Manager 26 Edit Channel 26 Edit Favourites 26 Channel Settings 26 Country Area 27 Manual Tuning 27 Transfer Channel list 27 Delete CAM operator profile 27 Satellite System 28 Subtitle 28 Primary Subt...

Page 3: ...rt 47 Remote Management 47 e Manual Troubleshooting 47 Software Update 48 Update Now 48 Auto Update 50 Manage Satellite 50 Contact Samsung 50 Reset Media Play The AllShare Play Screen 51 Accessing the AllShare Play Screen 51 Playing Commercial Discs Playing Files on a USB Device 52 Method 1 52 Method 2 Using the AllShare Network Function 54 To Download the AllShare Software 54 Playing Content Loca...

Page 4: ...V Channels 77 Watching different TV channels that is not under recording 77 To stop recording 77 Simultaneous Operation 78 Timeshift function 78 Start Timeshift with PLAY button 78 Start Timeshift with PAUSE button 78 Timeshift information 79 Playback control button during Timeshift function is enabled 79 To stop Timeshift Playing the Recorded Title 80 Using the View Filter and Options Menus 80 Us...

Page 5: ...ptions on the Keyboard Pop Up 102 Using the Setting Menu Linking Your Internet Service Accounts to the Player BD Live Settings 105 BD LIVE 106 BD LIVE Appendix Supported Formats 107 Video File Support 109 Supported Subtitle File Formats 109 Music File Support 110 Picture File Support 110 AVCHD Advanced Video Codec High Definition Troubleshooting ...

Page 6: ...ust also connect the Digital Audio Out on the product to audio system to hear audio Depending on your TV certain HDMI output resolutions may not work Please refer to the user manual of your TV When you connect the product to the TV using the HDMI cable for the first time or to a new TV the HDMI output resolution will be automatically set to the highest supported by the TV A long HDMI cable may cau...

Page 7: ...ct the power cord until you have made all the other connections When you change the connections turn off all devices before you start If connecting with 2 RF cables from the same satellite dish you can watch and record different channels For F8909S F8509S model If connecting with one RF cable you cannot view second channel while recording a channel For F8909S F8509S model ...

Page 8: ...finishing the connections press the input selector of the connected audio system and TV until the video signal from the product appears on your TV and you hear the audio signal through your audio system Do not connect the power cord until you have made all the other connections When you change the connections turn off all devices before you start ...

Page 9: ...t access to Samsung s software update server may not be allowed depending on the router you use or your ISP s policy For more information contact your ISP Internet Service Provider For DSL users please use a router to make a network connection To use the AllShare function with your PC your PC should be connected to the same network as your product ...

Page 10: ...unication failure If you select the Pure High throughput Greenfield 802 11n mode and set the Encryption type on your router or router to WEP TKIP or TKIP AES WPS2Mixed the product will not support a connection in compliance with new Wi Fi certification specifications If your router supports WPS Wi Fi Protected Setup you can connect to the network via PBC Push Button Configuration or PIN Personal I...

Page 11: ...3D if the TV supports 3D 3D only discs will not be played if your TV does not support 3D 3D 3D Play 3D only and Blu ray 3D discs in 3D mode at all times 3D 2D Play Blu ray 3D discs in 2D mode at all times 3D only discs will not be played For some 3D discs to stop a movie during 3D playback press the button once The movie stops and the 3D mode option is de activated To change a 3D option selection ...

Page 12: ...eference Some functions such as BD Wise screen size adjustment and resolution adjustment may not operate properly in 3D play mode You must use a high speed HDMI cable for proper output of the 3D signal Stay at least three times the width of the screen from the TV when watching 3D images For example if you have a 46 inch screen stay 138 inches 11 5 feet from the screen Place the 3D video screen at ...

Page 13: ...product to a 4 3 TV screen 16 9 content will have the extreme left and right portions cut off Depending on the disc type some aspect ratios may not be available If you select an aspect ratio and option which is different than the aspect ratio of your TV screen then the picture might appear to be distorted If you select the 16 9 Original your TV may display 4 3 Pillarbox black bars on sides of pict...

Page 14: ...f video per frame The i and p indicate interlaced and progressive scan respectively The more lines the higher quality BD Wise Automatically sets the resolution to the resolution of the Blu ray Disc DVDs if you have connected the product via HDMI to a TV with the BD Wise feature The BD Wise menu item appears only if BD Wise is set to On See BD Wise above Auto Automatically sets the output resolutio...

Page 15: ...1080p 1080p 1080i 1080i 1080i 1080i 720p 720p 720p 720p 576p 480p 576p 480p 576p 480p 576p 480p If the screen stays blank after you have changed the resolution remove all discs and then press and hold the button on the top of the product for more than 5 seconds on the home screen All settings are restored to the factory default When the factory default settings are restored all stored user BD data...

Page 16: ...ls may take longer than the function set to Off DTV smart resolution is activated only when resolution option is set to Auto Movie Frame 24fps Try Now Setting the Movie Frame 24fps feature to Auto lets the play adjust its HDMI output to 24 frames per second for improved picture quality You can enjoy the Movie Frame 24fps feature only on a TV supporting this frame rate Movie Frame is only available...

Page 17: ...tomatically set the optimum format supported by the connected display device YCbCr 4 4 4 Recommended when connected to a display that supported YCbCr 4 4 4 because most films are in this format RGB Standard Recommended when connected to a display that does not support the YCbCr format Select this for output of the normal range of RGB colours RGB Enhanced Select this for output of an enhanced range...

Page 18: ...e picture quality when viewing DVDs Auto Select to have the product automatically select the best picture quality for the DVD you re watching Video Select for the best picture quality from concert or TV show DVDs Audio Digital Output Try Now You set the Digital Output to match the capabilities of the AV receiver you ve connected to the product PCM Choose if you have connected an HDMI supported AV ...

Page 19: ...n HDMI supported AV receiver but have an AV receiver with Dolby Digital decoding capabilities Be sure to select the correct Digital Output or you will hear no sound or a loud noise If the HDMI device AV receiver TV is not compatible with compressed formats Dolby digital DTS the audio signal outputs as PCM Regular DVDs do not have BONUSVIEW audio and Navigation Sound Effects ...

Page 20: ... Plus Dolby Digital Re encoded DTS Re encoded Dolby Digital Audio Stream on Blu ray Disc Dolby TrueHD Up to PCM 7 1ch PCM 2ch Dolby TrueHD Dolby Digital Re encoded DTS Re encoded Dolby Digital DTS Up to PCM 6 1ch PCM 2ch DTS DTS Re encoded DTS Re encoded Dolby Digital DTS HD High Resolution Audio Up to PCM 7 1ch PCM 2ch DTS HD High Resolution Audio DTS Re encoded DTS Re encoded Dolby Digital DTS H...

Page 21: ... audio stream together into PCM audio and adds Navigation Sound Effects Outputs only the main feature audio stream so that your AV receiver can decode the audio bitstream You will not hear BONUSVIEW audio or Navigation Sound Effects Decodes the main feature audio and BONUSVIEW audio stream together into PCM audio and adds Navigation Sound Effects then re encodes the PCM audio into DTS bitstream De...

Page 22: ...the digital output as Bitstream unprocessed Re encoded DTS Re encoded Dolby D on your setup menu If your TV is not compatible with PCM sampling rates over 48kHz the product may output 48kHz downsampled PCM audio even though you set PCM Downsampling to Off Dynamic Range Control Try Now Set Dynamic Range control option for Dolby Digital Dolby Digital Plus and Dolby TrueHD Auto The Dynamic Range will...

Page 23: ...2 channels audio source Off Outputs a 2 channel audio signal through the front speakers only Cinema Select to play 2 channel movie sound over multi channels Music Select to play 2 channel music over multi channels If you are using an HDMI supported AV receiver this option is available when you set Digital Output setup as PCM Audio Sync Try Now In some cases when the product is connected to a digit...

Page 24: ... is the only sound producing device 1 If the TV does not support Dolby Digital bitstream input via HDMI no specific setting is required 2 If the TV supports Dolby Digital bitstream input via HDMI set Connected Device to Stereo If the DTV Programme you are watching is produced according to EBU R128 The Average Loudness between MPEG1 Layer2 Audio Dolby Digital Audio Dolby Digital Plus Audio HE AAC A...

Page 25: ... F8900A F8500A F8909S F8509S F6909S model Configure search settings such as frequency and symbol rate for cable network Aerial Try Now Except for F8900A F8500A model Selects an appropriate type of aerial for digital broadcasts Before your product can begin memorizing the available channels you must specify the type of signal source that is connected to the this product Channel List Try Now Select ...

Page 26: ...ed to make and edit favourite lists for channel Channel Settings Country Area Try Now Select your country so that the TV can correctly auto tune the broadcasting channels Password Enter the desired 4 digit password using the number buttons 1 France Italy You can not set the password to 0000 Please choose other numbers 2 Others Default password is set to 0000 Channel Ordering menu can be displayed ...

Page 27: ...not appear Delete CAM operator profile Except for F8900A F8500A model Select this menu to delete the CAM operator profile Satellite System For F8909S F8509S F6909S model Configure settings for your satellite equipment Satellite Selection Choose one or more satelites for your product LNB Power Enable or disable LNB Power supply from receiver LNB Settings Configure parameters for your satelite equip...

Page 28: ...anguage Try Now Select the Secondary Subtitle language Audio Language Select the type of Audio Language Primary Audio Language Select the Primary Audio language Secondary Audio Language Select the Secondary Audio language Edit Channel Number Use this to change channel number Depending on your country this menu function may not be supported ...

Page 29: ...text this feature is enabled Data Service Enable or disable the data service autorun feature which activates data service automatically Data Service allows you to use information text still images graphics documents software etc transmitted via broadcast media if the channel you are currently watching provides data service In some countries the Data Service item will not be listed in the menu Some...

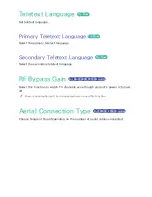
Page 30: ... Now Select the secondary teletext language RF Bypass Gain For BD F8900N F8500N model Select this function to watch TV channels even though product s power is turned off Power consumption will be increased when you use this function Aerial Connection Type For F8909S F8509S model Choose Single or Dual depending on the number of aerial cables connected ...

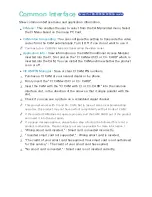
Page 31: ...h CI or CI CARD 3 Insert the CAM with the CI CAM with CI or CI CARD into the common interface slot in the direction of the arrow so that it aligns parallel with the slot 4 Check if you can see a picture on a scrambled signal channel This product works with CI and CI CAM But in case of some local broadcasting operators this product may not have perfect compatibility with all kinds of CAM If the ins...

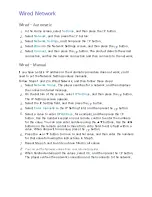
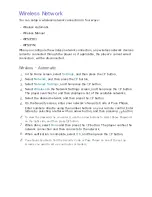
Page 32: ...ns and functions and upgrade the product s software through the network connection To use network services you must connect the product to the network Network Status Lets you check the current network and Internet status Network Settings Except for BD F6 series Before you begin contact your ISP to find out if your IP address is static or dynamic If it is dynamic and you have a wired or wireless ne...

Page 33: ... screen select IP Settings and then press the E button The IP Settings screen appears 3 Select the IP Setting field and then press the E button 4 Select Enter manually in the IP Setting field and then press the E button 5 Select a value to enter IP Address for example and then press the E button Use the number keypad on your remote control to enter the numbers for the value You can also enter numb...

Page 34: ...hes for and then displays a list of the available networks 5 Select the desired network and then press the E button 6 On the Security screen enter your network s Security Code or Pass Phrase Enter numbers directly using the number buttons on your remote control Enter letters by selecting a letter with an arrow button and then pressing E button To view the password as you enter it use the arrow but...

Page 35: ...Use the buttons on the remote control to move from entry field to entry field within a value When done with one value press the E button 7 Press the or button to move to another value and then enter the numbers for that value following the instructions in Step 6 8 Repeat Steps 6 and 7 until you have filled in all values You can get the Network values from your Internet provider 9 When finished sel...

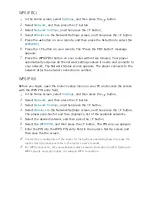
Page 36: ... router s setup menu on your PC and access the screen with the WPS PIN entry field 1 In the Home screen select Settings and then press the E button 2 Select Network and then press the E button 3 Select Network Settings and then press the E button 4 Select Wireless in the Network Settings screen and then press the E button The player searches for and then displays a list of the available networks 5...

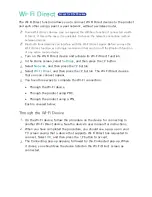
Page 37: ...Settings and then press the E button 3 Select Network and then press the E button 4 Select Wi Fi Direct and then press the E button The Wi Fi Direct devices that you can connect appear 5 You have three ways to complete the Wi Fi connection Through the Wi Fi device Through the product using PBC Through the product using a PIN Each is covered below Through the Wi Fi Device 1 On the Wi Fi device foll...

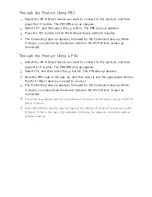
Page 38: ... to connect to this product and then press the E button The PBC PIN pop up appears 2 Select PIN and then press the E button The PIN pop up appears 3 Note the PIN code in the pop up and then enter it into the appropriate field in the Wi Fi Direct device you want to connect 4 The Connecting pop up appears followed by the Connected pop up When it closes you should see the device listed on the Wi Fi D...

Page 39: ... phone If this menu is set to On Auto Power Off function is not available Set Remote Access Try Now Remote access allows you to access and control your product from other devices You have to log in Samsung account ID to use Remote Access functions with Samsung Smartphone devices Remote Scheduler You can remotely schedule recording Only available with Samsung phones supporting remote schedule funct...

Page 40: ...ou are connected to the Internet BD Live Internet Connection Try Now Lets you fully allow partly allow or prohibit a BD Live Internet connection Delete BD Data Try Now For BD F8 series Delete all BD data in the storage BD Data Management For BD F6 series Manage BD data downloaded from a BD Live service or Blu ray Disc Select Device Change location of desired memory to store BD data Delete BD Data ...

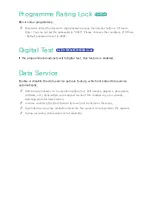
Page 41: ...vice Push Notification Settings Receive notifications from selected services Channel Bound Apps Enable or disable Channel Bound Apps There are available on certain channels that provide additional information or services Properties See basic info about Apps VOD Rating Lock You can lock access to Video on Demand VOD content based on its rating Depending on your country this menu function may not be...

Page 42: ... your device System Setup Try Now Sets the channels and the time when setting up this product for the first time or when resetting it Language Try Now You can select the language you prefer for the On screen menu disc menu etc The selected language will only appear if it is supported Device Manager Try Now Setup input devices to use with this product You can check your device list and adjust the s...

Page 43: ... the mouse only when a screen or window appears in the Web Browser and Apps screen To use a mouse with the product s menu 1 Connect the USB mouse to the product 2 Click the primary button you selected in Mouse Settings The Simple Menu appears 3 Click the menu options you want Depending on the model of the USB HID keyboard and mouse may not be compatible with your product Some HID keyboard keys may...

Page 44: ...bnormally Storage Device Manager Try Now Format Device Try Now Format selected device All contents will be deleted from that device Check Device Try Now Check to see if there is an error with the selected device Device Performance Test Try Now Test the recording performance of the device Since the product s Timeshift and other implemented functions require a certain amount of HDD space allocated i...

Page 45: ...you control the types of Blu ray Disc DVDs that your family can watch When you access this function the security screen appears Enter the your Security PIN Password Enter the desired 4 digit password using the number buttons 1 France Italy You can not set the password to 0000 Please choose other numbers 2 Others Default password is set to 0000 BD Parental Rating Prevent playback of Blu ray Discs w...

Page 46: ...nly when the product is connected to the network Menu Transparency Try Now Adjust the transparency of the menu box Anynet HDMI CEC Try Now Anynet is a convenient function that offers linked operations with other Samsung products that have the Anynet feature To operate this function connect this product to an Anynet Samsung TV using an HDMI cable DivX Video On Demand Try Now View DivX VOD Registrat...

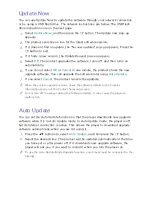
Page 47: ...ss the E button 2 Select Support and then press the E button 3 Select Software Update and then press the E button 4 To download update software and update now select Update Now and then press the E button See Update Now on this page for details 5 To let the product download update software automatically when available select Auto Update and then press the E button The upgrade is complete when the ...

Page 48: ... select Cancel the product cancels the upgrade When the system upgrade is done check the software details in the Product Information section of the Contact Samsung screen Do not turn off the player during the Software Update It may cause the player to malfunction Auto Update You can set the Auto Update function so that the player downloads new upgrade software when it is in Auto Update mode In Aut...

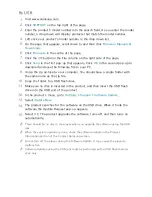
Page 49: ...lder with the same name as the zip file 10 Copy the folder to a USB flash drive 11 Make sure no disc is inserted in the product and then insert the USB flash drive into the USB port of the product 12 In the product s menu go to Settings Support Software Update 13 Select Update Now 14 The product searches for the software on the USB drive When it finds the software the Update Request pop up appears...

Page 50: ...tion for assistance with your product Reset Try Now Resets all settings to their default settings except for the network and App service settings The default PIN is 0000 Password Enter the desired 4 digit password using the number buttons 1 France Italy You can not set the password to 0000 Please choose other numbers 2 Others Default password is set to 0000 ...

Page 51: ...either connected directly or using your network Accessing the AllShare Play Screen To access the AllShare Play Main screen select Photos Videos Music on the Home screen and then press the E button Playing Commercial Discs 1 Press the button to open the disc tray 2 Place a disc gently into the disc tray with the disc s label facing up 3 Press the button to close the disc tray Playback starts automa...

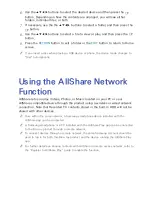
Page 52: ... the content of the device Depending on how the contents is arranged you will see either folders individual files or both 4 If necessary use the the buttons to select a folder and then press the E button 5 Select a file to view or play and then press the E button 6 Press the RETURN button to exit a folder or the EXIT button to return to the TV view mode Method 2 1 Turn the product on 2 Connect the...

Page 53: ...s Photos or Music located on your PC or your AllShare compatible device through the product using a wireless or wired network connection Note that Recorded TV contents stored in the built in HDD will not be shared with other devices Only within the same network a Samsung smartphone device installed with the AllShare app can be connected A Samsung smartphone or a PC installed with the AllShare Play...

Page 54: ...ect the product your PC and or your Allshare compatible device to the same wireless or wired network 2 Follow the directions in the Allshare software Installation Instruction manual to set up devices and files for playing or viewing 3 Select Photos Videos Music on the player s Home screen and then press the E button The AllShare Play screen appears 4 Select the type of content you want to play Pho...

Page 55: ...uct s menu go to Settings Network Allshare Settings 3 Set Share Hard Drive to On 4 Excute Allshare Play application on the phone or on your computer 5 Select the product as the playback device and then select the file you want to view or play Controlling Video Playback You can control the playback of video content located on a Disc USB mobile device or PC Depending on the disc or contents some of ...

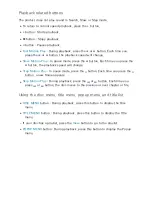
Page 56: ... speed will change Step Motion Play In pause mode press the button Each time you press the button a new frame appears Skip Motion Play During playback press the or button Each time you press or button the disc moves to the previous or next chapter or file Using the disc menu title menu popup menu and title list DISC MENU button During playback press this button to display the Disc menu TITLE MENU ...

Page 57: ...f your choice If the index information in the file is damaged or the file does not support indexing you will not be able to use the Search Scene function If you play the AllShare Play after connect to a computer with the network the Search Scene may not be supported Search Titles If there is more than one movie on the disc or device select to start a different title 1 Select Search Titles and then...

Page 58: ...t A B and then press the E button 2 Press the E button at the point where you want repeat play to start A Let the movie play 3 Press the E button at the point where you want repeat play to stop B You must set point B at least 5 seconds of playing time after point A Full Screen Select to set the size of the video image Audio Sync Select to set the audio sync Rotate Select to rotate the picture Pict...

Page 59: ...s menu may differ Video files with high bitrates of 20Mbps or more strain the product s capabilities and may stop playing during playback Using the View Options Menus Using the View Menu On a file screen containing video files select the View and press the E button Date Appears on the View function screen Sort to Date Title Appears on the View function screen Sort to Title Folder Appears on the Vi...

Page 60: ...elete a file from the device Controlling Music Playback You can control the playback of music content located on a Disc USB mobile device or PC Depending on the disc or contents some of the functions described in this manual may not be available Buttons on the Remote Control used for Music Playback NUMBER buttons Press the number of a track The selected track is played button Move to the next forw...

Page 61: ...n playback screen or a file screen containing music files select the Options and press the E button Play Selected Play Selected lets you select specific tract to play It works essentially the same for all media See the Repeating tracks on an Audio CD Send Select to send the selected file to other devices Ripping The Ripping function converts CD audio to the mp3 format and saves the converted files...

Page 62: ...s the E button 2 Use the to select the repeat mode you want Off One Song or All and then press the E button Shuffling Tracks on an Audio CD You can set the product to play tracks on an audio CD CD DA MP3 at random 1 On the Playback screen use the buttons to select in the lower left corner of the screen and then press the E button 2 Use the to set the Shuffle mode On or Off and then press the E but...

Page 63: ... a playlist with up to 99 tracks on Audio CDs CD DA If you have created a playlist Play Selected is replaced by Edit Playlist on the Options menu On the Selection Play screen you can also choose Select All Clear All and Cancel 1 Use Select All to select all tracks This cancels your individual track selections When you press the RETURN button on your remote control or select Play button and then pr...

Page 64: ...up appears 8 Use the buttons to select the device to store the ripping file and then press the E button Do not disconnect the device while rip is in progress 9 If you want to cancel ripping the track press the E button and then select Yes Select No to continue ripping 10 When ripping is complete the Successfully ripped message appears Press the E button 11 Press the RETURN or select the Cancel but...

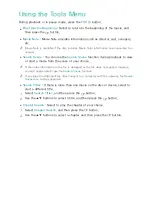
Page 65: ... current picture Enlarge up to 4 times Rotate Select to rotate the picture This will rotate the picture either clockwise or counter clockwise Background Music Select to listen to music while viewing a slide show Settings Select the picture mode and information Depending on the disc or storage device the Tools menu may differ All options may not be displayed To enable the background music function ...

Page 66: ...r not be shown Using the Options Menu On a file screen containing photo files select the Options and press the E button Slide show Lets the slide show containing the all files in the current folder without selections Play Selected Play Selected lets you select specific photo to see It works essentially the same for all media Send Select Send to upload selected files to app Picasa Facebook etc or d...

Page 67: ...he below buttons while you are viewing a channel NUMBER buttons To move TV channel directly press the channel numbers of desired TV channel PROG button Press this button to change TV channels INFO button Press this button to display detailed information of selected channel Channel List button Press this button to display the Channel List ...

Page 68: ...not be displayed when you use the BD Wise function Audio Language Select to set the desired audio language Dual I II Select to set the desired audio Lock Current Channel You can lock a TV channel by setting PIN This menu can be displayed when the country set to Netherlands and brodcast signal is cable Aerial Select to change a signal Edit Favourites Select to edit Favourites Signal Information Sel...

Page 69: ...button to display the channel list according to channel mode Edit Favourites All TV Radio Date Other 4 Select desired channel then press the E button The selected channel will be displayed Edit Channel You can manage the stored channels 1 In the Home screen select Settings and then press the E button 2 Select Broadcasting and then press the E button 3 Select Edit Channel and then press the E butto...

Page 70: ...nnels a Select this to change the channel number b Select this to lock or unlock channels Select this to deletes selected channel Select this to check all channels Go to Select this to move to a TV channel directly k Moves to next or previous page E Selects desired channel T button Displays the Tools menu ...

Page 71: ...s displayed you can manage the stored channels a Select this to search the desired channel and time quickly b Select this to change category Show All TV Radio Select this to reserve the desired TV programmes Schedule Recording Schedule Viewing Setting the Schedule Manager You can reserve the desired TV programmes using this menu Make sure that clock must be set before operating this function 1 Sel...

Page 72: ...tons red green yellow blue If the FASTEXT system is used by the broadcasting company the different topics on a Teletext page are colour coded and can be selected by pressing the coloured buttons Press the colour corresponding to the topic of your choice A new colour coded page is displayed Items can be selected in the same way To display the previous or next page press the corresponding coloured b...

Page 73: ...ted page number B Broadcasting channel identity C Current page number or search indications D Date and time E Text F Status information FASTEXT information Teletext TTX MIX control is available only when the DTV programme support teletext signal ...

Page 74: ...isplayed capacity on OSD which shows approximated available capacity for recording is shown below calculated based on shipped status Model Name HDD Vendor Specification Available Size BD F8900 F8900M F8900N 8900A 8909S 1 TB 889 GB BD F8500 F8500M F8500N 8500A 8509S 500 GB 431 GB Display of HDD Capacity The Capacity of the HDD manufacturer is calculated assuming that 1 KB 1 000 Bytes However the op...

Page 75: ...on to resume recording To stop recording Press the button to stop a recording in progress Playback control during recording During recording a TV channel you can search scene or move to the beginning point of recording without influence on the recording through Timeshift function 1 buttons Search the desired scene Each time this button is pressed playback speed will change 1 2 3 4 5 1 2 3 4 5 2 bu...

Page 76: ...recording a free TV channel If you are recording a scrambled channel only a free channel can be watched Recorded files of less than 10 seconds are not saved Simultaneous Recording Simultaneous Recording of Two TV Channels For BD F8 series 1 While a TV channel is being recorded move to other TV channel that you want to record 2 Press the REC Button The recording will be started Recording two differ...

Page 77: ...he E button to watch the possible TV Channel To watch a channel that is not displayed in Blue you need to stop at least one of currently recording To stop recording For BD F8 series If you are watching a TV channel which is under recording Press the button If you are watching a TV channel which is not under recording Press the button Simultaneous Operation You can play a disc or enjoy other functi...

Page 78: ... Timeshift operation In this case Timeshift of former channel is supported as history function The Timeshift of former channel is still available If Timeshift is started with Play or Pause key the Timeshift is sustained until the Stop button is pressed In case when the Timeshift operation becomes not available such as switching to another application an analogue channel or changing the input sourc...

Page 79: ...ation 7 button If you are watching the past scene playback point will jump to the same scene with Live TV If you are watching the same scene with Live TV the Timeshift function will be stopped To stop Timeshift 1 If Timeshift bar is not in pause or past mode press button The message Do you want to stop Timeshift will appear 2 Select OK button and press E button to stop Timeshift 3 If the Timeshift...

Page 80: ...ed back Using the View Filter and Options Menus Using the View Menu On playback screen select the View and press the E button Title Appears on the View function screen Sort to Title Date Appears on the View function screen Sort to Date Channel Appears on the View function screen Sort to Channel Depending on the disc or storage device the View menu may differ or not be shown Using the Filter Menu O...

Page 81: ...ntially the same for all media See the Repeating tracks on an Audio CD Lock You can lock the list Unlock You can unlock the list Delete You can delete the file from the list Partial Delete You can delete a title partially Split You can split a title Rename You can rename a title Manage Devices Select this menu to manage device Depending on the disc or storage device the Options menu may differ or ...

Page 82: ...ection of a Title Partial Delete 1 In the Recorded TV screen select the Options then press the E button 2 Select the Partial Delete then press the E button 3 Select the title you want to edit 4 Press the E button at the starting point The image and starting point time is displayed in the section deletion starting point window Select the start and end points of the section you want to delete using ...

Page 83: ...DVD RW DVD RW Finalise HDD or USB PTP USB is not available when you copy to USB The broadcast signal can be recorded on external or internal HDD but copy feature is not supported 1 Press the HOME button The home screen will be displayed 2 In Stop mode connect the USB storage device to the USB port on the front panel of the product 3 Select the desired contents type then press the E button 4 Select...

Page 84: ...ys one image above another 2 Press the buttons to select the desired 3D mode then press the E button 3 If you press the 3D button once more during 3D viewing displayed image will be changed into 2D mode If you change TV channel during watching DTV in 3D mode of Side by Side mode displayed image will be changed into 2D mode automatically When 3D effect of Side by Side mode is enabled you can not ad...

Page 85: ...our account e mail is displayed on the bottom left of the screen If you selected Sign me in automatically the next time you log in the player will automatically enter your e mail and password All you need to do is select Log In If your e mail address and password are not displayed when the Log In screen appears select the button with the down pointing arrow head next to the Email field and then pr...

Page 86: ...ms Conditions Privacy Policy screen you must review and agree to both the Smart Hub Terms and Conditions and the Privacy Policy to use Smart Hub 5 Scroll down and then click the View Details buttons to review the full documents 6 When done reading scroll up to the first entry field and press the E button to agree to the Terms and Conditions and consent to the Privacy Policy 7 Press the button to g...

Page 87: ... bottom of the screen Select Favourites Featured Movies TV Shows or Purchased and then press the E button On the page that appears use the buttons to select a show or movie and then press the E button On the Movies and TV Show screen you can also select What s New Most Popular or Genres to see more available shows or Films On the Genre screen use the buttons to select a Genre and then press the E ...

Page 88: ... will appear after Step 3 and you will need to log in If you don t have a credit card associated with your Samsung account after you log in the Register Card screen will appear Follow the directions on the screen You must have a credit card registered to your account to rent Films and to purchase for pay apps Using Apps You can download applications from the Internet and access various for pay or ...

Page 89: ...at s New you ll see a series of new apps Use the buttons to scroll the list right or left and then select an app Press the E button to see more information about the app If the app is free select Download and then press the E button to download the app If it is a for pay app select Buy press the E button and then follow the instructions on the screen To buy an app you must be logged into your Sams...

Page 90: ...lect a category Each time you move the highlight to another category a different set of applications appears on the right 6 Use the button to move to the applications and the buttons to move from app to app 7 To see more information about an app select it and then press the E button 8 To download the app follow the directions in Steps 2 and 3 Starting an Application 1 Select Apps on the Home scree...

Page 91: ...g the apps Start apps Sorting the Apps To sort the apps on the More Apps screen follow these steps 1 On the Home screen select Apps and then press the E button 2 On the Apps screen use the button to move to the More Apps hotspot at the bottom of the page and then press the E button 3 On the More Apps screen use the buttons to move to View at the top of the screen and then press the E button 4 In t...

Page 92: ...er the PIN using the number buttons on your remote control 4 To lock an application select the application and then press the E button A lock appears on the app Repeat to lock other individual apps 5 To unlock a locked app select the application and then press the E button 6 To lock all the apps at once use the buttons to select the Lock All button and then press the E button 7 To unlock all the l...

Page 93: ...ea below and the app icon in the top row is grayed out Grayed out apps are already in My Apps 4 When you return to the Apps screen the app will appear in the My Apps area Delete an App from My Apps 1 On the More Apps screen use the buttons to go to Options at the top of the screen and then press the E button 2 Select Edit My Apps and then press the E button The Edit My Apps screen appears 3 Select...

Page 94: ...ioned in the location you had selected Create Folder Create Folder lets you create a folder on the More Apps screen into which you can put apps 1 On the More Apps screen use the buttons to go to Options at the top of the screen and then press the E button 2 Select Create Folder and then press the E button The Set Folder Name pop up appears 3 Press the E button The keyboard appears 4 Select the Cle...

Page 95: ... right of the screen and then press the E button 6 When done select Select folder at the top of the screen and then press the E button The Select folder pop up appears 7 In the Select folder pop up use the buttons to select the folder you want to move the apps you selected to and then press the E button 8 The Apps Moved pop up appears Press the E button 9 To open a folder use the buttons to highli...

Page 96: ... move to an app or folder and then press the E button to select A check appears in the upper left corner of the app or folder you selected 4 To deselect an app press the E button The check disappears 5 Repeat Step 3 to select additional apps or folders To select all the downloaded apps select Select All at the top right of the screen and then press the E button To deselect all the apps select Dese...

Page 97: ... when the update is required Screen Mirroring For BD F8 series The Screen Mirroring function lets you view the screen of your smart phone or android tablet on the TV you have connected to the product 1 With the Blu ray s Home screen displayed press the button on the remote The Screen Mirroring pop up appears 2 Launch AllShare Cast on your device 3 On your device find the name of the product in the...

Page 98: ...rroring function we strongly recommend that you turn off the Bluetooth function on your smart phone or smart device tablet etc Screen Mirroring is only available with mobile devices that support AllShare Cast or Wireless Mirroring For more information visit the mobile device manufacturer s website Using the Web Browser You can access the Internet using the Web Browser application Select Web Browse...

Page 99: ... with Link Browsing Link Browsing moves a highlight from one link to the next in the Web Browser and is much faster than Pointer Browsing if you are using your remote To activate Link Browsing follow these steps 1 Use the buttons on your remote to move the pointer to the Link Browser icon on the top right of the screen The Link Browser icon is the third icon from the right The pointer will be in t...

Page 100: ...vious page Moves to the next web page Displays the Bookmarks and History screen You can bookmark the current page select an existing bookmark and edit and delete bookmarks You can also view your browsing history and select a page to revisit Moves to the Home screen of the Web Browser Lets you enter a page address manually using the keyboard pop up Reloads the current page so that it is refreshed o...

Page 101: ... the entry field 3 To access capital letters move the highlight to the Caps key on the top left and then press the E button Press the E button again with the Caps key highlighted to access small letters again 4 To access symbols and additional punctuation marks highlight the 123 button on the left and then press the E button 5 To delete a character you entered move the highlight to the button and ...

Page 102: ...ing around the letter you have just entered You can select a predicted letter or move to another letter You can turn this function On or Off Using the Setting Menu The Setting menu contains functions that control how the Browser operates and Browser security functions To open the Setting menu highlight the icon in the Control Panel and then press the E button To select an option in the setting men...

Page 103: ...ites to the Approved Sites list you will not be able to access any Internet sites Private Browsing On Off Enable or disable the Privacy mode When the Privacy mode is enabled the browser does not retain the URLs of sites you visit If you want to enable Privacy mode select OK If the Privacy mode is running the Stop icon appears in front of the URL at the top of the screen To disable Privacy mode sel...

Page 104: ... in to the service automatically when you start the app for that service To create a service account link follow these steps 1 On the Home screen press the a button on your remote to log in to your Samsung Account 2 After you have logged in press the a button on your remote again 3 Select Link Service Accounts in the My Account pop up and then press the E button 4 On the Link Service Accounts scre...

Page 105: ...there is not enough free space and disturbs BD Live operation delete BD Data to free memory space 1 Select Settings on the Home screen and then press the E button 2 Select Network and then press the E button 3 Select BD Live Settings and then press the E button 4 Select Delete BD Data and then press the E button 5 Insert a Blu ray Disc that supports BD LIVE 6 Select an item from the list of BD LIV...

Page 106: ...vices 2 Select Settings on the Home screen and then press the E button 3 Select Network and then press the E button 4 Select BD Live Settings and then press the E button 5 Select BD Data Management and then press the E button 6 Select Select Device and then press the E button 7 Select USB device and then press the E button 8 Insert a Blu ray Disc that supports BD LIVE 9 Select an item from the lis...

Page 107: ...PEG 4 v3 MSMPEG4 v3 1280x720 ADPCM IMA MS AAC tp trp FLV VRO Window Media Video v7 v8 v9 HE AAC WMA mov flv VOB PS MPEG2 Dolby Digital Plus MPEG MP3 vob svi TS SVAF MPEG1 DTS Core m2ts mts VP6 640x480 4 divx MVC 24 25 30 60 webm WebM VP8 1920x1080 6 30 20 Vorbis Limitations Even when the file is encoded by a supported codec listed above a file might not be played if its content has a problem Norma...

Page 108: ... support FMO ASO RS Does not support VC1 AP L4 CODECs except for WMVv7 v8 MSMPEG4 v3 MVC VP6 Below 1280 x 720 60 frames max Above 1280 x 720 30 frames max Does not support GMC 2 or higher Supports SVAF Top Bottom Side by Side Supports BD MVC Spec Audio decoder Supports WMA 10 PRO Up to 5 1 Does not support WMA lossless audio Supports ADPCM IMA MS Does not support ADPCM A Law μ Law Does not support...

Page 109: ...ternal Advanced SubStation Alpha MKV SubRip MKV MPEG 4 Timed text MP4 Music File Support File Extension Type Codec Support Range mp3 MPEG MPEG1 Audio Layer 3 m4a mpa aac MPEG4 AAC flac FLAC FLAC Supports up to 2ch ogg OGG Vorbis Supports up to 2ch wma WMA WMA Supports WMA 10 Pro Up to 5 1 Does not support WMA lossless audio Supports up to M2 profile Does not support LBR mode wav wav wav mid midi m...

Page 110: ...PEG 4 AVC H 264 format compresses images with greater efficiency than the conventional image compressing format Some AVCHD discs use the x v Color format This product can play back AVCHD discs that use x v Color format x v Color is a trademark of Sony Corporation AVCHD and the AVCHD logo are trademarks of Matsushita Electronic Industrial Co Ltd and Sony Corporation Some AVCHD format discs may not ...

Page 111: ...r or search time that is out of range Play mode differs from the Setup Menu selection Some of the functions selected in the Setup Menu may not work properly if the disc is not encoded with the corre sponding function The screen ratio cannot be changed The Screen Ratio is fixed on your Blu ray DVD disc This is not a problem with the product No audio Make sure you have selected the correct Digital O...

Page 112: ...een it means that TV does not support HDCP High bandwidth Digital Content Protection AllShare function I can see folders shared through AllShare but I cannot see the files AllShare shows only files corresponding to the Videos Photos and Music categories Files that do not correspond to these categories may not be displayed Video is played intermittently Check if the network is stable Check if the n...

Page 113: ...ance test failed message appears and also Schedule Recording record ing and Timeshift function does not work Using lower quality USB storage device not supporting Re cording function can cause this kind of problem It is rec ommended to use USB HDD storage device Recommended specification of USB HDD is at least 5400 rpm USB HDD of RAID type is not supported Pay channel Can not view Pay channel with...

Reviews: