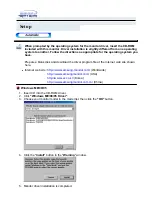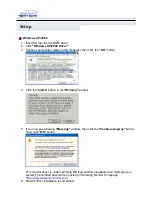
Microsoft
®
Windows
®
Millennium Operating System
1. Click "
Start
" , "
Setting
" , "
Control Panel
".
2. Double click "
Display
" icon.
3. Select the "
Settings
" tab and click "
Advanced Properties
" button.
4. Select the "
Monitor
" tab.
5. Click the "
Change
" button in the "
Monitor Type
" area.
6. Choose "
Specify the location of the driver
".
7. Choose "
Display a list of all the driver in a specific location..
" then click "
Next
" button.
8. Click the "
Have Disk
" button
9. Specify A:\(D:\driver) then click "
OK
" button.
10. Select "
Show all devices
" and choose the monitor that corresponds to the one you
connected to your computer and click "
OK
".
11. Continue choosing "
Close
" button and "
OK
" button until you close the Display Properties
dialogue box.
(You can get some other screen for warning message or others, then click the appreciate
option for your monitor.)
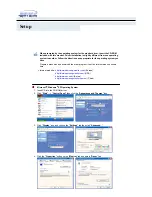
Microsoft
®
Windows
®
98 Operating System
1. Click "
Start
" , "
Setting
" , "
Control Panel
".
2. Double click "
Display
" icon.
3. Select the "
Settings
" tab and click "
Advanced Properties
" button.
4. Select the "
Monitor
" tab.
5. Click the "
Change
" button in the "
Monitor Type
" area then click "
Next
" button.
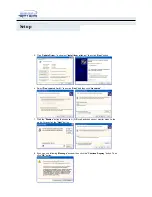
6. Choose "
Display a list of all the driver..
" then click "
Next
" button.
7. Click the "
Have Disk
" button, then click "
browse..
" button.
8. Specify A:\(D:\driver) then click "
OK
" button.
9. The "
Select Device
" dialogue box will appear. Select "
Show all devices
" then choose the
monitor that corresponds to the one you connected to your computer and click OK.
10. Continue choosing "
Close
" button and "
O.K
" button until you close the Display Properties
dialogue box.
Microsoft
®
Windows
®
95 Operating System
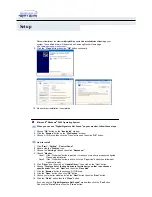
First determine the Windows 95 version installed on your computer by right-clicking the My
Computer icon on PC and selecting Properties. The version number is listed under System.
Perform the steps for the appropriate version.
Version 4.00.950A
1. Click
Start
,
Settings
,
Control Panel
, and then double-click "
Display
" icon.
2. In the "
Display Properties
" window, click the "
Settings
" tab and click "
Change Display
Type
".
3. In the "
Change Display Type
" window, click "
Change
" and then click "
Have Disk
".
4. Click "
browse..
" button and specify A:\(D:\driver) and click "
OK
".
5. In the Select Device window, click the appropriate monitor model and then click OK.
6. Continue choosing "
Close
" button and "
OK
" button until you close the "
Display
Properties
" dialogue box.
Version 4.00.950B
1. Click
Start
,
Settings
,
Control Panel
, and then double-click "
Display
" icon.
2. In the "
Display Properties
" window, click the Settings tab and then click "
Advanced
Properties
" button.
3. In the "
Advanced Display Properties
" window, click the "
Monitor
" tab and then click
"
Change
" button.
4. In the "
Select Device
" window, click "
Have Disk
" button.
5. Click "
browse..
" button and specify A:\(D:\driver) and click "
OK
".
6. In the "
Select Device
" window, click the appropriate monitor model and then click "
OK
".
Setup
Summary of Contents for 950B - SyncMaster 950 B
Page 1: ......


