2023_03_15-11:00
5
R. 03/23 896 854
SAMOA Industrial, S.A. · Pol. Ind. Porceyo, I-14 · Camino del Fontán, 831 · 33392 - Gijón - Spain · Tel.: +34 985 381 488 · www.samoaindustrial.com
EN
MAINTENANCE
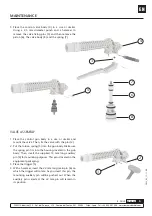
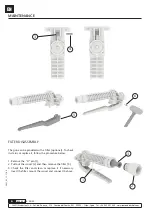
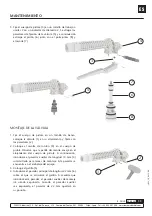
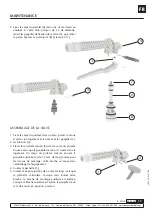
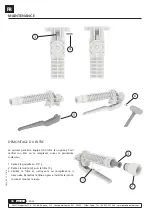
3. Place the control valve body (4) in a vise or similar.
Using a 2,5 mm diameter punch and a hammer to
remove the valve fixing pins (5) and then remove the
piston (6), the valve body (8) and the spring (7).
4
5
3
7
6
8
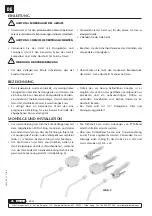
VALVE ASSEMBLY
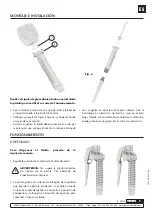
1. Place the control gun body in a vise or similar and
mount the valve. Then, fix the valve with the pins (2).
2. Put the torsion spring (3) into the gun body. Make sure
the spring pin fits into the housing located in the gun
body. Then, insert the supplied 14 mm long auxiliary
pin (4) for mounting purposes. This pin is located in the
equipment packaging.
3. Place the trigger (5)
4. With a hammer, insert the 22 mm long main pin (6) on
which the trigger will rotate. As you insert this pin, the
mounting auxiliary pin will be pushed out. When the
auxiliary pin is ejected, the 22 mm pin will remain in
its position.
2
1


