Doc.-ID: 160319-PT08BA-TG-ExCam IPQ1775 series_en_rev.01.docx, Seite 30 von 40
5.5.5
Closing of the pressure-resistant housing
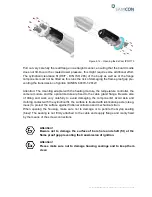
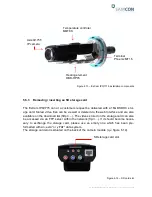
For closing the housing, please follow, in reversed order, the steps described in the
chater 6.4.2 regarding the opening of the housing. Do not use any other screws than
those which are part of the delivery scope. For the execution with a „K1“ cable gland, 8 x
cylin-der head screws M4 x 0.7 (ISO metric right-hand thread) with a thread length of 12
mm (DIN 912/ ISO 4762, quality 6g) are used. The material of the screw connection is
variable, e.g. stainless steel MNo. 1.4301 (A2-70) corresponding to the pressure resistant
housing or a titan execution (Ti22) in metallic red.
For the execution with a „K2“ cable gland, 7 x cylinder head screws M4 x 0.7 (ISO metric
right-hand thread) with a thread length of 30 mm are used.
Please check that the bore holes and flameproof joint (cylindrical fit) are clean and intact.
Attention!
In case the flameproof joint has been damaged mechanically, the
housing must not be used anymore!
Attention!
Do not lock-in any foreign objects inside the housing
Please make sure that the disassembled screw locks (washer spring DIN 127A) are re-
assembled.
The Gylon sealing must be intact and has to be reassembled according to the hole-
pattern of the flange. There is no restriction regarding the installation direction of the seal-
ing.
If, when closing the housing, it is noted that the surface of the flameproof joint is dirty or
not lubricated sufficiently, please clean it with a clean cloth and suitable cleaning deter-
gent. Afterwards, re-lubricate it with a suitable lubrication agent.
The screw connection of the flange and housing have to be tightened in crosswise se-
quence with a torque of
3 Nm
Please avoid extensive tightening
– this might lead to a
torn screw.
If the camera does not provide the anticipated results, steps 6.4.2 to 6.4.5 have to be
repeated.
For the fixed installation of the ExCam IPQ1775, either with a wall mount bracket, with a
hinge attachment for sight-glass installations or for the optional installation of a roof,
please observe the instructions of the EX installation manual!


