Baby Foods
It is vital to a babies’ health that they be fed properly…that they receive a
wide variety of fruits and vegetables to get the vitamins and minerals required
each day for proper growth. With the Saladmaster® Machine, it is easy to give
your baby fresh foods that have not lost important nutrients due to canning
and air exposure.
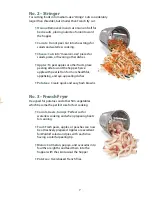
Use the No. 1 – Shredder for preparing such foods for a young baby…
and the No. 2 – Stringer when preparing junior foods.
Canning
Many people still enjoy good, old-fashioned home canned foods. The
Saladmaster® Machine prepares foods more attractively for canning and saves
many hours of work over the old hand cutting methods. In addition to reducing
work time, the Saladmaster® Machine will save food as well, as peeling is
unnecessary. Not peeling away the skins of fruits and vegetables allows you to
retain the healthful, body building vitamins and minerals.
Because the Saladmaster® Machine is so quick and easy to use, it also saves
you time and energy. The combination of all of these efficiencies allows you to
take advantage of the monetary savings possible through home canning of
plentiful fruits and vegetables.
•
Beets for relish:
No. 1 – Shredder or No. 2 – Stringer.
•
Beets for regular canning:
No. 3 – French Fryer.
•
Beets for pickling:
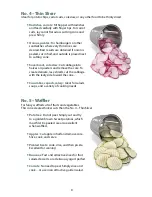
No. 5 – Waffler or No. 4 – Thin Slicer.
•
Corn or cucumbers for relish:
No. 2 – Stringer.
•
Cucumbers for pickles:
No. 4 – Thin Slicer.
•
Cabbage for sauerkraut or cole slaw:
No. 4 – Thin Slicer.
•
Onions/cabbage for Chow Chow:
No. 2 – Stringer.
•
Watermelon for sweet pickles:
No. 3 – French Fryer.
•
When canning, you can use any of the cutting cones, but the No. 5 –
Waffler is recommended for the extra show and beauty it brings to
canned foods. There are thousands of uses for the Saladmaster® Machine.
Just let your imagination be your guide.
9
Food Guide Use and Care
The food guide is an improved product feature that
enables precise cuts of fruits and vegetables.
Features Include:
•
Flap to guide food directly against
cutting cone at the correct angle to
ensure the best cutting results
•
Easy attachment to the hopper
of the food cutter
•
Finger tab to easily lift guide f lap
•
Easy to clean
•
Dishwasher safe
(top rack only)
Get started by following these simple steps:
For best results, always select fresh, crisp fruits and vegetables for cutting.
•
Before f irst use, thoroughly wash in warm,
soapy water. Rinse and dry.
•
Make sure that there is no cutting cone
attached to the food cutter.
•
Attach food guide by aligning it to top
edge of the hopper and sliding it securely
into position. Food guide should snap
into place and f it snuggly.
(Figure A)
•
Attach cutting cone of choice to the food
cutter.
(Figure B)
•
To cut foods, raise the guide f lap by
pressing the f inger tab and place food
into the hopper.
(Figure C)
Use the guide
f lap to guide the food against the cutting
cone. To ensure even cuts, apply constant,
gentle pressure while turning the food
cutter handle.
(Figure D)
4
Figure A
Figure B
Figure C
Finger Tab
Guide Flap
Guide Frame


