


14
NO /
NO/
YES/
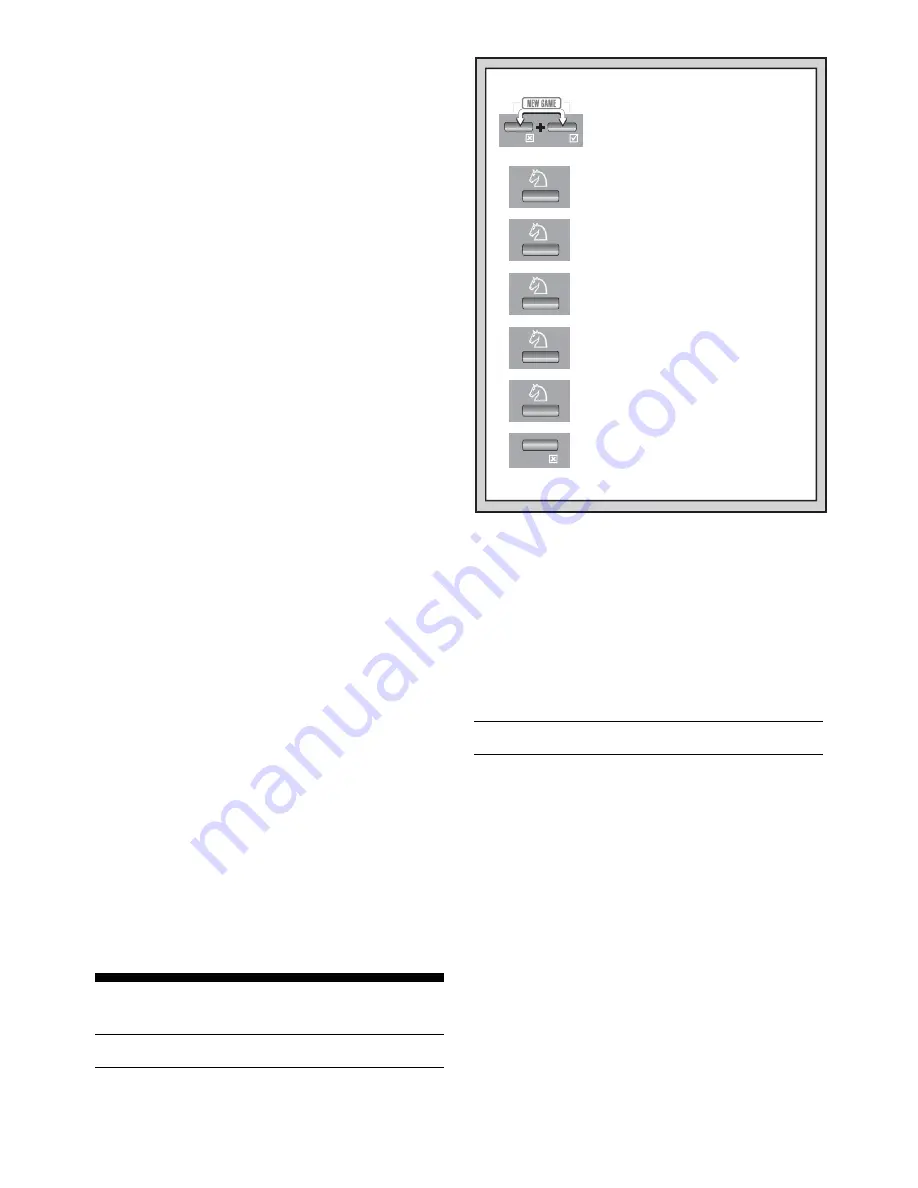
1. Press NO/X and YES/
?
together to
reset the computer for a new game.
Display:
0:00:00
.
IT’S EASY TO VERIFY PIECES
2. Press KNIGHT.
Display:
[@b1
(1st White Knight).
Square b1 lights up.
3. Press KNIGHT again.
Display:
[@G1
(2nd White Knight).
Square g1 lights up.
4. Press KNIGHT again.
Display:
]@b8
(1st Black Knight).
Square b8 lights up.
5. Press KNIGHT again.
Display:
]@g8
(2nd Black Knight).
Square g8 lights up.
7. Repeat the above for any piece you
want to verify! Press NO/X to exit
Verify Mode.
6. Press KNIGHT again.
Display:
@
(no more Knights left on
the board).
For more details, see Section 7.1.
making. Press the FWD key repeatedly to see the rest of the
moves in this line of play, as noted below. The principal
variation is shown to a maximum depth of four ply, or four
individual moves. The BACK key can be used to back up and
see previous displays again.
• Predicted line of play: 1st move.
• Predicted line of play: 2nd move.
• Predicted line of play: 3rd move.
• Predicted line of play: 4th move.
Since the first move of the predicted line of play is the
move the computer assumes you will make, you can also
consider this move as a hint! So—whenever you need help,
press HINT/INFO on your turn. For details, see Section 2.5.
6.2 Search Information
Press HINT/INFO a second time to get information on
the computer’s search. Use the FWD key to cycle through
the four displays listed below. The BACK key can be used to
back up and see previous displays again.
• Numerical evaluation of the current position, based on a
pawn being worth 1.0 points. A positive number indicates
that White is ahead.
Note that this score is not valid on
the Problem Solving Levels or Tactical Levels, since a
different search method is used.
• Two numbers. The first is the current search depth, or
the number of individual moves the computer is looking
ahead. The second is the number of moves the com-
puter has examined so far.
• The move currently being evaluated.
• The search speed, or number of positions (nodes) being
searched every second. Watch as this number changes!
6.3 Chess Clocks
Press HINT/INFO a third time to gain access to chess
clock information. Use the FWD key to cycle through all the
clock displays, as described below. The BACK key can be
used to back up and see previous displays again.
• Time since the last move was executed.
• Total elapsed time for White.
• Total elapsed time for Black.
• Remaining time for White
(Speed Chess/Tournament
Levels only).
• Remaining time for Black
(Speed Chess/Tournament
Levels only).
The chess clocks keep track of the time for both sides.
The clocks stop whenever you take back a move, check level
settings, select options, verify or set up a position, or turn the
computer off. In all of these cases, however, the times are
retained in memory, and the clocks resume as soon as play
is continued. Whenever you change the playing level or press
YES/
?
?
?
?
?
and NO/X together to reset the computer for a new
game, the chess clocks are always reset to
0:00:00
.
6.4 Move Count/Game Moves
Press HINT/INFO a fourth time to show the move num-
ber in the game so far. You can then use the BACK key to
cycle back through the moves of your game (up to 64 indi-
vidual moves). The FWD key can also be used to go forward
again at any point and see all the moves. This gives you an
opportunity to go back and write down the moves (up to the
last 64 individual moves) of a game that turns out to be
unexpectedly great!
• Move number in game so far.
• Moves of the current game.
7. VERIFYING/SETTING UP POSITIONS
7.1 Verifying Positions
See “IT’S EASY TO VERIFY PIECES” for a step-by-
step example of using Verify Mode.
If you knock over the pieces or think your position may be
incorrect, the computer can verify all piece locations for you.
When it is your turn, press one of the Piece Symbol Keys (
!
,
@
,
#
,
$
,
%
, or
&
). The computer says the name of the piece,
and uses board lights and the display to show you where the
first piece of that type is located. The display shows the
piece, color, and square location, and the light turns on for
that square. Press the same Piece Symbol Key again to see
the location of the next piece of that same type. All the White
pieces are shown first, then the Black pieces. When there
are no more pieces of that type, the board lights go out and
only the piece symbol remains in the display.
Repeat the above procedure using the other Piece Sym-
bol Keys, verifying the entire board if desired. Press NO/X to
return to normal play.
7.2 Changing Positions
See “TRY OUT POSITION MODE!” to get an idea of
how this feature works.
Your computer allows you to set up board positions to play
from or chess problems you want the computer to solve.
Caution: All previous moves in your current game will be
erased from the computer’s memory if you make changes to
the position during a game.
Press POSITION to enter Position Mode, and the display
shows
-POS-
. You may change or set up a board position
whenever it is your turn to move. After you have set up your
desired position, press NO/X. The computer will ask if you
want to play from this new position; press YES/
?
?
?
?
?
to confirm
and to exit Position Mode.
• To remove a piece from the board, press the piece on
its square and then remove it. Notice that the display
indicates the piece type and color, along with a minus
sign and the location for that square.
• To move a piece from one square to another, press
the piece on its original square, pick it up, and then
press it on the new square. As you do this, the display
will show a minus sign for the first square, and a plus
sign for the second square.
• To add a piece to the board, first press the Piece
Symbol Key for that piece (
!
,
@
,
#
,
$
,
%
, or
&
). Make
sure the display shows the correct color symbol for the
piece you want to add. If not, press BLACK or WHITE to
change the color. When the display shows the correct
piece type and color, place that piece on the desired


