background image

24

23

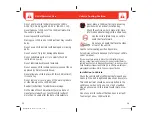
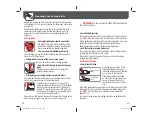
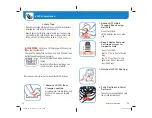
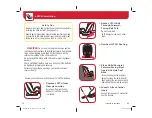
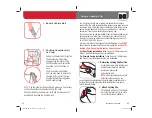
Accessories on Select Models

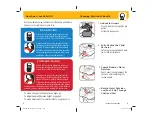
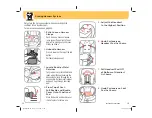
Body Pillow

When using the lower shoulder harness 
slots for smaller infants, you 

MUST

 use the 

body pillow.

To remove body pillow

, pull buckle through 

the slot in pillow and slide pillow out from 
behind the harness straps.

Or from the back of seat, remove harness strap loops from splitter 
plate. From the front, pull harness straps out of shell and body pillow. 
Pull buckle through slot in pillow. Rethread harness straps: 

For lower 

shoulder harness slots for smaller infants, 

see pages 10-11. 

For 

upper shoulder harness slots, 

see page 23.

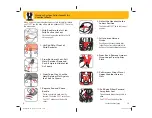
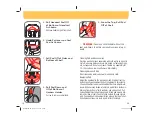
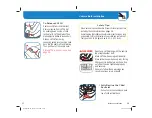
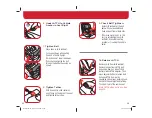
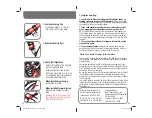
Buckle Cover

You

 MUST 

always use the buckle cover. 

Only remove for cleaning.

To remove buckle cover

, slide the ends 

out of the slot in pad. Pull up and off of the 
buckle.

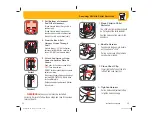
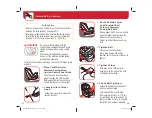
Harness Covers

Harness covers help provide comfort to the 
neck. If harness covers will not allow proper 
positioning of the chest clip or interfere with 
getting a tight enough fi t for a smaller baby, 
remove and do not use.

Store until child is large enough to use these 

harness covers while maintaining a properly fi tting harness.

To remove harness covers

, pull the fastening strips apart and remove 

harness covers. 

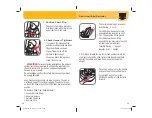
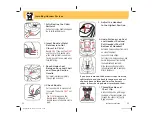
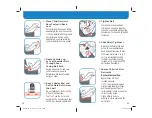
Head Pillow

To remove head pillow,

 gently pull tabs on 

back of head pillow out of headrest pad. 

To attach the head pillow

, slide the tabs  

on back of head pillow into headrest pad.

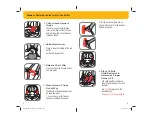
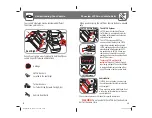
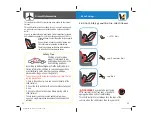
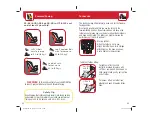
sewn 
end

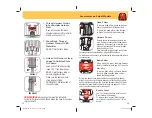
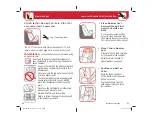
4.

 Attach 1st Harness Strap  

    Loops to Splitter Plate   
    As Shown

Sewn ends of the harness strap 
loops 

MUST

 face towards you. 

DO NOT

 twist harness strap or 

harness adjustment strap. 

Make sure the same harness 
strap loops are fitted 

COMPLETELY ON 

both sides of 

the splitter plate.

Correct

Incorrect

2.


Thread Harness Straps   

    into Shoulder Harness    
    Slots

If you will be using the lower 
shoulder harness slots for smaller 
infants, see pages 10-11.

WARNINGS: 

Harness system must be installed          

correctly. Failure to follow these steps can result in serious 
injury or death.

3. 

From Back, Thread  


    Harness Straps OVER    
    Metal Bar

DO NOT

 twist harness straps.

4358-6653 Grow and Go 3 in 1.indd   29-30

4358-6653 Grow and Go 3 in 1.indd   29-30

4/15/15   8:48 AM

4/15/15   8:48 AM

Summary of Contents for Grow and Go 3-in-1

Page 1: ...nd at least 4 years old KEEP INSTRUCTIONS FOR FUTURE USE Read all instructions before using this child restraint 4358 6653 4 10 15 Failure to follow the warnings on the labels and in the instruction m...

Page 2: ...10 1 18 kg 29 40 in 73 6 101 6 cm at least 2 years old if used forward facing Child restraint faces rear See page 3 to prepare seat Child restraint faces forward See page 3 to prepare seat Booster se...

Page 3: ...ATCH Installation 33 Vehicle Belt Installation 38 Forward Facing 41 Tether Use 42 LATCH Installation 43 Vehicle Belt Installation 47 Booster Seat 49 Lap and Shoulder Belt Installation 50 Important Inf...

Page 4: ...Back View Harness System Detail A B C D E F H G M S N O P Q Y O R S AA O I J K L M Rear Facing Level Line N Forward Facing Belt Path O LATCH Attachment for Storage P Shell child restraint Q Base R Re...

Page 5: ...2 Or the buckle tongues can be placed into the slots in the harness holders as shown 5 Place Child in Child Restraint to Determine Proper Harness Fit The child s bottom and back should be flat agains...

Page 6: ...child s shoulder height Harness strap MUST be at or slightly below shoulders If the lower shoulder harness slots are above the child s shoulders with the headrest in the lowest position do not use thi...

Page 7: ...rstand and follow all instructions and warnings Do not use this child restraint rear facing unless the top of your child s head is at least 1 in 2 5 cm below the top of the child restraint s headrest...

Page 8: ...on next page 9 1 With Buckle in the 1st Slot Fully Recline the Seat If you need to move the buckle to the 1st slot see page 6 5 Replace Pad and Check Buckle Pull up on buckle to make sure it is secure...

Page 9: ...raint Position harness strap over child s shoulders 3 Close Chest Clip Insert right half of chest clip into left half and snap together 2 Buckle Harness Push buckle tongues into buckle until you hear...

Page 10: ...on the child s flesh or push the child s body into an unnatural position To Remove Child From Child Restraint 1 Loosen Harness Strap 2 Unbuckle Harness 3 Release Chest Clip 4 Remove Child To recline...

Page 11: ...Locate Buckle s Metal Retainer Fully recline the child restraint and reach under the seat between the base and shell and through the re cline handle Rotate metal retainer and push it up through shell...

Page 12: ...ll on harness adjustment strap to remove any slack from the harness system 12 Pull Headrest Pad Down and Wrap Around Bottom of Headrest Attach fasteners on headrest pad and seat pad 3 Undo Fasteners o...

Page 13: ...from bottom of child restraint slip pad on shell Pull harness adjustment strap through pad Wrap pad around bot tom and sides of shell Push harness holders through slots in pad Push pad behind headrest...

Page 14: ...arness straps follow the steps below to rethread them 3 Reach Under Seat Between Base and Shell and Through Recline Handle Pull metal retainer completely through pad and shell 1 2 3 21 1 Thread Buckle...

Page 15: ...and do not use Store until child is large enough to use these harness covers while maintaining a properly fitting harness To remove harness covers pull the fastening strips apart and remove harness c...

Page 16: ...child rear facing in a seating position with an active frontal air bag Check the vehicle owner s manual for more information about air bag child restraint use Use the child restraint only on vehicle s...

Page 17: ...2 are equipped with LATCH Check your vehicle owner s manual to see which seating positions may be equipped with the LATCH system To store LATCH on this child restraint Thread LATCH belt through rear f...

Page 18: ...out it is a switchable retractor If you have an ELR lap and shoulder belt review the Vehicle Latch Plate section on page 30 to see if you need a locking clip 29 Switchable Retractor These belts switc...

Page 19: ...sheet or blanket when not in use 3 Check for hot seat and buckles before placing child in child restraint To help protect your vehicle seat s upholstery from dam age use a single layered towel undern...

Page 20: ...and up to 40 in 101 6 cm 4 Reach Under Pad and Pull Hook Across to Opposite Side Do not twist belt Belt MUST be in front of buckle strap You MUST use the 1st or 2nd buckle slot Do not place belt over...

Page 21: ...Check Belt Tightness Hold child restraint at the belt path with your weakest hand Push and pull from side to side If it moves more than 1 in 2 5 cm try reinstalling the child restraint try another sea...

Page 22: ...oosen belt Unhook LATCH from bar by squeezing spring lever pushing hook back into the seat bight and twisting Then pull it out of the vehicle seat Store LATCH when not in use See page 28 37 continued...

Page 23: ...Belt Place hand in child restraint Firmly push down and towards the vehicle seat back while pulling shoulder belt or free end of lap belt to tighten 6 Check Belt Tightness Hold child restraint at the...

Page 24: ...ecommend that you use the tether in the forward facing position If your vehicle does not have a top tether anchor please see your dealer or a qualified mechanic and have one installed The tether can g...

Page 25: ...43 2 Route LATCH Belt Through Forward Facing Belt Path Do not twist belt LATCH adjuster can be on either side 4 Place Child Restraint Forward Facing Flush Against Vehicle Seat Back Do not use any rec...

Page 26: ...kest hand Push and pull from side to side If it moves more than 1 in 2 5 cm try reinstalling the child restraint try another seating location or try using the vehicle belts To Release LATCH Remove chi...

Page 27: ...cle belts you have Do not twist belt Buckle vehicle belt 5 Tighten Tether With knee still in child restraint push firmly on the back of the seat and tighten tether strap 4 Tighten Belt Place knee in c...

Page 28: ...houlder belt under the child s arms Do not use the LATCH belts or tether strap when using as a booster seat Store both LATCH and tether strap Failure to follow these warnings can result in serious inj...

Page 29: ...dealership an auto store or where you purchased this child restraint You can also email us at consumer djgusa com or call us at 1 800 544 1108 for one A locking clip will not fix all types of seat bel...

Page 30: ...ake to read and follow these instructions After reading if you still have questions or have any con cerns with this child restraint please contact our Consumer Relations Department at Website www safe...

Page 31: ...model number and manufacturer date code MUST be included on the form to ensure proper replacement parts The codes can be found on a label on side of child restraint Payment in U S dollars must accomp...

Page 32: ...on and terms of the express written warranty Some states do not allow limitations as to how long an implied warranty lasts or the exclusion or limitation of incidental or consequential damages so the...

Reviews: