4
INSTALLATION OF THE GATE
ATTENTION: When fitting the gate on top of stairs, the safety gate should never be opened
over the stairs as this can lead to hazardous situations. Always open the gate away from the
stairs. See step 5.
Step 1
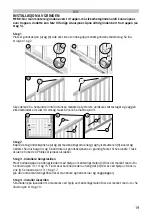
Place the gate sections (a) and (b) next to each other with no gap between the gate bars. See Pict.
1 and 2.
Slide the sections apart until the distance between the outermost gate vertical bar and the wall or
door surface is at least 30 mm and maximum 62 mm. See Pict. 3.
Step 2
Connect the two gate sections (a) and (b) with the connection screws (g) and the Barrel bolts (h)
at the top and bottom. See Pict. 4 and 5. Ensure that the gate sections are attached firmly to each
other. Screw the screws tight with a Phillips screwdriver.
Step 3 - Installing the hinge side
Mark the hole position on the hinge side with the help of the mounting template (n). These are
marked with ”B”. Se Pict. 13, 14 and 15. First, only the lower hinge parts (e) are attached using the
wood screws (i). See Pict. 13, 16 and 17.
(in another mounting surface use suitable screws and wall plugs)
Step 4 - Installing the locking side
The screw holes for the closing side must be marked using the mounting template (n). These are
marked with ”A”. See Pict. 8, 9 and 10.
UK
l
l
h
g
h
g
l
l
h
g
h
g
min. 30mm
min. 30mm
max. 62mm
max. 62mm
Summary of Contents for SafeGate Extending Basic
Page 5: ...5 UK l l g g j k f i f i i i n n e e i i n n n m ...
Page 10: ...10 DK l l g g j k f i f i i i n n e e i i n n n m ...
Page 15: ...15 SE l l g g j k f i f i i i n n e e i i n n n m ...
Page 20: ...20 NO l l g g j k f i f i i i n n e e i i n n n m ...
Page 25: ...25 ZH l l g g j k f i f i i i n n e e i i n n n m ...
Page 30: ...30 RUS l l g g j k f i f i i i n n e e i i n n n m ...


