


© Safe Fleet | September 2019 | All rights reserved
SSV9 Installation and Setup Guide
13
R2
Recommended Camera Locations and Settings
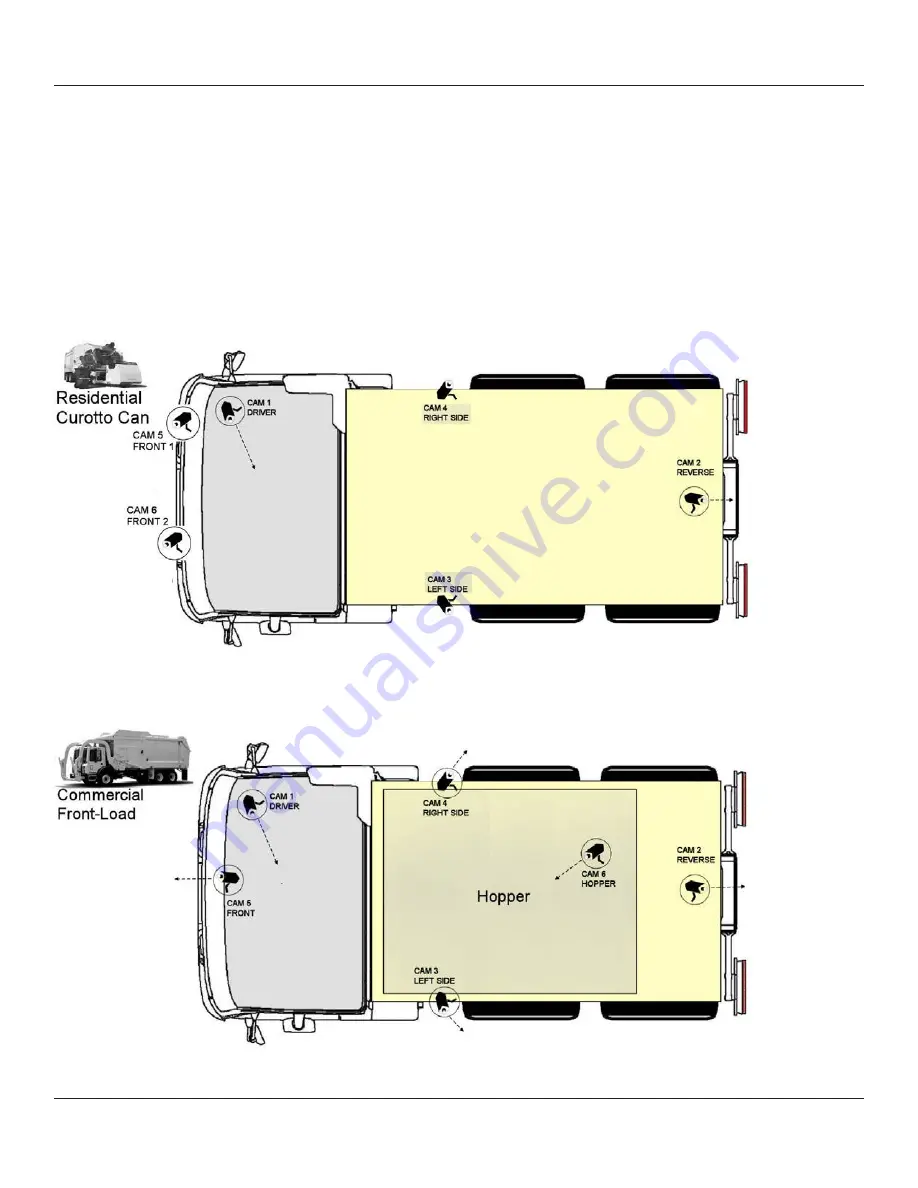
Recommended Camera Locations and Settings
Optimal camera configuration will ultimately depend on customer preference and the requirements involved for the various
types of waste collection. As a guideline, FleetMind proposes the following configurations based on actual installations
performed by our installation team.
The configurations presented here are “minimal” configurations, i.e., not all 6 cameras need be used in each scenario.
You can use as many cameras as you deem appropriate for your particular application.
Residential Front-Load (Curotto-Can)
Commercial Front-Load


