Sable 30K Directions For Use Manual Download Page 7

Page Number 

THE AUTOSCALER DIRECTIONS FOR USE Rev: A March 16, 2007 


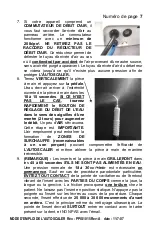
INSTALLING THE HANDPIECE ASSEMBLY 


1.  Align the electrical contacts of the 

MALE

 connector with the same on 

the 

FEMALE

 panel connector. 

2.  Gently insert the connector. It should slide in with very little effort. If 

the connector does 

NOT

  align, 

DO NOT

  force it. Turn the 

CONNECTOR BODY

 in either direction until the connector correctly 

aligns, and goes in. 

3. 

Once the connector has been completely inserted, screw the 

OUTSIDE LOCK RING

 to the 

RIGHT

 with light finger pressure until it 

stops. 

DO NOT

  over tighten the lock ring.

 Be careful not to cross 

thread the lock ring. 

4. 

To 

REMOVE

 the connector, unscrew the 

LOCK RING

 to the left, and 

gently pull outward grasping the entire

 CONNECTOR BODY. 


THE AUTOSCALER INSTALLATION AND OPERATION 


1.  (NOTE): DO NOT use THE AUTOSCALER until all of the following 

steps have been completed. 

2.  Upon receipt of your unit carefully unpack it and see that the Toggle 

Switch is in the 

OFF-O 

position. 

3. 

The Water Control Knob should be in the 

HIGH 

position. 

(Note: It is 

normal for the Knob to turn past the High position several 

rotations which will increase water flow substantially.) 

4.  Set the 

POWER KNOB

 all the way to the 

LEFT

 in the

 LOW

 position. 

5. 

Plug the 

MALE

 Water Quick Connector into the Dental operatory or 

have a plumber install a SHUT OFF style FEMALE connector. 

minimum of (20 P.S.I.) water input pressure,

  and a maximum  of 

(60 P.S.I.) is needed from the operatory for proper operation of 

THE


AUTOSCALER

. NOTE: 

It is recommended that water line filtration 

be used to remove larger particles before entering the scaler. 

6.  Plug the 

POWER CORD

 into the wall 

(see electrical requirements).


Press the toggle switch to the

 ON-I position. 

The 

L.E.D. light

 above 

the switch should be ON (“I” position). 

7.  If your device is equipped with an 

AIR 

SWITCH ACTIVATOR

  the air supply 

must be attached to the rear of the 

device, and a 

minimum of (20 PSIG)

 is 

necessary to activate the air switch

. DO 

NOT REMOVE THE AIR 

Summary of Contents for 30K

Page 1: ...LTRASONIC SCALING DEVICES AUTOSCALER U L T R A S O N I C D E N T A L S C A L E R DIRECTIONS FOR USE DFU PLEASEREADTHOROUGHLYBEFOREOPERATINGTHISDEVICE HEINTENDEDUSEOFTHEAUTOSCALER DEVICEISFORDENTA OPHY...

Page 2: ...e not interchangeable The Autoscaler accepts all major brands of scaling tips THE AUTOSCALER name is owned by Sable Industries Inc of Canada THE AUTOSCALER is acceptable for use in scaling and cleanin...

Page 3: ...e is subject to deterioration by aging chemicals in the water supply excessive flexing and pressure fluctuations As an added precaution the water supply should be turned OFF at the end of the day REME...

Page 4: ...p contamination from getting on the handpiece assembly Dispose sheathe after each patient Ask your local dealer for HIGH SPEED LONG sheathes INTRODUCTION THE AUTOSCALER Ultrasonic Scaler is a precisio...

Page 5: ...Switch is set to the ON position indicating the unit is ready for operation POWER CONTROL KNOB NOTE FOLLOW INSERT MANUFACTURERS COMPLETE INSTRUCTIONS Linear Power Control knob adjusts the output power...

Page 6: ...ating at a higher than normal temperature and should be replaced immediately NOTE Insert tips manufactured by other manufacturers may not achieve optimal results and could run at a higher temperature...

Page 7: ...ceipt of your unit carefully unpack it and see that the Toggle Switch is in the OFF O position 3 The Water Control Knob should be in the HIGH position Note It is normal for the Knob to turn past the H...

Page 8: ...g Vibrating end of the insert tip to any FLESH such as the cheek tongue or gums unless performing special periodontal procedures This will cause a friction burn to the patient Always keep the insert i...

Page 9: ...ion of the POWER KNOB is for controlling the Output Power to the insert tip in a smooth linear action The operator can select the EXACT power needed for cleaning Set power knob LOW to MEDIUM for coole...

Page 10: ...water flow is insufficient check water pressure at the operatory for minimum of 20 PSI The Insert Water SLOT could be clogged with debris Try another insert See if WATER QUICK CONNECTOR is locked ful...

Page 11: ...the Blue area at assure best performance Call your DEALER or customer service at Sable Industries Inc for further instructions at area 519 579 9323 and a technician will be available to help you with...

Page 12: ...ing and handling back to the customer 4 UNAUTHORIZED REPAIR ABUSE ETC The unit must not have been previously altered repaired or serviced by anyone other than a service facility authorized by SII To r...

Page 13: ...PT 5 GLOVES 3 H HANDPIECE ASSEMBLY 4 HANDPIECE INSTALLATION 5 HANDPIECE OR INSERT RUNS HOT 9 HANDPIECE PANEL RECEPTACLE 4 HANDPIECE SHEATHES 3HIGH POWER 8 HUMMING OR HIGH PITCH SOUND 10 I INSERT REPLA...

Page 14: ...Page Number 1 THE AUTOSCALER DIRECTIONS FOR USE Rev A March 16 2007 SABLE ULTRASONIC TIPS 1900601 DF3 30K 1900602 DF3 25K 1900603 DFK10 30K 1900604 DFK10 25K...

Page 15: ...TAIRES FORM S L UTILISATION DES DISPOSITIFS ULTRASONIQUES DE D TARTRAGE DOIVENT UTILISER CET APPAREIL VEUILLEZ LIRE AU COMPLET AVANT D UTILISER CET APPAREIL L AUTOSCALER EST CON U POUR LES TRAITEMENTS...

Page 16: ...rentes ne sont pas interchangeables L Autoscaler est compatible avec tous les embouts de d tartrage des principales marques Le nom L AUTOSCALER est la propri t de Sable Industries Inc of Canada L AUT...

Page 17: ...us l effet de l ge des produits chimiques contenus dans l eau d une flexion excessive et des changements de pression Par mesure de pr caution suppl mentaire il est pr f rable de FERMER l arriv e d eau...

Page 18: ...TABLES POUR PI CE MAIN afin d viter la contamination de l accessoire Changez de gaine apr s chaque patient Communiquez avec votre distributeur pour obtenir des GAINES LONGUES POUR HAUTE VITESSE INTROD...

Page 19: ...osition ON I L appareil est alors pr t fonctionner Le R GLAGE DE LA PUISSANCE REMARQUE RESPECTEZ LA LETTRE LES INSTRUCTIONS DES FABRICANTS D INSERTS Le bouton r gle la puissance de sortie de mani re l...

Page 20: ...R EFFICACIT ou fonctionneront une temp rature anormalement lev e Dans ce cas ils doivent tre remplac s imm diatement REMARQUE Il est possible que les pointes d insert provenant d autres fabricants don...

Page 21: ...ctu toutes les tapes suivantes 2 Lors de la r ception de votre appareil d ballez le avec pr caution et v rifiez que l interrupteur d alimentation est bien en position OFF O 3 Le bouton de r glage du d...

Page 22: ...pour augmenter le d bit Un peu d AIR s vacuera Cette tape est IMPORTANTE L air emprisonn peut entra ner la formation de ZONES DE SURCHAUFFE reconnaissables un son per ant pouvant compromettre l effic...

Page 23: ...vers la droite s il y a absence de brouillard ou pr sence d un tr s l ger brouillard Si vous utilisez des inserts SLIMLINE MC FSI MC ou des inserts parodontaux modifi s positionnez le bouton R GLAGE D...

Page 24: ...e c t de l interrupteur ne s allume pas remplacez le FUSIBLE situ dans le panneau arri re par un PETIT FUSIBLE fusion rapide de 2 A Si le fusible grille nouveau N ESSAYEZ PAS de le remplacer tout lais...

Page 25: ...n doit imm diatement tre r par ou remplac NE CONTINUEZ PAS appuyer sur la p dale En effet il est possible que le fusible de s ret du circuit interne soit grill et doive tre remplac par un technicien q...

Page 26: ...ACHAT D ORIGINE pour se pr valoir de la garantie La garantie N INCLUT PAS les frais de manutention et d exp dition au client ou au fabricant Consultez les termes de la garantie pour prendre connaissa...

Page 27: ...tion abusive ou contraire aux instructions La pi ce main ne sera pas garantie si elle a fait l objet d une utilisation abusive impliquant une traction ou un tirement excessifs ou encore l accumulation...

Page 28: ...E FUITE LA TERRE 5 GANTS 3 H PI CE MAIN 4 INSTALLATION DE LA PI CE MAIN 5 PI CE MAIN OU INSERT QUI SURCHAUFFENT 9 SUPPORT DE LA PI CE MAIN 4 GAINES POUR PI CE MAIN 3 PUISSANCE LEV E HIGH 8 BOURDONNEME...

Reviews: