

Saberz Project
M Chassis Installation Guide
D
ISCLAIMER AND
I
MPORTANT
S
TARTING
N
OTES
Version 1.9.5_b
–
September 18, 2022
•
Page 1
1
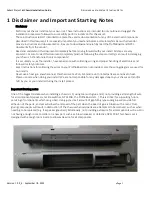
Disclaimer and Important Starting Notes
Disclaimer
-
Perform your chassis installs at your own risk. These instructions are intended to only outline and suggest the
installation process we followed to successfully perform installs on this chassis set.
-
These instructions are NOT intended to replace the vendor documentation for any of the electrical components
described in this document. It is especially important you read and become completely familiar with all vendor-
provide instructions and documentation. Be sure to download and carefully read the ProffieBoard and NPXL
documents from the vendor.
-
Read and understand this document completely before moving forward with your install. All steps are very
important. Failure to read this document completely (and not following the steps correctly) can result in damaging
your chassis, hilt and/or electronic components!
-
It is assumed you, as the installer, have experience with soldering, wiring and proper handling of electronics and
follow all safety protocols.
-
Exact instructions for soldering the wires to your ProffieBoard are not provided, only the wiring diagram we used for
our installs.
-
Never use a heat gun anywhere near this chassis set as PLA, SLS (and resin) printed parts are sensitive to heat.
-
Please use care when doing your install! We are not responsible for any damages done to your chassis set (and/or
hilt) by you or your installer during the install process.
Important Starting notes
One of the biggest mistakes when installing a chassis is 1) using too much glue and 2) not providing extra length of wire
for all components (speakers, tactile switches, NPXL PCB, the ProffieBoard etc..). This is critical for supporting future
servicing of components which can go bad. Using just a small amount of gap filling type superglue will provide full
adhesion of the parts, and yet will allow the removal of the part when the bead of glue is broken with a razor. Over-
gluing components will result in destruction of the chassis when said parts are attempted to be removed, such as when
needing to be replaced (e.g. if a speaker goes bad). Additionally, not providing extra wire for all components will result in
not having enough room to solder on a new part, such as a blown speaker or defective NPXL PCB. This chassis set is
designed with enough room inside to allow extra wire for all components.