background image

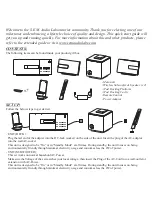
KEY CONTROLS:

Use the Function key to toggle between different sources from which you would like to have desired playback.

- FUNCTION KEY:

- SPEAKER:

Unwrap the speaker-cords of both speaker-boxes.
Please notice that each speakers cord consists of 2 wires. 
Insert the "clear" wire of the left speaker-box into the "red" ( + ) speaker connector.
Insert the "black" wire of the left speaker-box into the "black" ( - ) speaker connector.     
When connecting the speaker wires, ensure the “clear” and “black” wire pair are both in the “L” or “R” side 
matching.
Place the speaker boxes as far apart as possible for best sound effect.

- REMOTE:

The remote comes with a battery built-in from the get-go. Gently pull out the plastic ‘Tab’ from the battery 
compartment at the rear of the remote to begin wireless communication between the remote and unit.

- iPod:

Plug the tail end of the dock adapter into the DC-Jack (socket) on the side of the unit. Insert the plug of the AC-
adaptor into the wall AC-socket.

Unwrap the iPod dock to connect the cord to the main unit (Docking socket). 

SET CLOCK TIME:

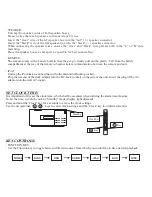
It is important to first set the clock time, which shall be essential when utilizing the alarm timer feature.
To set the time, switch the unit to “Standby” mode (display light dimmed). 
Press and hold the ‘Clock’ key for 2 seconds to access the clock settings.
Use the navigational, ‘


/


’, keys to select clock settings and the ‘Clock’ key to confirm selection. 

TUNER

DISC

USB

AUX

DISC

iPod

CARD

 Standby 

 Clock Set

 Key

 Key

Summary of Contents for Fusion Z-7799

Page 1: ...Website www semaudiolabs com Email info semaudiolabs com QUICK START GUIDE FUSION Z 7799 ...

Page 2: ...started UNIT DECK Plug the tail end of the adapter into the DC Jack socket on the side of the unit Insert the plug of the AC adaptor into the wall AC socket This unit is designed to be On or in Standby Mode at all times During standby the unit focuses on being environmentally friendly through minimal electricity usage and consumes less the 2W of power UNIT SUBWOOFER This set works on normal househ...

Page 3: ...th a battery built in from the get go Gently pull out the plastic Tab from the battery compartment at the rear of the remote to begin wireless communication between the remote and unit iPod Plug the tail end of the dock adapter into the DC Jack socket on the side of the unit Insert the plug of the AC adaptor into the wall AC socket Unwrap theiPoddocktoconnectthecordtothemainunit Dockingsocket SET ...

Page 4: ... should begin automatically whilst the Play Pause Next Back and Tune Up Tune down keys can be used to navigate the chapters or tracks on the disc and control playback The unit also allows for a host of options including subtitles audio language A B repeat chapter playback programming and many for For these please refer to the extended user manual Alarm LIGHTCURRENT Lightcurrent is a key technology...

Page 5: ...n on both the unit and the iPod Use the Play Pause Next and Previous keys to control playback from the iPod Use the menu key to navigate the available iPod menu s such as playlist artist song video or others depending on your iPod Use the next prev up down key s or jog wheel to scroll within menu s and submenu s Then press the select enter key to confirm highlighted section STEP 2 Fit the dock ada...

Page 6: ......

Reviews: