background image

CONTENTS:

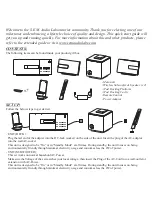
x7

- Main unit
- Wireless Subwoofer & Speaker (x 2)
- iPod Docking Platform
- iPod Docking Cavity
- Remote Control
- Power Adaptor

SET UP:

Welcome to the S.E.M. Audio Laboratories community. Thank you for selecting one of our 
milestones and embracing a lifestyle choice of quality and design. This quick start guide will 
get you up and running quickly. For more information about this and other products, please 
refer to the extended guide or visit www.semaudiolabs.com.

The following items can be found inside your product gift box. 

Follow the below steps to get started.

- UNIT (DECK):

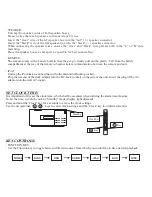
Plug the tail end of the adapter into the DC-Jack (socket) on the side of the unit. Insert the plug of the AC-adaptor 

into the wall AC-socket.

This unit is designed to be “On” or in “Standby Mode” at all times. During standby, the unit focuses on being 

environmentally friendly through minimal electricity usage and consumes less the 2W of power.

- UNIT (SUBWOOFER):

This set works on normal household AC-Power. 
Make sure the Voltage of the set matches your local voltage, then insert the Plug of the AC-Cord into a wall-outlet or 

extension with AC-Power.

This unit is designed to be “On” or in “Standby Mode” at all times. During standby, the unit focuses on being 

environmentally friendly through minimal electricity usage and consumes less the 2W of power.

Summary of Contents for Fusion Z-7799

Page 1: ...Website www semaudiolabs com Email info semaudiolabs com QUICK START GUIDE FUSION Z 7799 ...

Page 2: ...started UNIT DECK Plug the tail end of the adapter into the DC Jack socket on the side of the unit Insert the plug of the AC adaptor into the wall AC socket This unit is designed to be On or in Standby Mode at all times During standby the unit focuses on being environmentally friendly through minimal electricity usage and consumes less the 2W of power UNIT SUBWOOFER This set works on normal househ...

Page 3: ...th a battery built in from the get go Gently pull out the plastic Tab from the battery compartment at the rear of the remote to begin wireless communication between the remote and unit iPod Plug the tail end of the dock adapter into the DC Jack socket on the side of the unit Insert the plug of the AC adaptor into the wall AC socket Unwrap theiPoddocktoconnectthecordtothemainunit Dockingsocket SET ...

Page 4: ... should begin automatically whilst the Play Pause Next Back and Tune Up Tune down keys can be used to navigate the chapters or tracks on the disc and control playback The unit also allows for a host of options including subtitles audio language A B repeat chapter playback programming and many for For these please refer to the extended user manual Alarm LIGHTCURRENT Lightcurrent is a key technology...

Page 5: ...n on both the unit and the iPod Use the Play Pause Next and Previous keys to control playback from the iPod Use the menu key to navigate the available iPod menu s such as playlist artist song video or others depending on your iPod Use the next prev up down key s or jog wheel to scroll within menu s and submenu s Then press the select enter key to confirm highlighted section STEP 2 Fit the dock ada...

Page 6: ......

Reviews: