


6
PLANNED MAINTENANCE—QUARTERLY INSPECTION
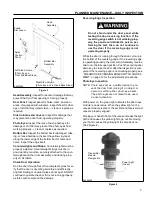
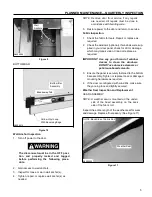
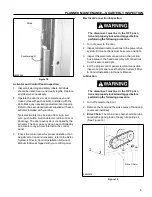
SIDE COLUMNS
NOTE: A weather seal is mounted on the inside lip
of each side column cover.
Inspect the entire length of both weather seals (side col-
umn cover and side column) on both sides of the door
for wear and damage. Replace if necessary.
(See Figure 12)
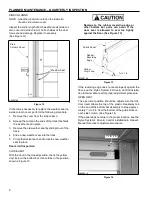
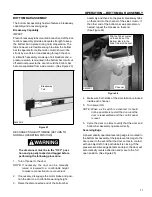
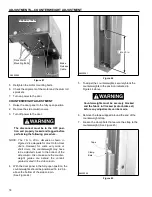
Damage to the rubber reversing edge or
other bottom bar parts can occur if the
door seal is allowed to seal too tightly
against the floor. (See Figure 13)
Side
Column Cover
Fabric Panel
Rubber
Reversing
Edge
Weather Seal
Yellow
Vinyl Loop
¹/
₂
to 1 in.
A7500195
A8500196
Figure 12
Figure 13
If the reversing edge does not seal properly against the
floor, see the Rytec System 4 Drive & Control Installa-
tion & Owner’s Manual for proper adjustment procedure.
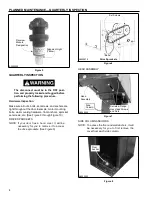
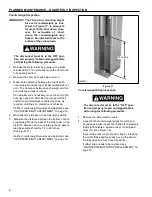
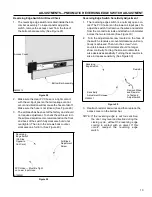
OPEN LIMIT
The open-limit position should be adjusted so that the
door travel allows the top of the plastic breakaway tab
on the end of the bottom bar assembly to stop approxi-
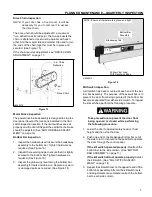
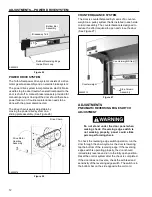
If it becomes necessary to replace the weather seal on
a side column cover, perform the following procedure.
1. Remove the cover from the side column.
2. Spread the crimp on the ends of the track that holds
the weather seal in place.
3. Remove the old weather seal by sliding it out of the
track.
4. Slide a new weather seal into the track.
5. Crimp the track at each end to lock the new weather
seal in place.
Door Limit Inspection
CLOSE LIMIT
With the door in the closed position, check the yellow
vinyl loop on the bottom bar. It should be in the position
shown in Figure 13.
mately 1
¹/₂
to 2 in. from the bottom of the guide block on
each side column. (See Figure 14)
If the panel does not stop in the proper location, see the
Rytec System 4 Drive & Control Installation & Owner’s
Manual for proper adjustment procedure.
1
¹/₂
to 2 in.
A8500214
Figure 14