English(Original instructions)
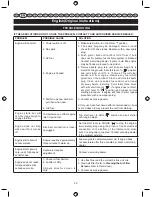
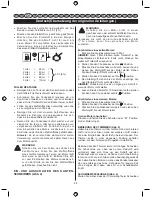
1 Litre
+ 20 ml =
2 Litres + 40 ml =
3 Litres + 60 ml =
50:1 (2%)
4 Litres + 80 ml =
5 Litres + 100 ml =
FILLING THE TANK
■
Clean surface around fuel cap to prevent
contamination.
■
Loosen fuel cap slowly to release pressure and to
keep fuel from escaping around the cap.
■
Carefully pour fuel mixture into the tank. Avoid spillage.
■
Prior to replacing the fuel cap, clean and inspect
the gasket.
■
Immediately replace fuel cap and hand tighten.
Wipe upany fuel spillage. Move 9 m away from
refueling site before starting engine.
Note:
It is normal for smoke to be emitted from a new
engine during and after first use.
WARNING
Always shut off engine before fueling. Never add
fuel to a machine with a running or hot engine.
Move at least 9 m from refueling site before
starting engine. Do not smoke.
STARTING AND STOPPING (Fig. 4)
WARNING
Never start or run the engine inside a closed or
poorly ventilated area; breathing exhaust fumes
can kill.
Be sure to return the stop switch to the "I" (RUN) position
before trying to start unit.
To start a cold engine:
1. Press the primer bulb 10 times.
NOTE:
After the 7th press, the fuel should be visible
in the primer bulb. If not, continue pressing until the
fuel is visible.
2. Set the choke lever to
choke position.
3. Keeping the throttle trigger squeezed completely and
pull the starter grip until the engine attempts to start.
Do not pull the starter grip more than 4 times.
4. Set the choke lever to
choke position.
5. Pull the starter grip until the engine starts. Do not pull
the starter grip more than 6 times.
NOTE:
If the engine does not start, repeat the
procedure from step 2.
6. Allow the engine to run for 10 seconds, then set the
choke lever to
position.
To start a warm engine:
1. Press the primer bulb 10 times.
2. Set the choke lever to
position.
3. Squeeze the throttle trigger completely and pull the
starter grip until the engine starts.
OPERATING THE TRIMMER (Fig. 5)
Hold the trimmer with the right hand on the rear handle
and the left hand on the front handle. Keep a firm grip
with both hands while in operation. Trimmer should be
held at a comfortable position with the rear handle about
hip height.
Always operate trimmer at full throttle. Cut tall grass
from the top down. This will prevent grass from
wrapping around the shaft housing and string head
which may cause damage from overheating. If grass
becomes wrapped around the string head, stop the
engine, disconnect the spark plug wire, and remove the
grass. Prolonged cutting at partial throttle will result in oil
dripping from the silencer.
CUTTING TIPS (Fig. 6)
When cutting make sure the cutter head is at a slight angle
as shown while still approximately parallel to the ground
surface. In tall grass cut from the top down to ensure the
moving parts do not get tangled with the long grass / brush.
Move the head in steady strokes from left to right as you
work through the grass / brush.
ADVANCING THE LINE (Fig. 7)
If the line becomes short, tap the head on the ground
as shown to extend more line. Take care not to ‘crash’ it
against a hard surface.
OPERATING THE BRUSHCUTTER (Fig. 5)
Hold the brushcutter with the right hand on the rear handle
and the left hand on the front handle.
Keep a firm grip with both hands while in operation.
Brushcutter should be held at a comfortable position with
the trigger handle about hip height. Maintain your grip and
balance on both feet. Position yourself so that you will
not be drawn off balance by the kick-back reaction of the
cutting blade.
Adjust the shoulder strap to position the brushcutter at
a comfortable operating position and to assure that the
shoulder strap will reduce the risk of operator contact
with the blade.
Exercise extreme caution when using the blade
with this unit. Blade thrust is the reaction which
may occur when the spinning blade contacts
anything it cannot cut. This contact may cause
the blade to stop for an instant, and suddenly
“thrust” the unit away from the object that was hit.
This reaction can be violent enough to cause the
17
Summary of Contents for RBC26SES
Page 135: ...133 15 91 R M 2...
Page 136: ...Ryobi 15 134...
Page 137: ...135 9 76...
Page 139: ...137 1 2 3 4 5 6 7 8 9 10 11 12 13 14 15 16 17 18 2 15 3 92 95 50 1 2...
Page 140: ...1 20 2 40 3 60 50 1 2 4 80 5 100 9 9 4 I 1 10 7 2 3 4 4 5 6 2 6 10 1 10 2 3 O 5 6 7 5 138...
Page 141: ...8 9 2 4 6 0 20 10 25 139...
Page 142: ...140 I 10 15 9 11 12 fl fl fl 13 Champion RCJ 6Y 0 63 1 ISO 2...
Page 143: ...141 CHOKE 3 2 14 1 2 3 4 5 1 2 3 4 5 1 2 1 2 1 2 3 1 2 2 3...
Page 218: ...216 15 91 R M 2...
Page 219: ...Ryobi Ryobi 15 217...
Page 220: ...c 9 76 13 76 218...
Page 222: ...1 2 3 4 5 6 7 8 9 10 11 12 13 14 15 16 17 18 2 15 3 91 R M 2 50 1 220...
Page 223: ...1 20 2 40 3 60 50 1 2 4 80 5 100 9 9 4 I 1 10 7 2 3 4 4 5 6 2 6 10 1 10 2 3 O 5 6 221...
Page 224: ...7 5 8 4 9 2 4 6 0 20 10 25 222...
Page 225: ...223 I 10 15 9m 11 12 13 Champion RCJ 6Y 0 63 1 ISO 2...
Page 226: ...224 14 1 2 3 4 5 1 2 3 4 5 1 2 1 2 1 2 3 1 2 3...
Page 239: ...960408009 01...
Page 240: ......


