


8
9
Russound MBX-AMP Installation Guide
Accessing Web Config First Time Setup
Web Config is a hosted web page within the MBX-AMP used
to configure all settings and to perform firmware updates.
It is accessed by navigating any web browser to the MBX-
AMP's IP address on your home network.
The first time that a user navigates to the MBX-AMP Web
Config page, Web Config will open automatically in First
Time Setup mode.
First Time Setup is designed to help configure a few basic
system settings as well as to provide for a quick method of
enabling Chromecast Built-in for Audio.
Using a web browser from any device (phone, tablet, or
computer) that is on the same network as the MBX-AMP,
navigate to the MBX-AMP’s Web Config page by entering
one of the following:
1. MBX-AMP IP address – Example: if the IP address is
192.168.0.105, enter http://192.168.0.105 into the web
browser. If you don’t know the IP address, you can use
a network scanning app such as Fing (Free for iOS and
Android) to discover the IP address.
2. MBX-AMP Hostname – The hostname is printed on a
label on the bottom of the MBX-AMP. The hostname is
formatted as MBX-AMP-XXXX where XXXX is the last four
digits of the MBX-AMP’s MAC ID. Example: If the hostname
is MBX-AMP-1234, enter http://MBX-AMP-1234 into the web
browser.
Device Name
The first item you will see on the first time setup screen is
the device name. The default device name is the hostname
MBX-AMP-XXXX. If you edited the name using Google
Home, or in your Apple configuration in the Installation
steps above, the name will be whatever you entered. The
name can be edited here or changed at any time in the
future using Web Config.
We suggest naming the MBX-AMP for the room or area
of the house where it is used. For example, "Kitchen" or
"Dining Room".
The name you choose will be the name that is visible within
the Russound app when controlling the MBX-AMP and also
the name that will appear in apps when attempting to cast
or stream audio from a phone or tablet. The name can be
changed at any time.
INSTALLATION AND FIRST TIME SETUP
Russound MBX-AMP Installation Guide
Option B3 (Using a soft access point)
The MBX-AMP will broadcast an SSID of “MBX-AMP-XXXX.
h013"” with XXXX being the last 4 digits of the MAC ID of
the device.
1. From your phone/tablet connect to the MBX-AMP-
XXXX.h013 Wi-Fi network.
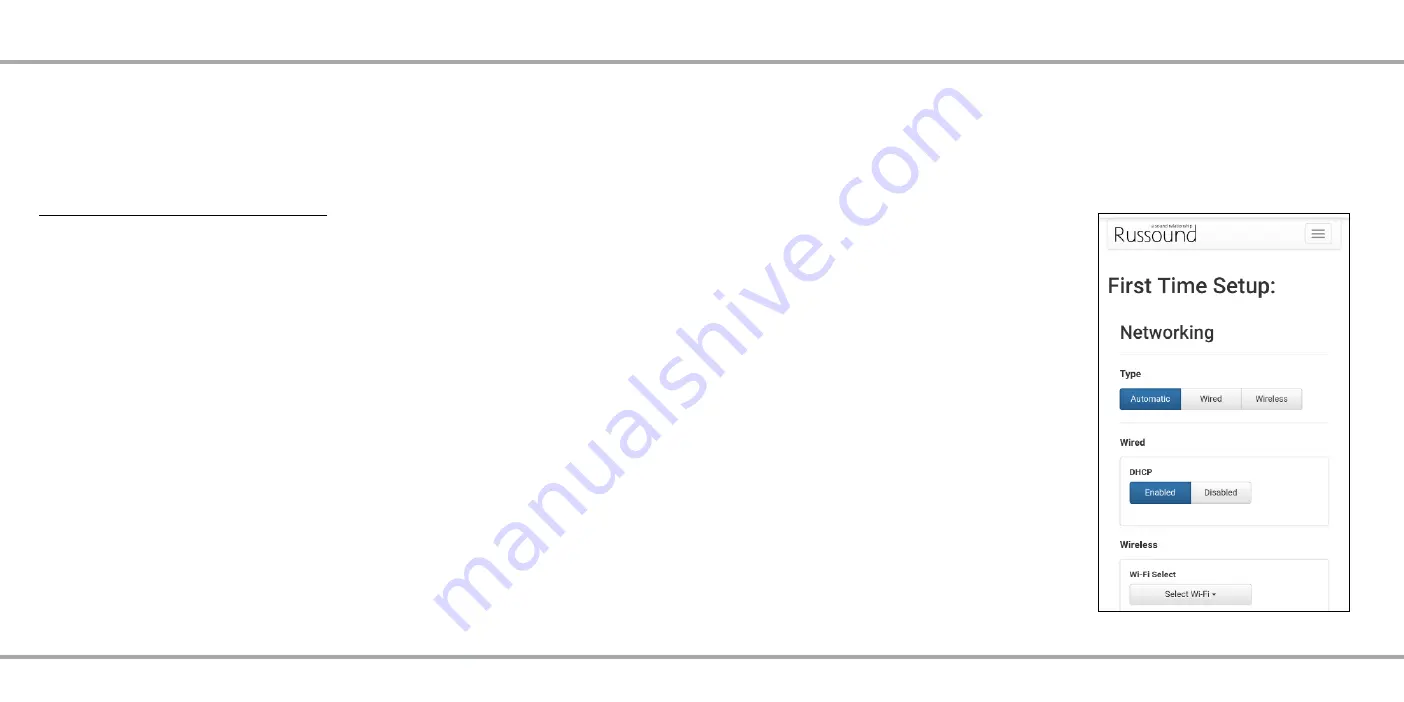
2. From a browser on your phone/tablet, navigate to
“http://192.168.255.249” to access the Web Config page
of your MBX-AMP. You can access the network settings
by navigating to Admin-Networking. It is recommended
to use “Automatic” as the Networking Type. Select the
Wi-Fi network you would like to connect to and enter the
appropriate password.
3. Select “Apply” to apply the new settings and the MBX-
AMP will reboot and attempt to connect to the Wi-Fi
network. The front panel LED of the MBX-AMP will turn
green when a successful connection has been made.
Option B4 (Configuring using a wired connection)
Connect the MBX-AMP to the network using a wired
connection and then use Web Config to access the MBX-
AMP settings and enter the appropriate network SSID
and password settings. These settings are accessed in the
Admin-Networking section.
4. After selecting the name, the next step is connecting to
Wi-Fi. Choose the Wi-Fi network you would like to connect
to, or enter the appropriate connection information
manually and follow the prompts to continue. The MBX-
AMP will attempt to connect to the selected network and
the front panel LED will turn green when the connection
is successful.
Option B2 (iOS devices only)
1. From an iOS device that is on the Wi-Fi network that
you would like to use with the MBX-AMP, go to Settings –
Wi-Fi – Set up new AirPlay speaker. The MBX-AMP will be
listed there as “MBX-AMP-XXXX” with XXXX being the last
4 digits of the MAC ID.
2. Select the MBX-AMP you want to configure.
3. Rename the MBX-AMP according to the room where it
is located. For example, "Kitchen".
4. Follow the prompts to connect to the appropriate Wi-Fi
network.
5. The MBX-AMP will attempt to connect to the selected
network and the front panel LED will turn green when the
connection is successful.
INSTALLATION
*During the setup process, the MBX-AMP will play a tone in order
to confirm that you are configuring the proper device. In order
for this tone to be heard, the MBX-AMP must be connected to
loudspeakers.
3. We suggest naming the MBX-AMP as that particular
room, such as “Kitchen”.