EN
6
* After the operation is completed, before maintenance and change of accessories (such
as sieves, knives) disconnect the mill from the power source.
* Check before starting that you have not left foreign bodies in the supply tanks or inside
the chassis.
* Before connecting to power supply make sure that the switch is in the "OFF - Closed"
position.
* All components must be assembled correctly and must meet all conditions that
guarantee the proper functioning of the mill.
* Check the alignment of moving parts, the stability of moving parts
Do not use the mill with the damaged switch. Replace defective switches.
Warning!
Use of other accessories than those recommended in this manual of instructions or by
the manufacturer may present a risk of personal injury.
* Repairs must be performed by qualified persons, otherwise they can lead to personal
injury.
Do not dispose of electrical, industrial electronic equipment and parts
of household waste! WEEE information. Considering the provisions of
GEO 195/2005 - regarding environmental protection and O.U.G. 5/2015.
Consumers will consider the following indications for the delivery of
electrical waste, specified below :
- Consumers are required not to dispose of waste electrical and electronic equipment
(WEEE) as unsorted municipal waste and to collect these WEEE separately
- The collection of these named waste (WEEE) will be carried out through the Public
Collection Service within the area of each country and through collection centers
Summary of Contents for GOSPODAR A1
Page 1: ...MOARA CU CIOCĂNELE A1 ...
Page 11: ...11 5 MONTAJUL Piese componente ...
Page 12: ...12 Se atașează maneta de reglare debit Se fixează cuva de alimentare ...
Page 13: ...13 Se montează protecția de refulare Se detașează capacul ...
Page 24: ...HU KALAPÁCSMALOM GOSPODAR A1 ...
Page 34: ...HU 11 Csatlakoztassa az áramlásbeállító kart A takarmánytölcsér rögzítése ...
Page 35: ...HU 12 Szerelje fel a kisülési védelmet Vegye le a fedelet ...
Page 42: ...BROYEUR A MARTEAUX ELECTRIQUE A1 ...
Page 52: ...11 5 ASSEMLBLAGE Pièces composantes ...
Page 53: ...12 Fixer la manette du réglage du débit Fixer la cuve d alimentation ...
Page 54: ...13 Monter la protection de refoulement Détacher le couvercle ...
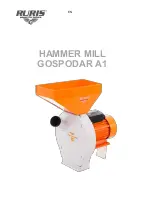
Page 65: ...EN HAMMER MILL GOSPODAR A1 ...
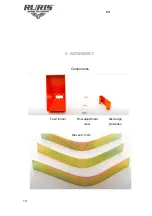
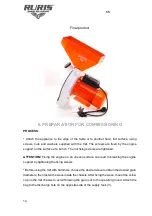
Page 75: ...EN 11 Attach the flow adjustment lever Secure the feed funnel ...
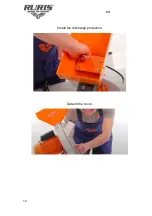
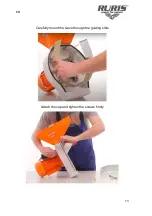
Page 76: ...EN 12 Install the discharge protection Detach the cover ...
Page 83: ...BG МЕЛНИЦА С ЧУКОВЕ GOSPODAR A1 ...

