background image

Controls and Functions

Crystal Series LCD Installation/Operation Manual

PRE

L

IMINAR

Y

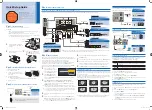
Figure 2-3. Model CX-47HD and CX-OPAL47 Inputs and Outputs


Summary of Contents for Crystal CX-42HD

Page 1: ...CX 42HD CX OPAL42 CX 47HD CX OPAL47 CX 55HD CX OPAL55 CX 65HD 1080p High Definition LCD Flat Panel Displays with INSTALLATION OPERATION MANUAL ...

Page 2: ......

Page 3: ...tive in material or workmanship during the warranty period Runco will repair the product replace the product with a similar new or like new product or refund a prorata share of the purchase price calculated based on the remainder of the warranty period and the then current MSRP2 of a similar product if repair or replacement of the product is determined by Runco to not be feasible Runco products ar...

Page 4: ...mage claims directly with the shipping company 5 The customer is responsible for providing a suitable box to ship the defective product to an authorized Runco repair depot Boxes may be purchased from a Runco technical support representative 6 The customer is responsible for paying freight charges to ship the defective product to an authorized Runco repair depot 7 Runco will pay freight charges to ...

Page 5: ...arranty does not cover black uniformity issues or other LCD issues associated with usage outside the Runco recommended guidelines and specifications for the product 7 Second day shipment delivery time and availability may vary based on origin and destination and Runco is unable to deliver to PO Box and FPO Box addresses Runco offers extended and expanded service plans For information on additional...

Page 6: ... you specific legal rights and you may have other rights which vary from locality to locality Some localities do not allow limitations on implied warranties and or do not allow the exclusion of incidental or consequential damages so the above limitations and exclusions may not apply to you Copyright 2009 Runco International LLC Runco This document contains proprietary information protected by copy...

Page 7: ...acles and the point where they exit from the apparatus 11 Only use the attachments accessories specified by Runco 12 Use only with a cart stand tripod bracket or table specified by the manufacturer or sold with the apparatus When a cart is used use caution when moving the cart apparatus to avoid injury from tip over 13 Unplug this apparatus during lightning storms or when unused for long periods o...

Page 8: ...nity test EN 61000 4 6 Electromagnetic compatibility EMC Part 4 Testing and measurement techniques Section 6 Conducted disturbances induced by radio frequency fields immunity test EN 61000 4 8 Electromagnetic compatibility EMC Part 4 Testing and measurement techniques Section 8 Conducted disturbances induced by power frequency magnetic fields immunity test EN 61000 4 11 Electromagnetic compatibili...

Page 9: ... Cet appareil numérique de la classe B est conforme à la norme NMB 003 du Canada Lamp s inside this product contain mercury This product may contain other electronic waste that can be hazardous if not disposed of properly Recycle or dispose in accordance with local state or federal Laws For more information contact the Electronic Industries Alliance at WWW EIAE ORG For lamp specific disposal infor...

Page 10: ...x Crystal Series LCD Installation Operation Manual P R E L I M I N A R Y Notes ...

Page 11: ...LCD at a Glance 5 Controls and Indicators 5 Crystal Series LCD Inputs and Outputs 8 Crystal Series LCD Remote Control 13 3 Installation 17 Remote Control 17 Battery Installation 17 Notes on Remote Control Operation 17 Quick Setup 18 Installation Considerations 19 Installing the Crystal Series LCD On a Table or In an Entertainment Center 19 Wall Mounting the Crystal Series LCD 19 Ambient Light 19 O...

Page 12: ...e PIP Size 48 Swapping the Main and PIP Images 48 5 Maintenance and Troubleshooting 49 Cleaning 49 Cleaning the Display Panel Body and Remote Control 49 Cleaning the Screen 49 Cleaning the Vents 49 Troubleshooting Tips 49 6 Serial Communications 51 RS 232 Connection and Port Configuration 51 Serial Command Syntax 51 Personalizing the Splash Screen Using Serial Commands 55 7 Specifications 57 Cryst...

Page 13: ...ital Audio Connection 24 3 8 External IR Receiver Connection 25 3 9 RS 232 Control System Connection 25 4 1 Crystal Series LCD OSD Menu Structure 30 4 2 Typical PLUGE Pattern for Adjusting Brightness 34 4 3 Typical Gray Bar Pattern for Adjusting Contrast 34 4 4 Typical Color Bar Pattern for Adjusting Color Saturation and Tint 35 4 5 Typical Test Pattern for Adjusting Sharpness 36 4 6 Crystal Serie...

Page 14: ...List of Figures xiv Crystal Series LCD Installation Operation Manual P R E L I M I N A R Y Notes ...

Page 15: ...s and other Runco product manuals on line at www Runco com If You Have Comments About This Manual Runco welcomes your comments about this manual Send them to info runco com Textual and Graphic Conventions Text Conventions The following conventions are used in this manual in order to clarify the information and instructions provided Remote control button identifiers are set in upper case bold type ...

Page 16: ...e or special significance They also provide supplemental information CAUTIONS alert users that a given action or omitted action can degrade performance or cause a malfunction WARNINGS appear when a given action or omitted action can result in damage to the equipment or possible non fatal injury to the user DANGER appears when a given action can cause severe injury or death Tip Note Caution WARNING...

Page 17: ...ffers 1920 x 1080 resolution and includes Runco s discrete aspect ratio control with VirtualWide mode to fill the 16 9 screen with standard 4 3 images without loss of picture quality Also included are discrete source aspect ratio and power selection and an RS 232 interface for whole house or automated control system integration The Crystal Series LCD is multimedia ready with simple computer connec...

Page 18: ... Stand Model CX 42HD part number 997 5876 00 Model CX OPAL42 part number 997 5877 00 Model CX 47HD part number 997 5906 00 Model CX OPAL47 part number 997 5907 00 Model CX 55HD part number 997 5908 00 Model CX OPAL55 part number 997 5909 00 Model CX 65HD part number 997 5582 00 Remote Control Unit and two 2 AAA size batteries AC Power Cord Crystal Series LCD Installation Operation Manual this docu...

Page 19: ... PC Audio In Speaker Out HDMI 4 HDMI 3 HDMI 2 HDMI 1 SPDIF Out IR In MENU EXIT COMPONENT 1 Video 1 Video 2 RS232 Video 2 S Video COMPONENT 2 COMP 1 Audio COMP 2 Audio Video 2 Audio L R L R L R L R Video 1 Audio L R 3 6 4 5 2 1 1 RGB HDMI 4 HDMI 3 HDMI 2 HDMI 1 SPDIF Out IR In PC Audio In Speaker Out L R COMPONENT 1 Video 1 Video 2 Video 2 S Video COMPONENT 2 COMP 1 Audio COMP 2 Audio Video 2 Audio...

Page 20: ...eive signals from the remote control unit The rear sensor is directly opposite the front sensor on the back of the unit It allows an IR bug to be attached to the rear of the panel eliminating the need to wrap the wire around the frame for a cleaner look COMPONENT 1 Video 1 Video 2 RS232 Video 2 S Video COMPONENT 2 COMP 1 Audio COMP 2 Audio Video 2 Audio L R L R L R L R Video 1 Audio SOURCE RGB PC ...

Page 21: ... Series LCD Remote Control on page 13 SOURCE To select a source press the SOURCE button repeatedly with no menus visible on screen Volume Use this button to increase the sound volume When a menu is visible on screen this button operates identically to the right arrow or ENTER button on the Crystal Series LCD remote control unit Volume Use this button to decrease the sound volume When a menu is vis...

Page 22: ...ation Operation Manual P R E L I M I N A R Y Crystal Series LCD Inputs and Outputs Figure 2 2 Figure 2 3 Figure 2 4 and Figure 2 5 show the locations of the Crystal Series LCD inputs and outputs Figure 2 2 Model CX 42HD and CX OPAL42 Inputs and Outputs ...

Page 23: ...Controls and Functions Crystal Series LCD Installation Operation Manual 9 P R E L I M I N A R Y Figure 2 3 Model CX 47HD and CX OPAL47 Inputs and Outputs ...

Page 24: ...Controls and Functions 10 Crystal Series LCD Installation Operation Manual P R E L I M I N A R Y Figure 2 4 Model CX 55HD and CX OPAL55 Inputs and Outputs ...

Page 25: ...Controls and Functions Crystal Series LCD Installation Operation Manual 11 P R E L I M I N A R Y Figure 2 5 Model CX 65HD Inputs and Outputs ...

Page 26: ...eo Stereo Audio Standard or high definition up to 1080p YPrPb component video and stereo audio input Also provides RGB input for RGBS sources 6 COMPONENT 2 Component Video Stereo Audio Standard or high definition up to 1080p YPrPb component video and stereo audio input 7 IR IN Wired input from a Niles or Xantech compatible infrared IR repeater system 8 DIGITAL AUDIO OUT S PDIF Optical Connect this...

Page 27: ...d the paragraphs that follow describe its functionality Figure 2 6 Crystal Series LCD Remote Control RGB 16 9 4 3 LETTER V WIDE TIMER OFF VOL VOL ENTER MENU CUSTOM PIP 1 2 3 4 5 6 7 8 9 100 0 MUTE POSITION SIZE SWAP HDMI 1 HDMI 2 HDMI 3 HDMI 4 COMP 1 COMP 2 VID 1 VID 2 BRIGHT CONTR PIP SRC AUDIO 1 AUDIO 2 AUDIO 3 I S F D A Y I S F N I G H T E X I T I N F O 1 4 6 12 14 3 11 13 15 5 7 2 9 8 10 ...

Page 28: ...o select a Composite or S Video input 5 BRIGHT BRIGHT Use these buttons to adjust the brightness 6 Numeric Buttons MUTE Button Use the numeric buttons to enter menu pass codes Press the MUTE button to mute the audio output to the speakers 7 CONTR CONTR Use these buttons to adjust the contrast 8 Memory Preset Buttons ISF DAY Press to recall settings for the current input from the ISF Day memory pre...

Page 29: ... center of the screen LETTER Letterbox Cinema Fill Image in letterbox format is enlarged to fit 16 9 full screen display and the upper lower portions are blanked off V WIDE VirtualWide 4 3 image is enlarged NON linearly in horizontal direction to fit 16 9 full screen display 13 Picture In Picture PIP Function Buttons PIP Press to change the PIP mode picture in picture picture by picture or off POS...

Page 30: ...Controls and Functions 16 Crystal Series LCD Installation Operation Manual P R E L I M I N A R Y Notes ...

Page 31: ...scent lamp If that occurs move the LCD display away from the fluorescent lamp Make sure that there is nothing obstructing the infrared beam between the remote control and the IR receiver on the LCD display If the effective range of the remote control decreases or it stops working replace the batteries with new ones Ambient conditions may possibly impede the operation of the remote control If this ...

Page 32: ...ble 3 1 Installation Overview Step Procedure For Details refer to page 1 Mount the Crystal Series LCD on a wall optional 19 2 Connect signal sources to the Crystal Series LCD 19 3 Connect external controller to RS 232 port optional 25 4 Apply power to the Crystal Series LCD 27 5 Change the OSD language 27 6 If using the Crystal Series LCD with a PC adjust PC display properties 28 7 Display calibra...

Page 33: ...ight falls on the image Images may then appear washed out and less vibrant Other Considerations Other considerations and tips that can help improve your installation Keep the ambient temperature constant and below 35 C 95 F Keep the display away from heating and or air conditioning vents Changes in temperature may cause drifts in the display circuitry which may affect performance Keep the Crystal ...

Page 34: ...s the highest video quality because the signal is carried in the digital domain throughout the entire signal path from source component output into the display This Crystal Series LCD supports the VESA Display Data Channel DDC standard This standard provides Plug and Play capability the display and a VESA DDC compatible computer communicate their setting requirements allowing for quick and easy se...

Page 35: ...an those listed may cause some functions not to work 2 Some Macintosh computers may require a Macintosh video adapter Contact your nearest authorized service center or dealer 3 This Crystal Series LCD may not be able to display images from notebook computers in simultaneous CRT LCD mode Should this occur switch the notebook computer to CRT only mode If you are unsure how to do this refer to your n...

Page 36: ...eries LCD has two 2 Composite video inputs and an S Video input for connecting a VCR camcorder laser disc player or DVD player see Figure 3 4 Figure 3 4 Composite and S Video Connections If you connect an S Video source to the Video 2 input the Composite input on Video 2 is inactive COMPONENT 1 Video Video Video 2 S Video COMPONENT 2 COMP 1 Audio COMP 2 Audio L R L R RGB DVD DTV STB Audio Cable Vi...

Page 37: ...R L terminals see Figure 3 6 Maintain the correct polarity For more information refer to the owner s manual for your speakers Figure 3 6 External Speaker Connection You must enable SCART connectivity in the Setup menu to use SCART sources refer to SCART on page 41 Note COMPONENT 1 Video 1 Video 2 Video 2 S Video COMPONENT 2 COMP 1 Audio COMP 2 Audio Video 2 Aud L L L R L R Video 1 Aud Gaming Conso...

Page 38: ... or receiver connect the SPDIF digital audio output from the Crystal Series LCD to the digital audio input of the amplifier receiver as shown in Figure 3 7 Figure 3 7 Digital Audio Connection The audio output level is fixed The volume and mute controls affect only the speaker outputs Note r Out HDMI 2 HDMI 1 SPDIF Out IR In R Digital Audio Cable Optical Dolby Digital Amplifier ...

Page 39: ... a PC or home theater control automation system if present to the RS 232 port on the Crystal Series LCD see Figure 3 9 For more information about using this connection refer to Serial Communications on page 51 Figure 3 9 RS 232 Control System Connection PC Audio In Speaker Out SPDI IR In L R RGB 16 9 4 3 LETT ER V WIDE TIME R OFF VOL VOL EN TER ME NU CUS TOM PIP 1 2 3 4 5 6 7 8 9 100 0 MUT E POSI ...

Page 40: ...Installation 26 Crystal Series LCD Installation Operation Manual P R E L I M I N A R Y Notes ...

Page 41: ...ystal Series LCD is in standby mode 5 Press the ON button on the remote control to turn on the display or press the power button on the side of the display The power indicator turns off 6 After a brief warm up period approximately 10 seconds the Crystal Series LCD will display an image 4 2 Changing the OSD Language The Crystal Series LCD OSD language is initially set to English but can also displa...

Page 42: ...uter you may need to adjust the display properties of your PC video card To do this 1 Choose Settings from the Windows Start menu and click on Control Panel 2 Double click on the Display icon 3 Click the Settings tab on the display dialog box 4 Set the Screen area to 1400x1050 pixels 5 Click the Advanced button and click the Monitor tab on the dialog box Set the Refresh Frequency to 60Hz and click...

Page 43: ...ting you want to change Then press ENTER or the right arrow button 5 Press the right or left arrow button to change that setting 6 To return to the previous menu press MENU or The Crystal Series LCD OSD menus are arranged hierarchically as shown in Figure 4 1 Depending on the selected input source and or signal characteristics some menu options may not be available 1 The maximum available resoluti...

Page 44: ...R 0 1 2 3 5 MPEG NR 0 1 2 3 63 Backlight 0 1 2 3 100 Color Temp 5400 6500 8500 or Custom Gamma 2 0 2 2 or 2 4 Save Settings Custom ISF Day ISF Night Restore Settings Custom ISF Day ISF Night White Balance R G B Gain 128 129 256 383 384 R G B Offset 50 49 0 49 50 CMS Hue Red Yellow Green Cyan Blue Magenta 0 1 2 3 100 CMS Saturation CMS Luminance Blue Enable Enable Disable Factory Reset No Yes Splas...

Page 45: ... Ratio To change the aspect ratio size and shape of the projected image select Aspect Ratio from the Main Menu and press ENTER Select the appropriate aspect ratio for the type of program material being viewed refer to Table 4 1 The currently selected aspect ratio is indicated by an arrow to its left in this example 16 9 is selected Runco CX 65HD Source Aspect Ratio Picture Adjust Audio Timer Setup...

Page 46: ... programming and most VHS video cassettes Letterbox Cinema Fill LETTER Letterbox mode scales zooms in on a 4 3 image linearly by the same amount on all sides to fill a 16 9 display The zoom factor is either 1 33 or 1 78 depending on the Letterbox Mode setting refer to Letterbox Mode on page 40 Letterbox is best suited for viewing LaserDisc movies or non anamorphic DVDs on a 16 9 screen 4 3 Image s...

Page 47: ...ternal test pattern source Ovation Multimedia Digital Video Essentials or AVIA test DVD or equivalent A blue filter provided with many test DVDs for color level and tint adjustments Connect your test pattern source to the input that you are calibrating and proceed as follows Perform the adjustments in the order listed here Brightness On your external test pattern source select a PLUGE pattern PLUG...

Page 48: ...tness so that The darkest black bars disappear into the background The dark gray areas are barely visible The lighter gray areas are clearly visible The white areas are a comfortable level of true white The image contains only black gray and white no color Contrast On your external test pattern source select a stepped gray bar pattern like the one shown in Figure 4 3 Figure 4 3 Typical Gray Bar Pa...

Page 49: ...e shade of blue Tint Tint or hue is essentially the ratio of red to green in the color portion of the image When tint is decreased the image appears redder when it is increased the image appears greener To set the tint select Tint from the Picture Adjust menu While looking at the color bar pattern through a blue filter adjust the tint level until the cyan and magenta color bars on either side of t...

Page 50: ...sy RGB images such as those from a PC Adjust as desired using the left or right arrow buttons keeping in mind that reducing noise which reduces high frequencies may also soften the image MPEG NR Use the MPEG Filter to reduce or eliminate so called mosquito noise in MPEG compressed video signals digital broadcasts or DVDs Adjust as needed to minimize distortion around the edges of moving objects mo...

Page 51: ... in between values utilized in other grays Unlike brightness and contrast controls Gamma allows you to lighten or darken the overall tone of your images without changing the extremes All images will be more vibrant while still showing good detail in dark areas The default Gamma setting of 2 2 is appropriate for most typical home theater environments Save Settings The Crystal Series LCD lets you sa...

Page 52: ...other audio mode press ENTER to store your settings and repeat Steps 1 through 4 6 Press MENU or EXIT when you have finished configuring audio modes Speaker To disable the speakers select Speaker from the Audio menu set it to Off and press ENTER The effect is similar to using the MUTE button except that the Crystal Series LCD remembers this setting if you turn off the display then turn it back on ...

Page 53: ...cute Auto Adjust on command select Auto Adjust and press ENTER Clock Use the up or down arrow buttons to highlight Clock Then use the right arrow button to increase the pixel clock rate use the left arrow button to decrease it Phase Adjust the phase if the image shows shimmer or horizontal noise Pixel phase adjusts the phase of the pixel sampling clock relative to the incoming signal The effect of...

Page 54: ...he HDMI inputs with a PC or other device that does not support audio output via HDMI set HDMI Audio Input to Stereo for that input Also connect the audio output from your source as shown in Figure 3 1 This setting associates the PC AUDIO IN input with that HDMI input If the source does support audio output via HDMI set this option to HDMI to route the HDMI digital audio signal to the speakers and ...

Page 55: ...ip over them saving time The PIP input select function using the PIP SRC button on the remote control unit is similarly affected HDMI 1 HDMI 2 HDMI 3 HDMI 4 Enables or disables an HDMI source Component 1 Component 2 Enables or disables the Component 1 or Component 2 source RGB Enables or disables the RGB source Video 1 Video 2 Enables or disables the a video source LED Option Select LED Option fro...

Page 56: ...select Color Temp from the Picture Adjust menu and press ENTER Color temperature defines the color of gray The choices are 5400K 6500K 8500K and Custom The default setting 6500K is appropriate for most situations Higher settings produce a bluer picture lower ones impart a reddish hue to the image Each color temperature setting has six 6 white balance parameters associated with it two each for red ...

Page 57: ...he gray areas contain traces of red green or blue decrease the Offset for that color CMS Hue CMS Saturation CMS Luminance Use the Color Management System CMS controls to customize the stored color space characteristics To do this select CMS Hue CMS Saturation or CMS Luminance from the ISF Calibration menu Then use the or button to select a component color Red Yellow Green Cyan Blue or Magenta and ...

Page 58: ...ue Enable removes all red and green color information from the image simulating a blue filter You can use it instead of a blue filter when performing color and tint adjustments Factory Reset To reset all Crystal Series LCD settings to their factory defaults select Factory Reset from the ISF Calibration menu and press ENTER To confirm the reset press or to highlight Yes and press ENTER again This c...

Page 59: ...after power up see Figure 4 6 To prevent this screen from appearing set the Splash Duration to 0 Figure 4 6 Crystal Series LCD Splash Screen You can personalize the splash screen with the customer name Runco dealer name or any other string Refer to Personalizing the Splash Screen Using Serial Commands on page 55 for instructions CALIBRATED FOR Runco Customer By Runco Dealer CUSTOM BUILT BY Note ...

Page 60: ...5 Using Picture In Picture PIP To use PIP press the PIP button The PIP window appears inside the main image window Press PIP again to switch to side by side PIP mode Press PIP again to turn PIP off 16 9 4 3 LETTER V WIDE PIP POSITION SIZE SWAP PIP SRC AUDIO 1 AUDIO 2 AUDIO 3 2 Press the ...

Page 61: ...nd PIP Source Combinations PIP Input Source VIDEO 1 VIDEO 2 COMP 1 SCART COMP 2 RGB HDMI 1 HDMI 2 HDMI 3 HDMI 4 Main Input Source VIDEO 1 VIDEO 2 COMP 1 SCART COMP 2 RGB HDMI 1 HDMI 2 HDMI 3 HDMI 4 Notes 1 means that that source is available as a PIP source when that input is selected means that it is not 2 The Crystal Series LCD cannot display the same source in both the main and PIP windows nor ...

Page 62: ...e SIZE button on the remote control repeatedly to achieve the desired window size Swapping the Main and PIP Images To swap the main and PIP images press the SWAP button on the remote control 16 9 4 3 LETTER V WIDE PIP POSITION SIZE SWAP PIP SRC AUDIO 1 AUDIO 2 AUDIO 3 16 9 4 3 LETTER V WIDE PIP POSITION SIZE SWAP PIP SRC AUDIO 1 AUDIO 2 AUDIO 3 ...

Page 63: ... a malfunction Cleaning the Vents As a general rule use a vacuum cleaner about once a month to clean the vents on the rear panel of the display of dust buildup set the vacuum cleaner to its weakest setting when doing this If not removed accumulated dust can cause the internal temperature to increase resulting in possible breakdown or fire 5 2 Troubleshooting Tips Table 5 1 provides some general gu...

Page 64: ...age appears washed out and or dark areas appear too bright Brightness is set too high Lower the brightness setting Colors in the image are swapped for example reds appear blue or vice versa The Red Pr Green Y or Blue Pb outputs from the source are connected to the wrong inputs on the Crystal Series LCD Ensure that the source outputs are connected to the correct Crystal Series LCD input RGB HD imag...

Page 65: ...terminal emulation software create a text file containing that command Then use the file transfer function in your terminal emulation program to send the command If you are using HyperTerminal choose Send Text File from the Transfer menu When you send a valid command the Crystal Series LCD executes it and acknowledges it with a right bracket character followed by the four digit numeric code you se...

Page 66: ...etterbox 3 16 9 Example S4E0002 selects Letterbox S4G 000 PIP Input selection 1 Video 1 2 Video 2 3 Component 1 SCART 4 Component 2 5 HDMI 3 6 RGB 7 HDMI 4 8 HDMI 1 9 HDMI 2 Example S4G0003 selects PIP Component 1 or SCART 4G Select next PIP AV input SAB 000 Power on off control 0 standby 1 on Example SAB0001 turns unit on SDA 000 Set PIP mode 0 OFF 1 PIP 2 PBP Example SDA0002 selects PBP SDB 000 ...

Page 67: ...oing so via serial commands These commands provide active OSD responses just like the IR remote Each command begins with key followed by the four digit number of the button No carriage return is necessary The response you receive from the unit if the command is valid will be a right bracket followed by the four digit numeric code you sent For example the ON com mand is key0015 the response will be...

Page 68: ...key 0040 16 9 0043 4 3 0039 LETTERBOX 0126 VIRTUALWIDE key 0007 Right Arrow key 0016 Down Arrow key 0018 Up Arrow key 0011 Left Arrow key 0046 ENTER key 0026 MENU key 0100 EXIT key 0036 PIP SRC 0047 PIP SIZE 0034 PIP POSITION 0032 PIP 0037 TIMER OFF 0033 SWAP key 0091 MUTE 0055 INFO 0084 AUDIO 1 0085 AUDIO 2 0086 AUDIO 3 key 0087 BRIGHT Table 6 1 Serial Commands continued Command Description ...

Page 69: ...containing that command Then use the file transfer function in your terminal emulation program to send the command If you are using HyperTerminal choose Send Text File from the Transfer menu When you do the Crystal Series LCD echoes the string back to the control system or PC enclosed in quotes for example Runco Customer If it doesn t verify that you sent the command correctly To see the changes t...

Page 70: ...Serial Communications 56 Crystal Series LCD Installation Operation Manual P R E L I M I N A R Y Notes ...

Page 71: ...i 1080p ISF Settings Yes Contrast Ratio CX 42HD CX OPAL42 4000 1 CX 47HD CX OPAL47 4000 1 CX 55HD CX OPAL55 5000 1 CX 65HD 2000 1 Data Graphics Compatibility Refer to Table 7 2 Response Time typical 4 5 milliseconds Vivix Processing 3 2 or 2 2 pull down Video Audio Inputs Multiple input combinations with up to 2 Composite Video 1 S Video 2 Component Video 4 HDMI 1 3a w HDCP 1 RGB 15 pin D sub 5 An...

Page 72: ...densing Altitude 9 842 feet 3 000 meters Dimensions CX 42HD CX OPAL42 see Figure 7 1 and Figure 7 2 CX 47HD CX OPAL47 see Figure 7 3 and Figure 7 4 CX 55HD CX OPAL55 see Figure 7 5 and Figure 7 6 CX 65HD see Figure 7 7 and Figure 7 8 Weight including stand CX 42HD CX OPAL42 77 2 lbs 35 00 kg CX 47HD CX OPAL47 99 2 lbs 45 00 kg CX 55HD CX OPAL55 132 3 lbs 60 00 kg CX 65HD 220 5 lbs 100 00 kg Regula...

Page 73: ...R Y 7 2 Crystal Series LCD Dimensions All dimensions given here are in millimeters CX 42HD CX OPAL42 Dimensions Figure 7 1 and Figure 7 2 show the CX 42HD and CX OPAL42 dimensions Figure 7 1 CX 42HD CX OPAL42 Dimensions Top Front 77 0 17 32 176 IRU VHFXULQJ VWDQG WR LQVWDOODWLRQ VXUIDFH ...

Page 74: ...Specifications 60 Crystal Series LCD Installation Operation Manual P R E L I M I N A R Y Figure 7 2 CX 42HD CX OPAL42 Dimensions Rear Side ...

Page 75: ... Operation Manual 61 P R E L I M I N A R Y CX 47HD CX OPAL47 Dimensions Figure 7 3 and Figure 7 4 show the CX 47HD and CX OPAL47 dimensions Figure 7 3 CX 47HD CX OPAL47 Dimensions Top Front 77 0 17 32 176 IRU VHFXULQJ VWDQG WR LQVWDOODWLRQ VXUIDFH ...

Page 76: ...Specifications 62 Crystal Series LCD Installation Operation Manual P R E L I M I N A R Y Figure 7 4 CX 47HD CX OPAL47 Dimensions Rear Side ...

Page 77: ...ystal Series LCD Installation Operation Manual 63 P R E L I M I N A R Y CX 55HD CX OPAL55 Dimensions Figure 7 5 and Figure 7 6 show the CX 55HD and CX OPAL55 dimensions Figure 7 5 CX 55HD CX OPAL55 Dimensions Top Front ...

Page 78: ...Specifications 64 Crystal Series LCD Installation Operation Manual P R E L I M I N A R Y Figure 7 6 CX 55HD CX OPAL55 Dimensions Rear Side 0 ...

Page 79: ...ion Operation Manual 65 P R E L I M I N A R Y CX 65HD Dimensions Figure 7 7 and Figure 7 8 show the CX 65HD dimensions Figure 7 7 CX 65HD Overall Dimensions Top Front 1564 3 558 118 939 4 61 803 52 1428 48 65 4 65 4 Active area Active area 919 4 ...

Page 80: ...Manual P R E L I M I N A R Y Figure 7 8 CX 65HD Overall Dimensions Rear Side 310 82 6 66 166 8 400 440 180 180 100 3 6 6 ø 3 5 Ventilative hole dimension Ventilative hole dimension 4 4 ø 2 12 6 12 6 ø 3 5 Ventilative hole dimension ø 8 Mounting hole dimension 8x ...

Page 81: ...75 00 37 500 31 500 85 00 43 269 36 000 800x600 800x600 60 00 37 879 40 000 72 00 48 077 50 000 75 00 46 875 49 500 85 00 53 674 56 250 1024x768 1024x768 60 00 48 363 65 000 70 00 56 476 75 000 75 00 60 023 78 750 85 00 68 677 94 500 1152x864 1152x864 75 00 67 500 108 000 1280x768 1280x768 60 00 47 400 68 250 60 00 47 776 79 500 75 00 60 289 102 250 85 00 68 633 117 500 1280x960 1280x960 60 00 60 ...

Page 82: ...25 00 28 125 74 250 1080 30i 1920x1080 30 00 33 749 74 250 1080 60i 1920x1080 60 00 67 500 148 500 1080 24p 1920x1080 24 00 26 990 74 250 1080 25p 1920x1080 25 00 28 200 74 250 1080 30p 1920x1080 30 00 33 750 74 250 1080 60p 1920x1080 59 94 67 500 148 350 NTSC 3 58 59 94 15 734 3 580 NTSC 4 43 59 94 15 734 4 430 PAL 702x574 50 00 15 625 13 500 SECAM 50 00 15 625 13 500 Table 7 2 Supported Signal T...

Page 83: ......

Page 84: ...Runco International 800 23RUNCO Fax 503 748 8161 www runco com 020 0969 01 Rev A August 2009 ...

Reviews: