RG-AP630(CD) Wireless Access Point
Quick Installation Guide
7
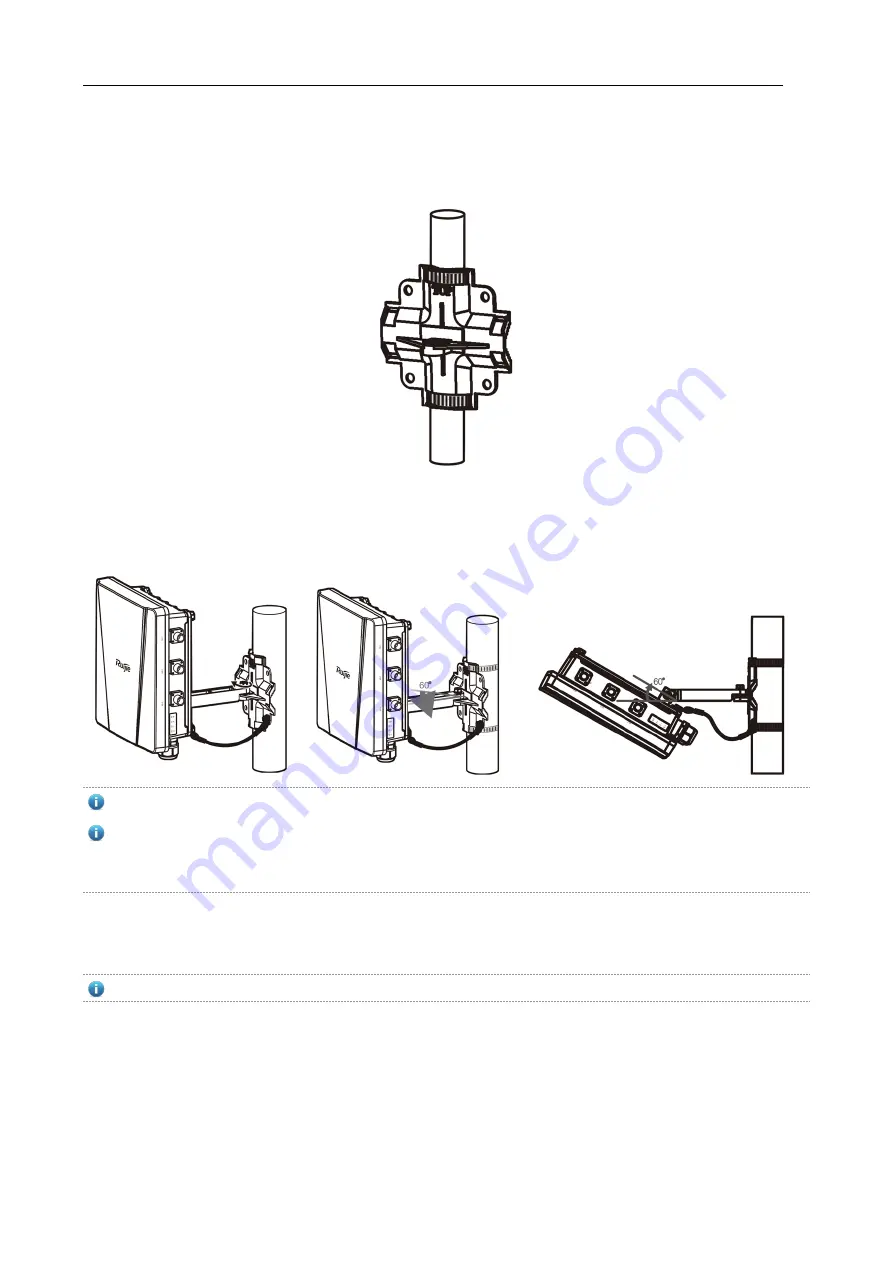
Mounting the AP to the Pole
Attach the mounting bracket to a pole with a hose clamp.
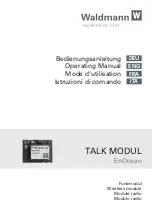
Attach the mounting plate to the mounting bracket through the rod with the M8x40 screws, adjust AP orientation, and
tighten the screws on the rod with the Phillips screwdriver (or the wrench). Finally, connect Loop B of the security cable to
the bracket by fastening the screw attached to Loop B
Horizontal pole mount is also supported. The procedure of horizontal pole mount is similar as that of vertical mount.
The outdoor AP can be mounted on a wall and a pole (diameter: 75 mm to 120 mm). If the diameter of the pole is out
of the range, the hose clamp is customer-supplied. In this case, we strongly recommend you to use a 304 stainless
steel hose clamp with thickness of 2.5mm at least.
8
Mounting the AP on the Wall
Attach the mounting bracket to the wall with user-supplied expansion screws. M8 x 60 screws are recommended.
Mark the locations of the four screw holes by using the marker. Drill four 8 mm diameter holes. Tap expansion anchors
into the holes, and drive three screws through the mounting bracket into the anchors to fix the bracket.


