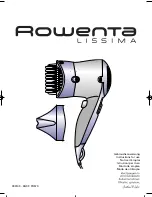
LISSIMA is a new Professional Hair straightener, specially designed to straighten and style all types of
hair (long or shoulder-length, wavy or very curly): you will be able to blow your hair dry quicker and
easier than with a traditional dryer. A LISSIMA dryer is held in one hand and will ensure a perfectly
smooth style at the front and the back of your head.
Used with its slim concentrator nozzle attachment, LISSIMA also functions as a classic hair dryer.
To obtain the best results with your LISSIMA dryer, read the instructions and safety precautions
carefully before using.
2. SAFETY RECOMMENDATIONS
- Ensure that the voltage of your electrical installation corresponds to that of your appliance. Incorrect connection
may cause irreversible damage which will not be covered by the guarantee.
- Don’t use your appliance and contact a service Centre if:
- your appliance is dropped
- if it doesn’t work normally
- Never use the dryer with wet hands or near water in a bath, washbasin or any other recipient.
- If the hair dryer is used in a bathroom, disconnect after use since water can present a danger even when the hair
dryer is not being used.
- The dryer must be disconnected:
- before cleaning and maintenance.
- in the event of a malfunction
- as soon as you have finished using it
- if you have to leave it unattended, even for a few moments.
- To ensure additional protection, we recommend that you have a differential residual circuit breaker installed, with
an operating differential of no more than 30 mA. Contact your installer for advice.
- If the power cable is damaged, it must be replaced by the manufacturer, its after-sales service or a person with
similar qualifications to avoid any danger.
- If the power cable is damaged, it must be replaced by the manufacturer, its after-sales service or a person with
similar qualifications to avoid any danger.
- The dryer is equipped with a heat-sensitive safety device. In the event of overheating (for example if the rear grill
is blocked), the dryer will stop automatically: contact the After-Sales Service.
GUARANTEE
This appliance has been designed for a domestic use only. It can not be used in any professional apllication.
The guarantee becomes null and void in case of incorrect use.
3. RECOMMENDATIONS FOR USE
FITTING AND REMOVING ATTACHMENTS:
Place the attachment (STRAIGHTENER or CONCENTRATOR) onto the dryer, with the notch at the top (Fig. 1). Push
gently until the attachment clicks into place (Fig.2).
To remove:
press on the buttons (Fig.3) to remove the attachment.
SPEEDS:
LISSIMA has 2 heat/speed settings†(Fig.4):
- Level "
1
" : average airflow and heat to style your hair (ideal for a perfectly smooth
result).
- Level "
2
" : faster airflow, ideal for drying your hair fast.
GB
1
2
3
4
NOT lissima Row 030140 31/07/03 12:39 Page 10


