15
English
Note: Using QUEUE feature: A short press on SELECT for any song or
album will start that selection playing. You can also create a custom
QUEUE to create a song mix by holding the SELECT button for 5 seconds.
The selected track(s) will be added to the QUEUE and will be played
in the order selected. Push QUEUE button to call up tracks waiting to
be played. A 5 second push on the STOP button will remove specific
songs from the QUEUE.
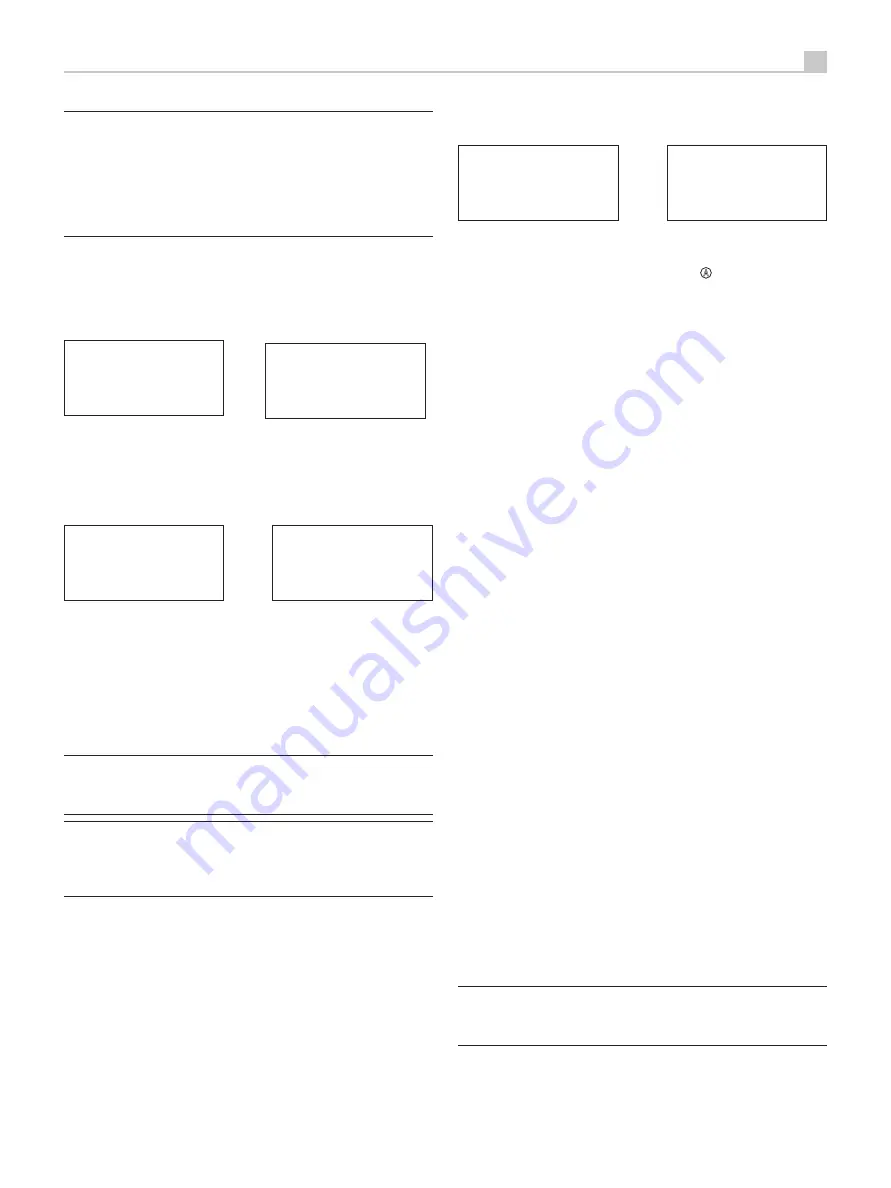
Clear Queue
You can clear QUEUE by pressing the QUEUE button and selecting
[Clear Queue] or by going into QUEUE menu from the Media Player
submenu.
UPnP Server
Playback Mode
< Queue >
< [Clear Queue] >
You can also delete individual tracks in QUEUE by selecting the track
and press STOP for 5 seconds.
Playback Mode
UPnP Server
< Playback Mode >
Queue
< Repeat *>
Shuffle
Use NEXT, PREV, keys to select ‘Media Player’ -->‘Playback Mode’, there
are 2 sub-menu, “Repeat” and “Shuffle”. Select either Repeat, Shuffle or
both. A mark will indicate the selection made.
REPEAT: Tracks are played one after another and will start from the first
track again when the last track is finished.
SHUFFLE:Play tracks in random.
Note: If both REPEAT and SHUFFLE are on, The unit will first play the
list in random, after all tracks are played one time, it will continue to
play the list in random until STOP is pressed.
Note: Using shuffle feature with large music libraries may not be
possible or may take an excessively long time. We recommend that
you create shorter playlists in Windows Media Player and then shuffle
these.
iPod/USB Connection Quick Start
<< iPod/USB >>
001/009
00:01:41
123.MP3
> 01_Folder
music-files-002. wav
music-files-003. mp3
music-files-004. aac
USB Storage Device Connection
1. Plug your USB storage device containing music files, or through a
USB adaptor into the front panel’s USB socket
A
.
2. Press USB button on the front panel to enter iPod/USB mode. The
unit will automatically search music file from root directory. Once the
directory is found, the unit will start playing. The display shows song’s
information, such as name, time, tracks.:
3. If your music files are in sub directories, turn the knob to display all
directories. Turn and press the knob to enter the desired directory. Then
look for the desired music files turning and pressing the knob.
4. Press BACK button to return to the previous menu and select another
directory.
iPod/iPhone Connection
1. Apple’s iPod/iPhone can be connected via the iPod’s USB cable to
the USB front socket.
2. The iPod/iPhone will send a digital music signal to the unit. All
operations can be made from the iPod/iPhone. Only simple commands
can be made through the Rotel unit as explained below.
3. The iPod/iPhone screen will remain active while connected to the
unit. If no operations are made from the iPod/iPhone for an extended
period, the screen will turn to “charging”.
PlayBack Control Buttons
9
1. Use the PLAY
/
button to start playback.
2. Use the STOP
.
button to stop playback.
3. Use the PLAY
/
/PAUSE
,
button to either pause a currently playing
track or to restart a currently paused track or to restart a stopped track.
4. Use the BACK TRACK buttons
{
to start playback of the previous
track in the queue.
4. Use the FORWARD TRACK button
}
to start playback of the next
track in the queue.
5. Push and hold the STOP
.
button for 5 seconds to safely remove
the USB device from the unit.
Note: The Rotel unit will operate with iPhone 3GS, iPhone 3G, iPod
Classic, iPod touch 2G, iPod Nano 2G, iPod Nano 3G, iPod Nano
4G, and iPod Nano 5G.


