


3–2 • User Interface Overview
PIVOTCam Control Panel User Guide (1.2)
Figure 3.3
- Camera Configuration Interface
The camera configuration interface includes the following sets of controls:
• “
• “
• “
• “
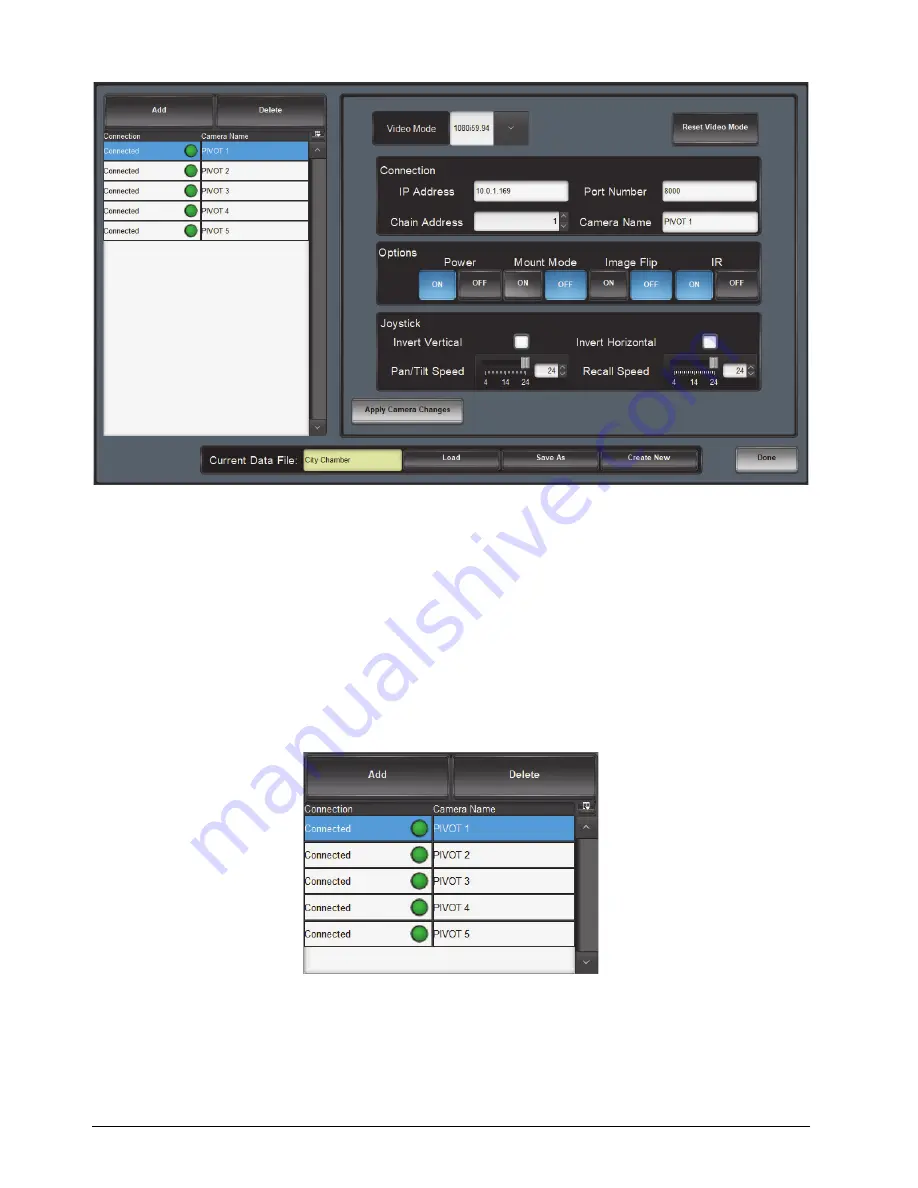
Camera List
The camera list (
) enables you to add and delete cameras.
Changes you make in the camera list are applied immediately.
Figure 3.4
- Camera List
The camera list includes the following controls:
•
Add
button — adds a new camera entry to the camera list.
•
Delete
button — deletes the selected camera from the list.


