


45
© ROPOX 2014
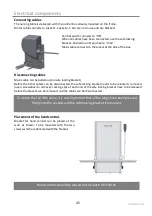
Electrical components
Connecting cables
The nursing table is delivered with the control box already mounted on the frame.
Motor cable connects to socket 1. Socket 2, 3 & 4 are not in use and are blocked.
Control switch connects to ”HB”.
When all cables have been connected, use the safe locking
bracket. Pushed in until you hear a “click”.
Mains cable connects to the socket at the side of the box.
Disconnecting cables
Mains cable can be pulled out (no safe locking bracket).
Before the other cables can be disconnected, the safe locking bracket needs to be released / removed
(
use a screwdriver to remove
). Locking clips at each end of the safe locking bracket have to be released
before the bracket can be removed, and the cables can be disconnected.
Placement of the handcontrol.
Bracket for hand control can be placed at the
wall as shown. To be mounted with the two
screws which are delivered with the bracket.
To obtain the full IPX6 value, it is very important that all the plugs have been pressed
firmly into the sockets and the safe locking bracket is mounted.
Hand control should be placed out of reach of children
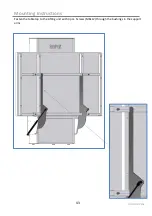
Summary of Contents for Vario 40-306 Series
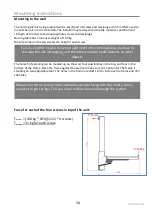
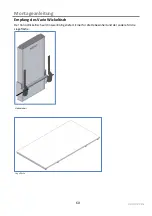
Page 13: ...13 ROPOX 2014 Montageanvisning Monter l fteenheden til v ggen med skruer i top og bund...
Page 14: ...14 ROPOX 2014 Montageanvisning Skyd frontpladen tilbage i l fteenheden...
Page 15: ...15 ROPOX 2014 Montageanvisning Monter afd kningspladen p toppen af l fteenheden...
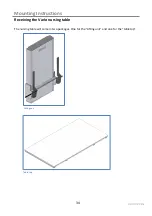
Page 40: ...40 ROPOX 2014 Mounting Instructions Slide the front plate back into the Lifting unit...
Page 41: ...41 ROPOX 2014 Mounting Instructions Mount the cover plate on the top of the lifting...
Page 66: ...66 ROPOX 2014 Montageanleitung Die Frontplatte in der Hebeeinheit schieben...
Page 67: ...67 ROPOX 2014 Montageanleitung Die Abdeckplatte oben auf die Hebeneinheit monteren...


