


33
© ROPOX 2014
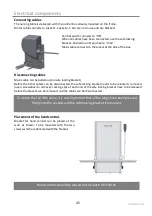
Recommendations in use
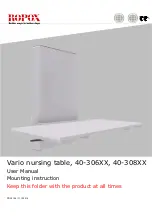
Recommendations in the use of the height adjustable nursing table
The height adjustable nursing table helps the caretaker to obtain the most optimal working height.
Height adjustment allows you to customize the working height to the individual carer, and can also
save unnecessary lifting.
To ensure optimum utilization of the nursing tables features and avoid accidents, it is
important to observe some basic safety procedures
•
NEVER leave a person on the nursing table unattended - not even for a very
short period.
•
The nursing table must be operated by adults. The nursing table is a working
tool and not a toy.
•
Only height adjust nursing table when tabletop is folded down in horizontal
position.
•
Pay particular attention to other people in the room when using the nursing
table. Make sure that no children are playing under or with the table. The
nursing table is not a playground.
•
Keep the hand control out of the reach of children. Make sure that they cannot
operate the table unattended. A bracket for wall mounting is included with
delivery.
•
Make sure that there is free space above and below the nursing table to allow
height adjustment. The worktop is up foldable, but please be aware of obsticles
above, below and around the worktop to prevent trapping risk.
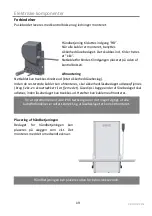
•
If the control switch has been damaged or stopped working, it has to be replaced
immediately. The up and down buttons are “push and hold”. The motor stops
when the button is being released. This is a very important safety element.
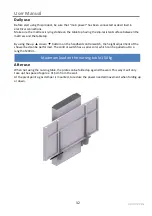
•
If two nursing tables are mounted next to each other, we recommend to mount a
side cover between, to avoid the trapping risk.
Summary of Contents for Vario 40-306 Series
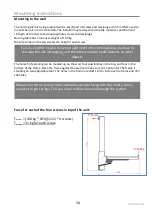
Page 13: ...13 ROPOX 2014 Montageanvisning Monter l fteenheden til v ggen med skruer i top og bund...
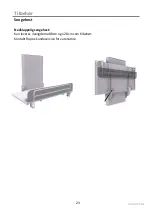
Page 14: ...14 ROPOX 2014 Montageanvisning Skyd frontpladen tilbage i l fteenheden...
Page 15: ...15 ROPOX 2014 Montageanvisning Monter afd kningspladen p toppen af l fteenheden...
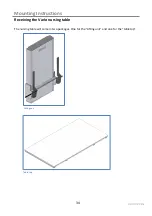
Page 40: ...40 ROPOX 2014 Mounting Instructions Slide the front plate back into the Lifting unit...
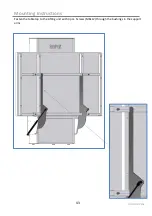
Page 41: ...41 ROPOX 2014 Mounting Instructions Mount the cover plate on the top of the lifting...
Page 66: ...66 ROPOX 2014 Montageanleitung Die Frontplatte in der Hebeeinheit schieben...
Page 67: ...67 ROPOX 2014 Montageanleitung Die Abdeckplatte oben auf die Hebeneinheit monteren...


