


29
EN
www.roof.fr
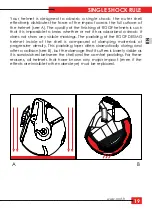
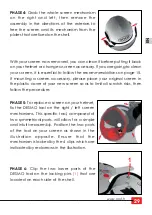
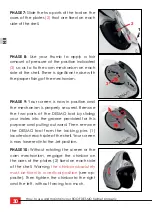
PHASE 4: Grab the whole screen mechanism
on the right and left, then remove the
assembly in the directions of the exteriors to
free the screen and its mechanism from the
plates that are fixed on the shell.
PHASE 5: To replace a screen on your helmet,
fix the DESMO tool on the right / left screen
mechanisms. This specific tool, composed of
two symmetrical parts, will allow for a simple
and intuitive assembly. Position the two parts
of the tool on your screen as shown in the
illustration opposite. Ensure that the
mechanism is locked by the 4 clips which are
indicated by red arrows in the illustration.
PHASE 6: Clip the two lower parts of the
DESMO tool on the locking pins
(1)
that are
located on each side of the shell.
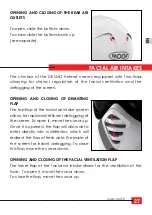
With your screen now removed, you can clean it before putting it back
on your helmet or change a screen accessory. If you are going to clean
your screen, it is essential to follow the recommendations on page 15.
If mounting a screen accessory, please place your original screen in
the plastic cover of your new screen so as to limit all scratch risks, then
follow the procedure.
1
Summary of Contents for RO31 DESMO
Page 1: ......
Page 2: ...Français 1 16 English 17 32 Deutsch 33 48 Italiano 49 64 Espanol 65 80 ...
Page 20: ......


