


EN
30
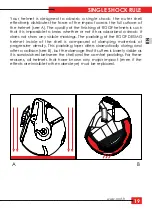
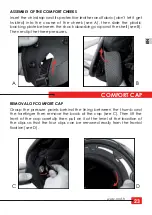
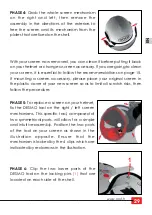
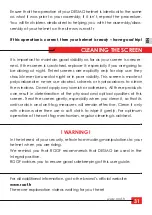
PHASE 8: Use your thumb to apply a fair
amount of pressure at the position indicated
(3)
so as to fix the cam mechanism on each
side of the shell. There is significant noise with
the proper fixing of the mechanism.
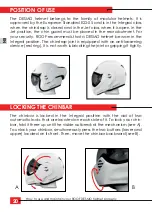
PHASE 9: Your screen is now in position and
the mechanism is properly secured. Remove
the two parts of the DESMO tool by sliding
your index into the groove provided for this
purpose and pulling outward. Then remove
the DESMO tool from the locking pins (1)
located on each side of the shell. Your screen
is now lowered into the Jet position.
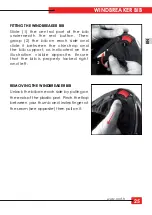
PHASE 10: Without rotating the screen or the
cam mechanism, engage the chinbar on
the axes of the plates (2) fixed on each side
of the shell. Warning
the chinbar absolutely
must be fixed in a vertical position
(see op-
posite). Then tighten the chinbar to the right
and the left, without forcing too much.
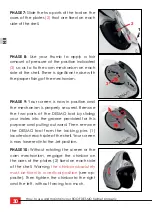
PHASE 7: Slide the two parts of the tool on the
axes of the plates
(2)
that are fixed on each
side of the shell.
1
2
1
2
3
How to use and maintain your ROOF DESMO helmet properly
Summary of Contents for RO31 DESMO
Page 1: ......
Page 2: ...Français 1 16 English 17 32 Deutsch 33 48 Italiano 49 64 Espanol 65 80 ...
Page 20: ......


