


5
Rollerdor RD77 Installation Guide, Edition 2022/01
2. HEADER ASSEMBLY CONSTRUCTION
fig.2.1
fig.2.4
fig.2.5
fig.2.2
fig.2.3
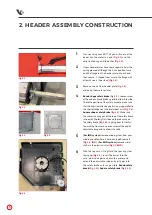
1
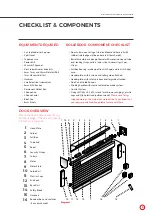
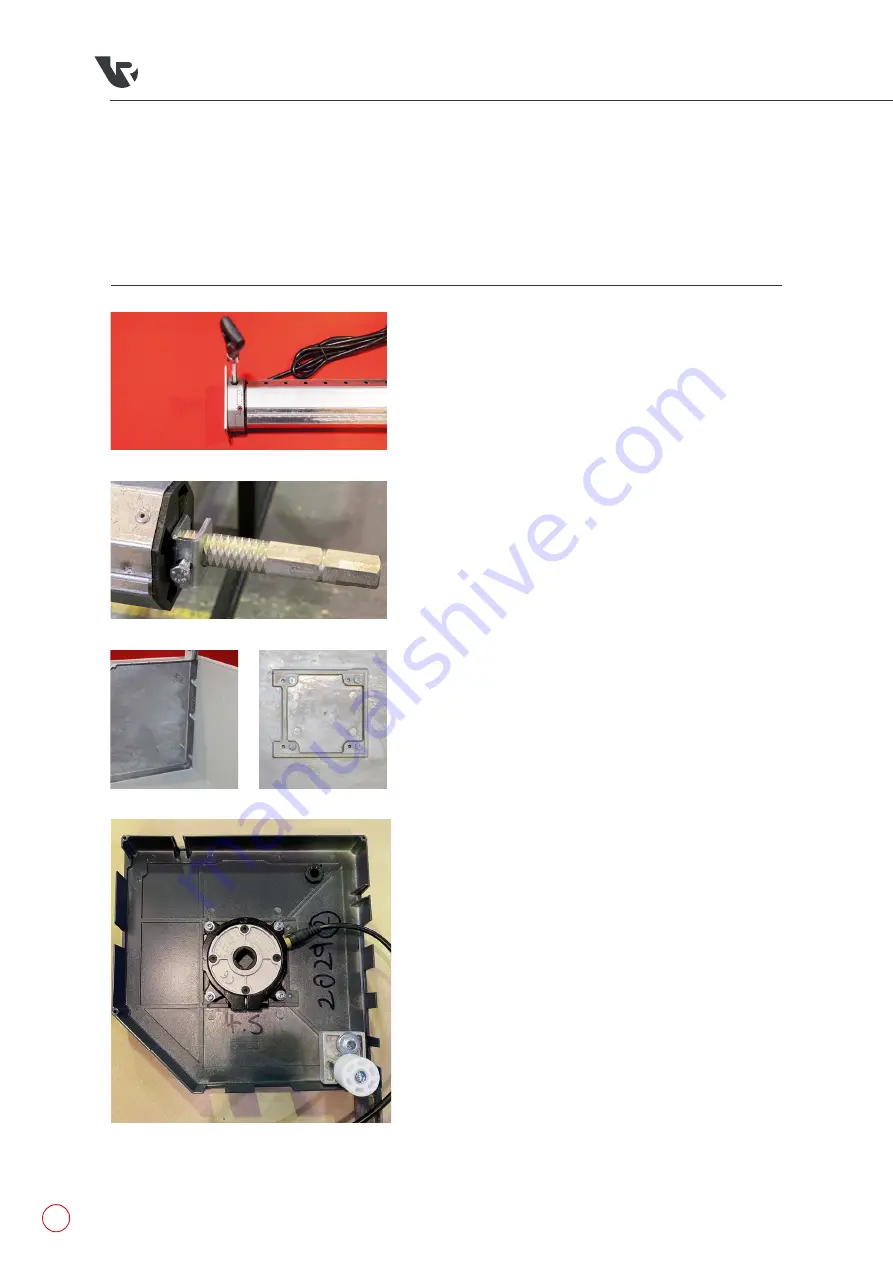
On unpacking your RD77 kit you will see that the
barrel has the motor in 1 end
(fig.2.1)
and the
adjustable bung end the other
(fig.2.2)
.
2
If your header plates have come separate from the
casing please drill though the ‘L’ shaped front case
and the flange on the header plate at each end,
then secure ‘L’ shaped front case to the flange with
at least 4 rivets (2 per face)
(fig.2.3)
.
3
Remove screws from header plate
(fig.2.4)
and keep them safe for later.
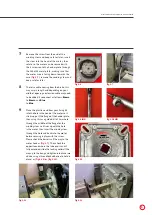
4
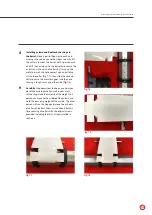
Round shape safety brake
(fig.2.5)
: Loosen screw
at the end of adjustable bung end to allow it to slide.
Check the position of the safety brake to make sure
that the big silver allen key bolt is running parallel to
the shortest edge near the inlet wheel as in
(fig 2.5)
.
Square shape safety brake
(fig.2.6)
: Make sure
the cable is coming out of the top of the safety break
in line with the long flat side and the red curve on
the safety break
(fig.2.10)
is going from fat to thin
towards the front case. Loosen screw at the end of
adjustable bung end to allow it to slide.
5
(For IMO system)
remove winding stem from your
winding handle where it has been taped securely
(fig.2.8.IMO)
.
(For EMO system)
remove metal
shaft via the plastic circlet
(fig.2.9.EMO)
.
6
With the top case sitting flat & the locating stem
facing up
(fig.2.3)
, insert the barrel into the
case, whilst one person holds the motor end
extend the adjustable tube end so it goes into
the safety brake as far as possible.
Round safety
break
(fig.2.11)
Square safety break
(fig.2.12)
.