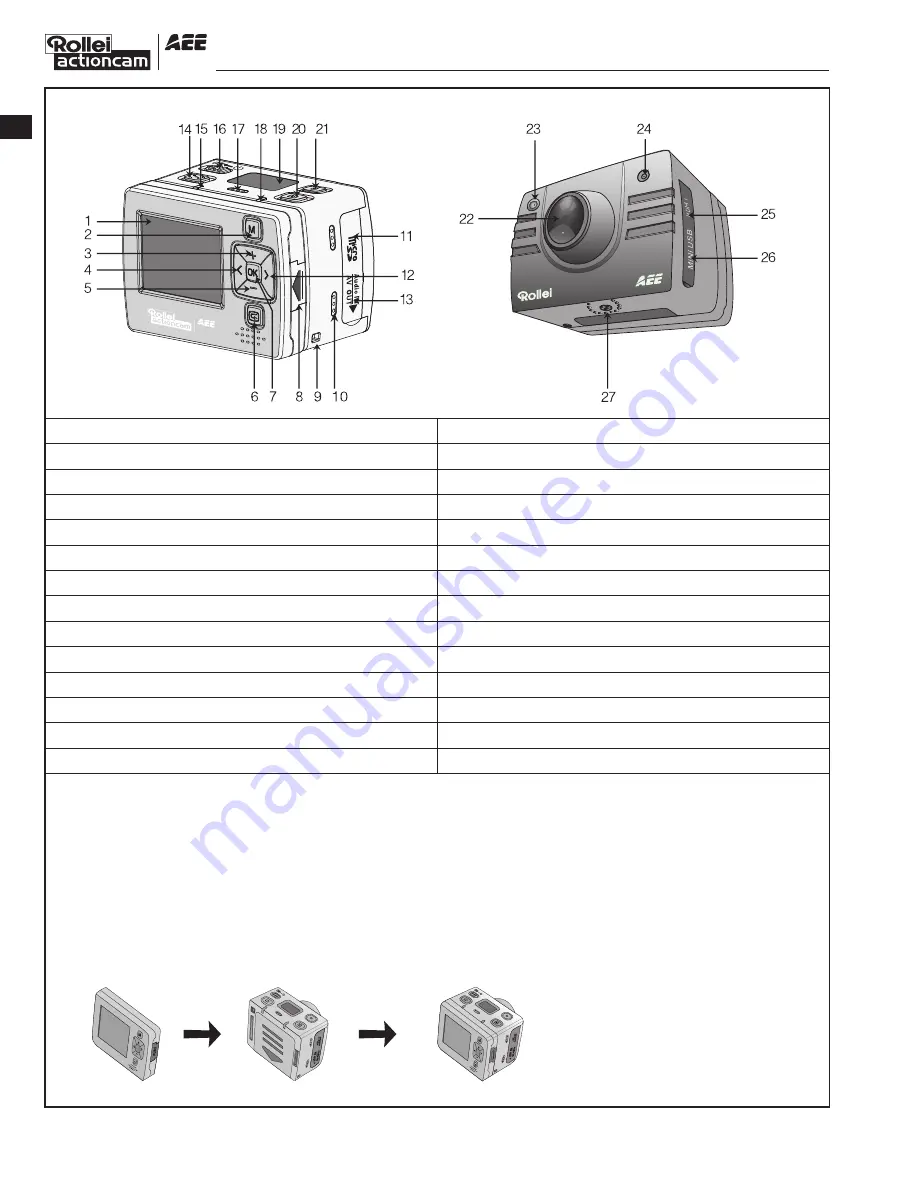
1. TFT screen
3. Upward key
5. Downward key
7. OK key
9. Wrist strap hole
11. SD card slot
13. AV out/Audio in
15. Video/Audio indicator (Green)
17. Microphone
19. LCD segment screen
21. Stop key
23. Video/Photo indicator (Green)
25. HDMI output
27. Threaded interface
2. Menu key
4. Leftward key
6. Playback key
8. TFT screen lock knob
10. Buzzer
12. Rightward key
14. Record key
16. Power switch
18. Operating/Recharging indicator (Red)
20. Shutter key
22. Lens
24. Laser indicator
26. USB output interface
(2). Put the Rollei 5S video camera into the waterproof housing
video camera Waterproof Put the video camera into
housing the waterproof housing
** To remove the TFT screen, press the PUSH snap button and then remove it.**
2. Installing the Remote Controller
The Rollei 5S video camera is equipped with an independent remote controller, which can be
placed at different positions, depending on the accessories.
(1). Velcro
(2). Back clip (3). Binding strap
(provided by users)
Use and Installation
1. Installing the Rollei 5S Video camera
The Rollei 5S video camera can be hand-held or used with hand-free accessories. It can be
installed at your desired place or after being equipped with a waterproof housing, placed in
water for shooting underwater sceneries.
How to install the Rollei 5S video camera
(1). Assemble the TFT screen onto the video camera
TFT screen video camera Assemble the TFT screen onto the video camera
Structure
EN
-4-


