11. Connecting the HDMI Output
In the preview state, connect the Rollei 5S video camera to an HD display device using an HDMI
patch cord. After being connected to the HD display device, the Rollei 5S video camera can
implement all its functions.
Note:
Incorrect removal of the HDMI patch cord may result in exceptions on the Rollei 5S video camera. After
being restarted, the Rollei 5S video camera can restore to the normal state.
12. Prompt Tones upon Operations
The Rollei 5S video camera can generate various prompt tones upon operations.
a
.
In normal cases, the Rollei 5S video camera generates a tick tone, indicating that the operation is
valid when you press the ”
Video
” or ”
Photo
”
key once.
b. Upon stopping video recording, the Rollei 5S video camera generates a tick tone twice, indicating
that the video recording operation stops.
c. If code pairing is successful upon a power-on operation, the Rollei 5S video camera generates a
tick tone twice, indicating that the code pairing operation is successful.
d. During video recording, the Rollei 5S video camera does not generate a tick tone when you press
the ”
Photo
”
key.
e. When any operations are performed on the TFT screen, you can enable or disable the function for
generating a tone. Specifically, press the “
M
” key when the Rollei 5S video camera is in the preview
state. Then press the “
<
” or “
>
” key to display the ”
Setup
”
menu. Press the “
+
” or “
–
” key, and
select “
Prompt tone
“.
f. During video recording, the Rollei 5S video camera generates a tick tone twice, indicating that the
video recording operation stops when you press the ”
Stop
” key on the remote controller once.
g. During video recording, no prompt tone is generated by the Rollei 5S video camera or by the
speaker on the TFT screen when you press the ”
Photo
” key on the remote controller once.
h. In the standby state, the Rollei 5S video camera generates a tick tone twice, indicating that the
main system starts when you press a key on the remote controller.
13. Turning On/Off the TFT Screen
a. After the Rollei 5S video camera is powered on, you can press and hold the ”
Photo
” key for three
seconds to turn on or off the TFT screen.
b. The ”
Photo
” key on the remote controller does not provide the function for turning on or off the
TFT screen.
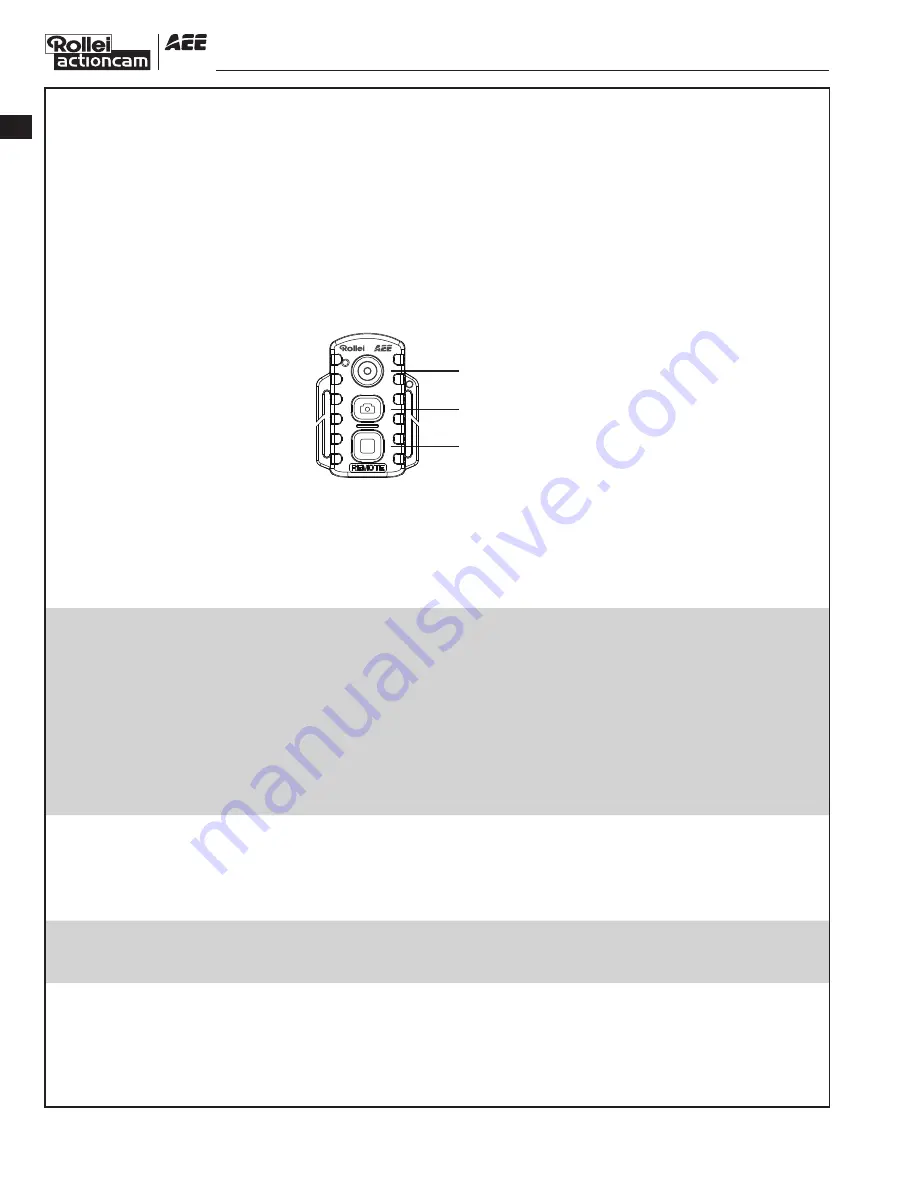
Video key
Photo key
Stop key
3) Automatically Playing a File
In the photo file interface, the Rollei 5S video camera can automatically play photos in sequence
every five seconds.
To automatically play a file, perform the following operations: Enable the playback function, and
press “
OK
”.
8. Using a Remote Controller
The Rollei 5S video camera is equipped with a remote controller, which is used for control of video
recording and shooting. After you pressing the corresponding key, the red indicator on the remote
controller blinks once. The following figure shows the functional keys of the remote controller.
To match the functions of the remote controller with those of the Rollei 5S video camera one to
one, perform the following operations for code pairing before using the remote controller.
— Press the “
Video
“ key on the Rollei 5S video camera in power-off state mode.
— Turn the power switch to the
ON
position.
— Release the “
Video
“ key. Then hold the “
Video
“ and “
Stop
“ keys on the remote controller once
within five seconds.
After successful code pairing, the Rollei 5S video camera generates the tick tone twice.
Note:
a. To check whether code pairing is successful, use a wireless remote controller to control the Rollei
5S video camera. The control functions involve starting/stopping video recording, shooting,
waking-up in standby mode. For each operation, the Rollei 5S video camera generates a tick tone,
indicating that the operation takes effect. When you use the remote controller to stop video
recording, the camera generates a tick tone twice.
b. The remote controller must be used within a distance of up to 10 meters in an obstacle-free and
horizontal angle.
c. In standby mode, you can press the “
Video
“, “
Photo
“ or “
Stop
“ key on the remote controller to start
the Rollei 5S video camera.
9. Starting the Rollei 5S Video camera in Standby Mode
The Rollei 5S video camera enters preview mode after power-on. If no task or operation is carried
out within the preset standby time, the system automatically enters the standby mode to save
power. To wake up the camera from standby state, you can press the “
Video
“, “
Photo
“ or “
Stop
“
key, or press a key on the remote controller.
Note:
a. In the standby state, the system does not start when you press any key on the TFT screen.
b. In the standby state, no information is displayed on the LCD segment screen.
10. Connecting the AV Output
In the preview state, connect the Rollei 5S video camera to a display device using an AV cable.
After being connected to a display device, the Rollei 5S video camera can still implement all its
functions.
EN
-14-


