background image

107

Add Finishing Touches to Your Song

Add Finishing Touches 

to Your Song

Selecting the Portion that will be Written to the 
CD-R Disc

To simplify the task of assembling the track cuts, you can select a desired 
area, and register it in the Locator function. For details on registering/
deleting Locator entries, refer to “Using Locators” (Owner’s Manual p. 43).

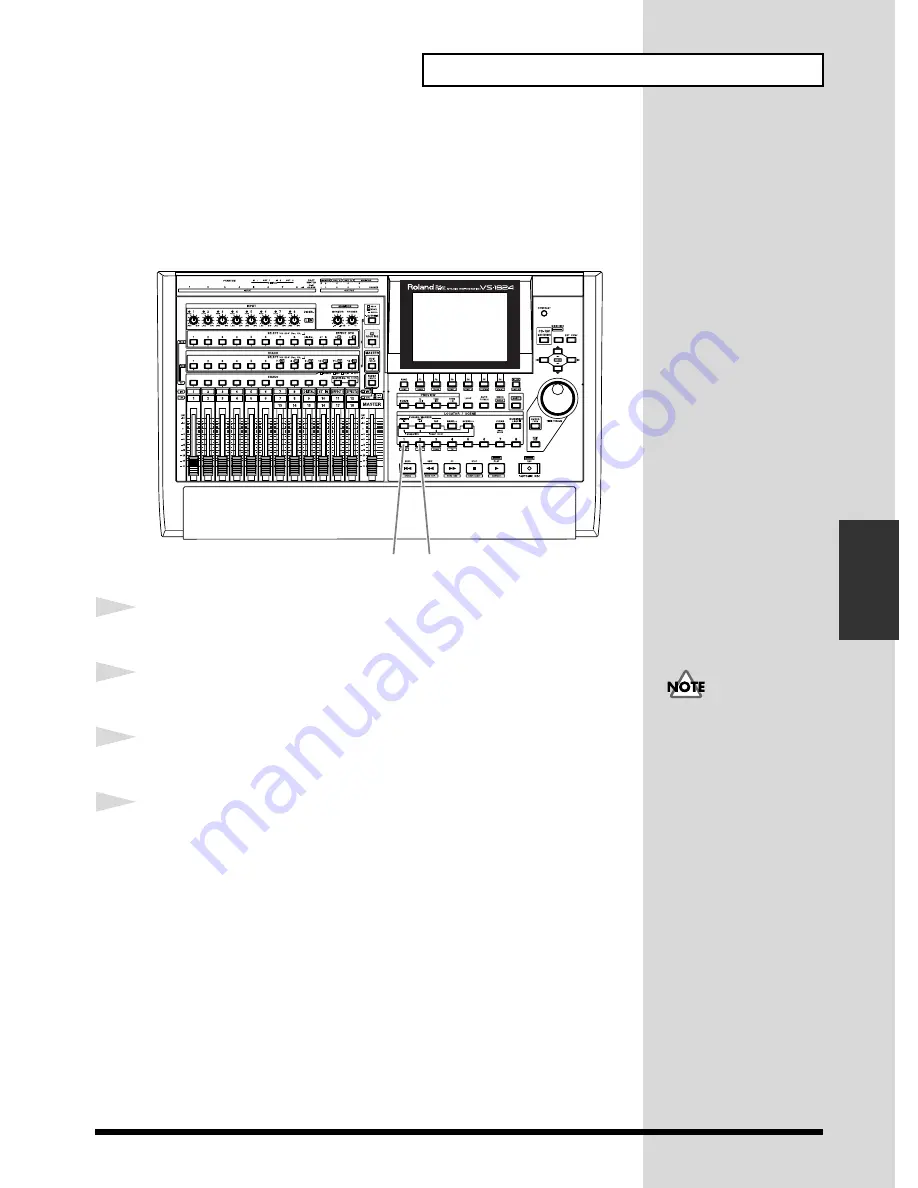
fig.5-02a

1

Move to the time location where you wish to begin writing.

2

Press LOCATOR[1]. The time will be registered in locator 1.

3

Move to the time location where you wish to stop writing.

4

Press LOCATOR[2]. The time will be registered in locator 2.

2

4

If the LOCATOR buttons is 
already lit, a locator is 
already stored there. You 
can either select a different 
LOCATOR or clear the 
existing locator by holding 
[CLEAR] and pressing that 
LOCATOR button.

Summary of Contents for VS-1824

Page 1: ...nit Additionally in order to feel assured that you have gained a good grasp of every feature provided by your new unit User Guide Owner s Manual and Appendices should be read in its entirety These man...

Page 2: ...2...

Page 3: ...he Volume of an Individual Track 27 Adjusting the Headphone Volume 27 Listening to the Demo Song with a Different Arrangement Scene 28 Deleting Unneeded Songs Song Erase 29 Making a Multi Track Record...

Page 4: ...our Song 99 Combining the Performances of Multiple Tracks Track Bouncing 99 Erasing an Unwanted Portion Track Cut 106 Selecting the Portion that will be Written to the CD R Disc 107 Deleting an Unwant...

Page 5: ...ne or other audio source to record such as an electric guitar synthesizer or CD player etc sold separately User guide will also explain the use of the following equipment which you may purchase as des...

Page 6: ...e board grasp it only by its edges Avoid touching any of the electronic components or connectors Save the bag in which the board was originally shipped and put the board back into it whenever you need...

Page 7: ...unit in place Be careful not to touch the lithium battery of the VS 1824 fig 1 05 e 4 Use the screws that you removed in step 2 to fasten the cover back in place This completes installation of the eff...

Page 8: ...rify that the Effect B menu appears fig 1 06_80 When you reequip with a effect expansion board EFFECT A please check that hold SHIFT and press F3 FX A and a menu is displayed If the Display Indicates...

Page 9: ...vous manipulez la carte la tenir par les c t s vitez de toucher aux composants ou aux connecteurs Conservez le sachet d origine dans lequel tait la carte lors de l envoi et remettez la carte dedans s...

Page 10: ...pilles de plastique Reliez les connecteurs de la VS8F 2 ceux du VS 1824 tout en ins rant les goupilles de plastique dans les orifices de la VS8F 2 Veillez ce que la VS8F 2 ne touche pas la pile au lit...

Page 11: ...correctement appuyez sur F4 FX B tout en tenant SHIFT enfonc et v rifiez si le menu d effet B appara t l cran Si No Effect Board appara t l cran Ce message signifie que la carte d extension d effets...

Page 12: ...hen you purchase the VS 1824 it will be set so that all analog audio signals are output from the MASTER jacks The MONITOR jacks will output the same sound as the MASTER jacks Stereo Set etc To Power O...

Page 13: ...he Display or Don t Know What to Do If an unfamiliar display appears or if you do not know how you arrived at the current condition press PLAY DISPLAY This will return you to the initial power on scre...

Page 14: ...to cancel the operation press EXIT NO If you attempt to perform an incorrect operation or if the specified operation cannot be executed an error message will appear in the display Please refer to Err...

Page 15: ...is is a convenience that helps you keep track of the date or order in which recordings were made After turning on the power for the first time after purchase please use the following procedure to set...

Page 16: ...show DATE press PAGE so that it displays DATE and then press F2 DATE 4 Use to move the cursor and use the TIME VALUE dial to set each value You can refer to the calendar that is displayed fig 1 14_80...

Page 17: ...at the specified time arrives The specified time will take effect at that moment 6 Press PLAY DISPLAY to return to the original display screen The internal clock operates on a battery There is no need...

Page 18: ...n SHIFT and press SHUT EJECT STOP 2 SHUTDOWN EJECT will be displayed Press ENTER YES fig 1 16_80 3 STORE Current store the current song will be displayed If you wish to store the currently selected so...

Page 19: ...played This message asks whether or not you wish to store the currently selected song to disk If you wish to store the song before continuing with the operation press ENTER YES If you do not need to s...

Page 20: ...plied with this product for any purpose other than private personal enjoyment without the permission of the copyright holder is prohibited by law Additionally this data must not be copied nor used in...

Page 21: ...d Scene 2 Acoustic version Scene 3 Guitar solo COSM effected version Locator 6 1 2 3 4 5 6 7 8 9 V Track 2 V Track 1 V Track 3 11 12 13 14 15 16 10 1 2 3 4 5 6 7 8 9 V Track 2 V Track 1 V Track 3 V Tr...

Page 22: ...song when you listen to a demo song Use the following procedure to select a song fig 2 05 1 Press PLAY DISPLAY 2 Hold down SHIFT and press F1 SONG The Song menu icons will appear 3 Press F1 SEL If F1...

Page 23: ...TER YES If not press EXIT NO 8 The song will be selected and you will return to the play condition display Different types of songs for the VS 1680 the VSR 880 the VS 880 and VS 880EX are distinguishe...

Page 24: ...FADER MUTE so that the TR track indicator is lit 3 Set the track channel 1 12 faders to the 0 dB position 4 Press FADER MUTE until the TR track indicator blinks 5 Set the track channel 13 16 faders t...

Page 25: ...se the master fader to adjust the volume The playback time level meters and playback status of each track playlist etc will be displayed To adjust the volume of the headphones rotate the PHONES knob f...

Page 26: ...d down SHIFT and press or so that the middle section of the display is enclosed in a heavy frame 3 Press F1 LMTrk If F1 does not indicate LMTrk first press PAGE until LMTrk appears and then press F1 L...

Page 27: ...he Pre Levels or Post Levels are currently displayed prepst disp Adjusting the Overall Volume To adjust the overall volume of the performance use the MASTER fader or the MONITOR knob Adjusting the Vol...

Page 28: ...demo song arranged in different ways Here s how you can listen to various arrangements of the demo fig 2 04 1 Press STOP 2 Press SCENE The button indicator will light 3 Press LOCATOR 2 Scene two will...

Page 29: ...se After creating audio CD s or backing up songs to a Zip disk etc you may wish to delete unneeded songs from the hard disk This operation cannot be undone by the Undo function fig 7 01 1 Press PLAY D...

Page 30: ...A list of songs will appear 4 Use the TIME VALUE dial to move the cursor to the song that you wish to delete and press F3 MARK A mark will be attached to the song the icon will darken Each time you pr...

Page 31: ...to erase the marked song s or press EXIT NO to cancel the operation 8 If you are erasing a song other than the current song the display will ask STORE Current Store the current song 9 If you wish to...

Page 32: ...ze the hard disk p 68 However all contents demo songs saved on the hard disk will be lost and cannot be recovered As necessary please back up the demo songs beforehand on a external removable disk or...

Page 33: ...Hold down SHIFT and press F1 SONG The Song menu icons will appear fig 3 02_80 3 Press F2 NEW If F2 does not show NEW press PAGE so that NEW appears and then press F2 NEW The Song New display will app...

Page 34: ...have assigned the name press F5 Write 7 Press to make the cursor move to SampleRate 8 Use the TIME VALUE dial to select the sample rate for the song 32kHz 44 1kHz 48kHz If you will be creating an orig...

Page 35: ...d If you wish to store the current song press ENTER YES If not press EXIT NO fig 3 06_80 14 The new song will be created and you will return to the display screen where you began The demo songs are pr...

Page 36: ...d an acoustic guitar and the other mic will record the vocal fig 3 07a 1 Lower the master fader of the VS 1824 to the minimum position 2 Connect the microphones to the INPUT jacks A mic with an XLR co...

Page 37: ...Lower the volume The power of the VS 1824 must be turned off before you switch the phantom power on off If the phantom power is switched on off when the VS 1824 is on a loud noise will be output which...

Page 38: ...ss F2 LM In If F2 does not show LM In first press PAGE so that LM In appears and then press F2 LM In Now the level meters will show the volume level of the input source fig 3 10_80 4 Make sure that th...

Page 39: ...volume level that will be sent to Master Out by each input channel Furthermore When an input channel is assigned to a track the corresponding channel fader will adjust the recording level to the appli...

Page 40: ...nput indicator is lit 3 Raise and lower channel fader 1 and verify that the volume changes The input channel fader is used to make fine adjustments to the recording level In order to record with the o...

Page 41: ...1 SELECT SELECT so that it blinks 8 If you continue holding STATUS for a short time longer you can check which source is assigned to each track fig 3 12_80 9 Raise and lower channel fader 1 to verify...

Page 42: ...dicator will light green and recording will begin Start playing your acoustic guitar 12 When you finish playing press STOP 13 For each track whose STATUS is blinking red press the STATUS button severa...

Page 43: ...corded on track 1 fig 3 13 1 Press FADER MUTE so that the TR track indicator is lit 2 Hold down STOP and press the track 1 STATUS button STATUS will light green 3 Press ZERO You will return to the beg...

Page 44: ...cording time is left you can use the following procedure It is a good idea to check the remaining recording time before you start recording fig 3 13a 1 Hold down SHIFT and press PLAY DISPLAY several t...

Page 45: ...icators that are either blinking red ready to record or lit red recording This display indicates the remaining length of time that can be recorded When you execute Undo the recorded data will appear t...

Page 46: ...y how many steps you wish to return For example if you Undo back to level 1 the VS 1824 will be restored to the point prior to your last recording or edit fig 3 16b_80 3 Press ENTER YES The UNDO indic...

Page 47: ...ange your mind about your most recent Undo allowing you to go back to having the change put into effect thus redoing it Note for example that if you ve carried out Undo two times in a row by using Red...

Page 48: ...ta is overwritten by this process the data that is no longer played back is not actually erased from the hard disk This means that the available recording time will decrease when you punch in punch ou...

Page 49: ...e returned to playback mode 6 Press STOP The song will stop 7 To listen to your recording press ZERO You will return to the beginning of the song 8 Press PLAY The song will play back 9 Use the channel...

Page 50: ...fig 3 18 1 Press PLAY DISPLAY 2 Hold down SHIFT and press F2 TRACK 3 Press F1 Tr Ph to access the Track Edit menu fig 3 19_80 Although it will appear that the audio data is erased by this process the...

Page 51: ...UE dial to specify the ending time of the area that you wish to erase fig 3 20_80 10 Press F4 Exec The Track Erase operation will be executed You can press to move the cursor from START to END About F...

Page 52: ...cording fig 3 18 11 When the operation has been completed successfully the display will indicate Complete 12 Press PLAY DISPLAY to return to the original display screen 12 For details refer to Track E...

Page 53: ...e disk drive without being actually deleted The Song Optimize operation deletes this unneeded data from the hard disk in order to increase the available space recordable time on the hard disk This ope...

Page 54: ...rm Press ENTER YES If you decide not to execute press EXIT NO fig 3 23_80 6 Optimize Really Sure will be displayed Press ENTER YES to execute the Optimize operation If you decide not to execute press...

Page 55: ...n record up to 288 18 x 16 tracks of audio The following example shows how to record a performance on V track 2 of track 1 fig 3 24 1 Press FADER MUTE so that the TR track indicator is lit 2 Press the...

Page 56: ...ding playback For this example select 2 5 Press PLAY DISPLAY to return to the original display screen 6 Now you will be able to record on V track 2 of track 1 As described in Recording On a Track p 40...

Page 57: ...of track 1 contain recorded performances Here s how you can compare the performances of the two V tracks fig 3 26 1 Press FADER MUTE so that the TR track indicator is lit 2 Press the track channel 1 S...

Page 58: ...Y Playback will begin 6 Press STOP 7 Use the TIME VALUE dial to select V track 2 8 Press PLAY Notice that a different performance is played back 9 Press STOP 10 Press PLAY DISPLAY to return to the ori...

Page 59: ...formance that you recorded earlier on track 1 As described in Adjusting the Input Sensitivity p 38 adjust the input sensitivity of the mic connected to the INPUT 2 jack before you begin fig 3 28 1 Pre...

Page 60: ...t you wish to record For this example hold down REC and press the track 3 STATUS button STATUS will blink red 8 Select the source that will be recorded on the track Hold down the STATUS button of the...

Page 61: ...does not affect the recording level You will be able to record even if you don t hear any sound Adjust the level to a comfortable monitoring volume You can use channel fader 1 to adjust the volume of...

Page 62: ...Playing Back Two or More Tracks Adjust the Volume Balance of the Tracks fig 3 29a 1 Press FADER MUTE so that the TR track indicator is lit or blink 2 Use the channel fader of each track to adjust the...

Page 63: ...use the following procedure fig 3 30a 1 Press FADER MUTE so that the TR track indicator is lit or blink 2 Hold down STOP and press the STATUS button for the track whose pan you wish to adjust so that...

Page 64: ...y back 7 When playback ends press STOP 8 If you wish to adjust the equalizer for other tracks repeat steps 1 7 6 7 5 5 4 By holding down SELECT CH EDIT and turning the MONITOR knob you can manipulate...

Page 65: ...he track channel whose equalizer you wish to adjust SELECT CH EDIT will light and the Track Mixer display will appear 3 Press F2 Low If F2 does not show Low first press PAGE so that Low is displayed a...

Page 66: ...making adjustments press PLAY DISPLAY to return to the play condition screen 6 9 5 5 7 If you adjust the equalizer while sound is playing you may notice blips in the sound This is not a malfunction I...

Page 67: ...ata or when you have been using the VS 1824 for an extended period we recommend that you save your data frequently fig 3 33 1 Hold down SHIFT and press STORE ZERO 2 STORE OK will be displayed If you a...

Page 68: ...DISPLAY 2 Hold down SHIFT and press F6 UTILITY The Utility menu icons will appear fig 7 06_80 If important data is erased by mistake there is no way to recover it Roland can take no responsibility of...

Page 69: ...the TIME VALUE dial to select the disk drive that you wish to initialize IDE SCSI0 SCSI7 For this example select IDE 6 Press The cursor will move to Partition 7 Use the TIME VALUE dial to select the...

Page 70: ...ed Surface Scan When you initialize a hard disk you can check the entire area of that drive to verify that read write can be performed correctly This operation is called Surface Scan When Surface Scan...

Page 71: ...VS 1824 Here s how to use effects when VS8F 2s have been installed For details on installing a VS8F 2 refer to Installing Effect Expansion Boards p 6 If the Display Indicates No Effect Board A VS8F 2...

Page 72: ...R MUTE so that the TR track indicator is lit 3 Select the track s for playback Hold down STOP and press the track 1 STATUS button STATUS will light green 4 Press the SELECT button for the track channe...

Page 73: ...ither Pre or Pst For this example select Pst so that the effect will be applied to the sound that has passed through the channel fader fig 4 03_80 7 Hold down SHIFT and press F3 FX A The Effect A menu...

Page 74: ...at you wish to use For this example select an effect such as P000 RV LargeHall fig 4 05_80 11 After you have selected an effect press F4 Exec 12 Preparations are now complete Press PLAY DISPLAY to ret...

Page 75: ...1 to adjust the volume of track 1 16 Press FADER MUTE so that the IN input indicator is lit 17 Use channel fader 11 EFFECT1 to adjust the effect return level 18 When the song ends press STOP fig 4 05a...

Page 76: ...ke to try out various reverb settings during playback fig 4 06 1 Press PLAY DISPLAY 2 Press FADER MUTE so that the TR track indicator is lit 3 Hold down a STATUS button of any track and press CLEAR 4...

Page 77: ...tton of the input channel that you wish to assign as the source For this example hold down the track 2 STATUS button and press the input channel 1 SELECT button SELECT will blink 9 If you continue hol...

Page 78: ...light and the Track Mixer display will appear 12 Press F1 FX1 If F1 does not show FX1 press PAGE so that FX1 appears and then press F1 FX1 13 Use the TIME VALUE dial to turn the effect on off Select...

Page 79: ...u does not appear press F6 EXIT fig 4 04_80 15 Press F1 FX1 16 Select an effect Press F2 Sel and a list of effects will appear 17 Use the TIME VALUE dial to move the cursor to the effect you wish to u...

Page 80: ...06b 19 Press PLAY DISPLAY to return to the original display screen 20 As described in Recording On a Track p 40 record a performance and then listen to it fig 4 06c 19 Signal Flow Routing TR2 FX1 MAST...

Page 81: ...track s for playback Hold down STOP and press the STATUS button for the track s that you wish to playback For this example hold down STOP and press the track 3 STATUS button To this point in the exam...

Page 82: ...Hold down SHIFT and press F3 FX A The Effect A menu will appear If the Effect A menu does not appear press F6 EXIT fig 4 04_80 7 Press F1 FX1 8 Select an effect Press F2 Sel and a list of effects will...

Page 83: ...asy to hear if you select an effect such as P005 RV VocalRoom fig 4 05b_80 10 After you have selected an effect press F4 Exec 11 Press FADER MUTE so that the IN input indicator is lit 12 Use channel f...

Page 84: ...Y DISPLAY 2 Press FADER MUTE so that the IN input indicator is lit 3 Raise and lower channel fader 1 and verify that the volume of the source changes The input channel fader is used to make fine adjus...

Page 85: ...example hold down the STATUS button of track 3 and press the input channel 1 SELECT button so it begins to blink 8 Raise and lower channel fader 3 and verify that the volume changes The track channel...

Page 86: ...Use the TIME VALUE dial to turn the effect on off Select either Pre or Pst For this example select Pst so that the effect will be applied to the sound that has passed through the channel fader fig 4 0...

Page 87: ...F2 Sel A list of effects will appear 15 Use the TIME VALUE dial to move the cursor to the effect that you wish to use For this example select an effect such as P000 RV LargeHall fig 4 05_80 16 After...

Page 88: ...to make fine adjustments to the recording level Set it to an appropriate position 20 Press FADER MUTE so that the TR track indicator is lit 21 Assign the effect return to the recording track Hold dow...

Page 89: ...ding STATUS for a time you can see the source and effect return that is assigned to the track fig 4 10_80 23 As described in Recording On a Track p 40 record a performance and listen to it fig 4 10a S...

Page 90: ...AY DISPLAY 2 Press FADER MUTE so that the TR track indicator is lit 3 Select the track that you wish to playback Hold down STOP and press the track 1 STATUS button STATUS will light green 4 Press the...

Page 91: ...9 Press F4 FX2 10 Select an effect Press F2 Sel A list of effects will appear 11 Use the TIME VALUE dial to move the cursor to the effect that you wish to use For this example select an effect such a...

Page 92: ...Press PLAY DISPLAY to return to the original display screen 14 Press PLAY Notice that the effect is applied to the sound 15 Use channel fader 1 to adjust the volume of track 1 16 When the song ends pr...

Page 93: ...ck For example if you insert FX2 into track 1 the FX2 bus will not be used it will be vacant In this situation if you set the track 2 FX2 SW to Pst the track 2 signal will be sent to the FX2 bus but i...

Page 94: ...t on track 1 fig 4 16 1 Connect an electric guitar to the GUITAR Hi Z jack 2 Press PLAY DISPLAY 3 Press the SELECT button of the channel to which you wish to apply the effect For this example press th...

Page 95: ...pear If the Effect A menu does not appear press F6 EXIT fig 4 04_80 8 Press F4 FX2 9 Select an effect Press F2 Sel A list of effects will appear If the display indicates FX2 the effect FX2 is inserted...

Page 96: ...r you have selected an effect press F4 Exec 12 Press PLAY DISPLAY to return to the original display screen 13 Press FADER MUTE so that the IN input indicator is lit 14 Raise and lower channel fader 8...

Page 97: ...ish to record and press the SELECT button of the input channel that you wish to assign as the source For this example hold down the track 1 STATUS button and press the input channel 8 SELECT button so...

Page 98: ...98 Using Effects fig 4 18a Signal Flow Routing MASTER OUT MONITOR OUT TR1 IN8 Hi Z...

Page 99: ...reate an original audio CD you can specify two of the VS 1824 s tracks as the left track and right track and write them to a CD R disc A performance that has not yet been mixed down must be mixed down...

Page 100: ...LECT button of the track channel s to which you wish to apply the effect For this example press the track channel 1 SELECT button SELECT will light and the Track Mixer display will appear 6 Press F1 F...

Page 101: ...o which you wish to apply the effect For this example select Pst so that the effect will be applied to the sound that has passed through the channel fader fig 4 03c_80 9 Hold down SHIFT and press F3 F...

Page 102: ...ursor to the effect that you wish to use For this example select an effect such as P000 RV LargeHall fig 4 05_80 13 After you have selected an effect press F4 Exec 14 Press PLAY The song will play bac...

Page 103: ...IN input indicator is lit 18 Use channel fader 11 EFFECT1 to adjust the effect return level At this time the sound that you are monitoring will be recorded to tracks 7 and 8 exactly as you hear it 19...

Page 104: ...ack 7 or 8 STATUS button and press the SELECT buttons of track channels 1 6 SELECT will blink 27 Assign the effect return to the recording tracks Hold down the track 7 or 8 STATUS button and press the...

Page 105: ...and press the STATUS button of the track that you wish to record For this example hold down REC and press the track 7 or 8 STATUS button STATUS will blink red 33 Press REC The REC indicator will blink...

Page 106: ...ong end This means that if there are silent portions at the beginning or end of the performance the capacity of the CD R disc will be wasted To avoid this you can erase unwanted portions fig 5 02 e fi...

Page 107: ...entries refer to Using Locators Owner s Manual p 43 fig 5 02a 1 Move to the time location where you wish to begin writing 2 Press LOCATOR 1 The time will be registered in locator 1 3 Move to the time...

Page 108: ...End of the Song fig 5 03 1 Press PLAY DISPLAY 2 Hold down SHIFT and press F2 TRACK 3 Press F1 Tr Ph so that the Track Edit menu appears fig 5 04_80 4 Press F6 Cut If F6 does not show Cut first press...

Page 109: ...ht red 7 Use to move the cursor to START 8 Specify the starting location of the area that will be deleted Press LOCATOR 2 and then press F2 NOW 9 Press The cursor will move to END 10 Specify the end l...

Page 110: ...ginning of the Song fig 5 06 1 Press PLAY DISPLAY 2 Hold down SHIFT and press F2 TRACK 3 Press F1 Tr Ph so that the Track Edit menu appears fig 5 04_80 4 Press F6 Cut If F6 does not show Cut first pre...

Page 111: ...8 STATUS buttons STATUS will light red 7 Use to move the cursor to START 8 Specify the beginning of the area to be deleted Press ZERO and then press F2 NOW 9 Press The cursor will move to END 10 Speci...

Page 112: ...Press CD RW fig 2 04 2 Press F1 MstRm The operation of playing back 16 tracks while you mixdown to the mastering tracks MST TR is significantly affected by the speed of the hard disk For this reason d...

Page 113: ...same time Status mastering track status Rec Play back tracks 1 16 while recording them to the mastering tracks Play Play back the mastering tracks The sound of tracks 1 16 will not be output from the...

Page 114: ...his is the switch for setting whether to record the mastering tracks in CDR mode Off The mastering tracks are recorded using the recording mode of the present song On The mastering tracks are recorded...

Page 115: ...track indicator lights 5 Hold down STOP and press the STATUS button for all tracks 1 12 that you wish to mixdown The STATUS indicators will light green fig 5 15 fig 2 07 e 6 Press FADER MUTE so that...

Page 116: ...jacks volume levels panning will be recorded to the mastering tracks It is best to set the volume as high as possible without causing the volume to distort 11 15 8 14 13 10 9 7 You cannot record the...

Page 117: ...on at which you wish to begin the mixdown such as 00h00m00s00f 13 Press REC The REC indicator will light in red 14 Press PLAY The PLAY indicator will light in green and recording will begin 15 When yo...

Page 118: ...y or Off 3 Press F6 to cycle between M Rec M Play M Off This allows you to change the mastering track switch and mastering track status at the same time The current status of the mastering tracks can...

Page 119: ...vels F3 Enlarges the playlist in the time direction five levels F4 Reduces the playlist in the time direction five levels F5 WAVE Display the sound level waveform that is recorded in the tracks 7 When...

Page 120: ...ed you can insert effects while you mixdown fig 5 30 1 Press CD RW cdrwmenu_80 2 Press F1 MstRm 1 2 6 4 3 5 While performing a mixdown it is common to insert an effect such as a parametric equalizer o...

Page 121: ...s Specify the status of the master tracks For this example select Off Off The mastering tracks will not be used Rec Play back tracks 1 16 and record on the mastering tracks Play Play back the masterin...

Page 122: ...inserted into both channels The inserted effects are shown as icons and as patch names up to ten characters Snd effect send level Adjust the volume level of the signal that is sent to the insertion e...

Page 123: ...Press F2 Sel 10 Use the TIME VALUE dial to move the cursor to the effect that you wish to use For this example select an effect such as P210 MTK Mixdown fig 5 26 11 After selecting an effect press F4...

Page 124: ...tor will light in green fig 2 06 15 Press FADER MUTE so that the TR track indicator blinks fig 2 07 e 16 Hold down STOP and press STATUS for all tracks 13 16 that you wish to mixdown The STATUS indica...

Page 125: ...out causing distortion 20 When you are finished adjusting the volume press STOP 21 Move to the time location at which you wish to begin the mixdown e g 00h00m00s00f 22 Press REC The REC indicator will...

Page 126: ...it convenient to use the Preview function or the Scrub function Owner s Manual p 166 2 Hold down PLAY DISPLAY and press TAP A track number marker will be placed at the current time location The first...

Page 127: ...hich songs have already been written track numbers will be assigned in sequence to follow the previously written songs For example if five songs have already been written to the CD R disc the next son...

Page 128: ...e A CD R CD RW drive allows you to use CD R or CD RW discs to create audio CDs CD R discs are the preferred format for audio CDs 1 Make sure that the power of all devices is turned off 2 Use a SCSI ca...

Page 129: ...o the image file regardless of the partition settings The image file will be deleted automatically after it has been written to the CD R disc fig 6 01 1 Place a blank CD R disc in the CD R CD RW drive...

Page 130: ...ask you to confirm Press ENTER YES 6 The display will ask STORE Current Store the current song If you wish to store the current song before you write the CD press ENTER YES If not press EXIT NO fig 6...

Page 131: ...c after writing the song For this example select Off 13 Press The cursor will move to Write Method Finalize Finalize means to write the TOC Table Of Contents to the audio CD created by the VS 1824 If...

Page 132: ...t was written using Disc at Once It will be in the same condition as if Finalize had been performed fig 5 01 e Track at Once Two seconds of silence will automatically be written to the CD R disc befor...

Page 133: ...sage with license agreement will appear Please read the message carefully and if you accept the agreements press ENTER YES The VS 1824 will begin writing to the CD R disc If you do not accept the agre...

Page 134: ...ote a song an unfinalized CD R disc cannot be played back in its current condition on a commercial CD player To check audition the song you wrote to the disc use the following procedure fig 6 05 1 Ins...

Page 135: ...rom the current location PREVIOUS or Return to the previous song NEXT or Advance to the next song Master fader Adjust the overall volume MONITOR knob Adjust the volume of the MONITOR jacks PHONES knob...

Page 136: ...sert switch 122 Effect menu 73 79 82 87 91 95 101 effect return level 122 effect send level 122 effects 71 equalizer 65 F Factory reset 14 Finalize 131 132 FXIns 114 G GUITAR Hi Z jack 39 94 Guitar Mu...

Page 137: ...Song Name 33 Song New 32 Song Optimize 53 Song Protect 32 Song Select 22 Song Store 67 Stereo Position 63 STORE Current 19 Surface Scan 70 System initialization 14 System Menu 15 T Table Of Contents...

Page 138: ...138 MEMO...

Page 139: ...eliopolis Cairo 11341 EGYPT TEL 20 2 417 1828 REUNION Maison FO YAM Marcel 25 Rue Jules Hermann Chaudron BP79 97 491 Ste Clotilde Cedex REUNION ISLAND TEL 0262 218 429 SOUTH AFRICA That Other Music Sh...

Page 140: ...repro duction of Music CD or other copyrighted material without permission of the copyright owner avoiding technical prohibiting features of second generation and later copying like SCMS or others co...

Reviews: