5. Filling with Ink
25
3.
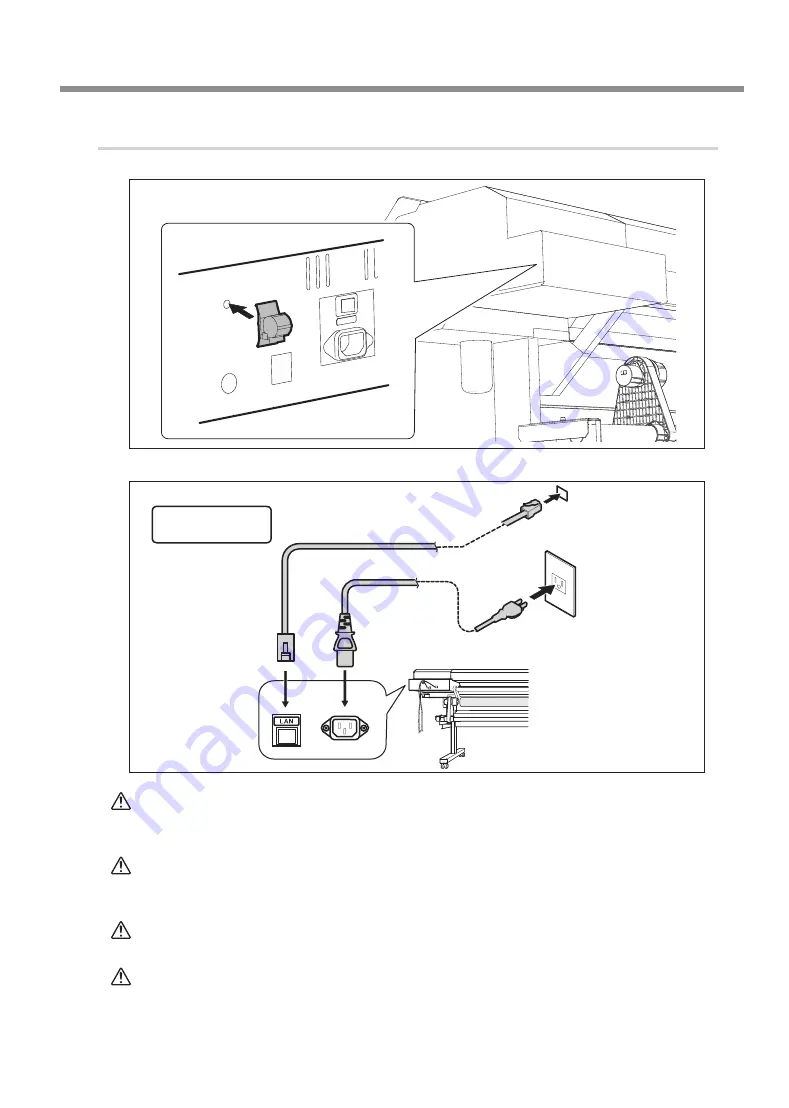
Switch on the power switch and make the initial settings.
v
WARNING
Connect to electrical outlet that complies with this machine's ratings (for
voltage, frequency, and current).
Incorrect voltage or insufficient current may cause fire or electrical shock.
WARNING
Connect to ground.
This can prevent fire or electrical shock due to current leakage in the event of
malfunction.
WARNING
Perform this task with all power switches left switched off.
Otherwise sudden movement of the machine may cause injury.
CAUTION
Never insert your hand or fingers into the opening of the front cover.
The print head carriage moves at high speed inside the cover. Hitting may
cause injury.
Ethernet cable (Cat-
egory 5 or higher)
Never insert a
telephone cable.
Ethernet (100Base-TX
is recommended.)
Summary of Contents for Texart RT-640
Page 2: ......
Page 4: ...2 ...
Page 12: ...4 Assembling and Installing 10 w x Tighten fully View from right above ...
Page 14: ...4 Assembling and Installing 12 Tighten fully Bolts long 4 ...
Page 16: ...4 Assembling and Installing 14 Tighten fully Bolts short 4 Tighten fully ...
Page 17: ...4 Assembling and Installing 15 Tighten loosely 3 Install the media holder Tighten loosely ...
Page 18: ...4 Assembling and Installing 16 x y Tighten loosely ...
Page 19: ...4 Assembling and Installing 17 z Tighten fully ...
Page 23: ...5 Filling with Ink 21 1 Install the ink pouch holder v w ...
Page 28: ...5 Filling with Ink 26 w ...
Page 42: ......
Page 43: ......
Page 44: ...R1 141107 1000012754 ...


