background image

4

Installation Procedure

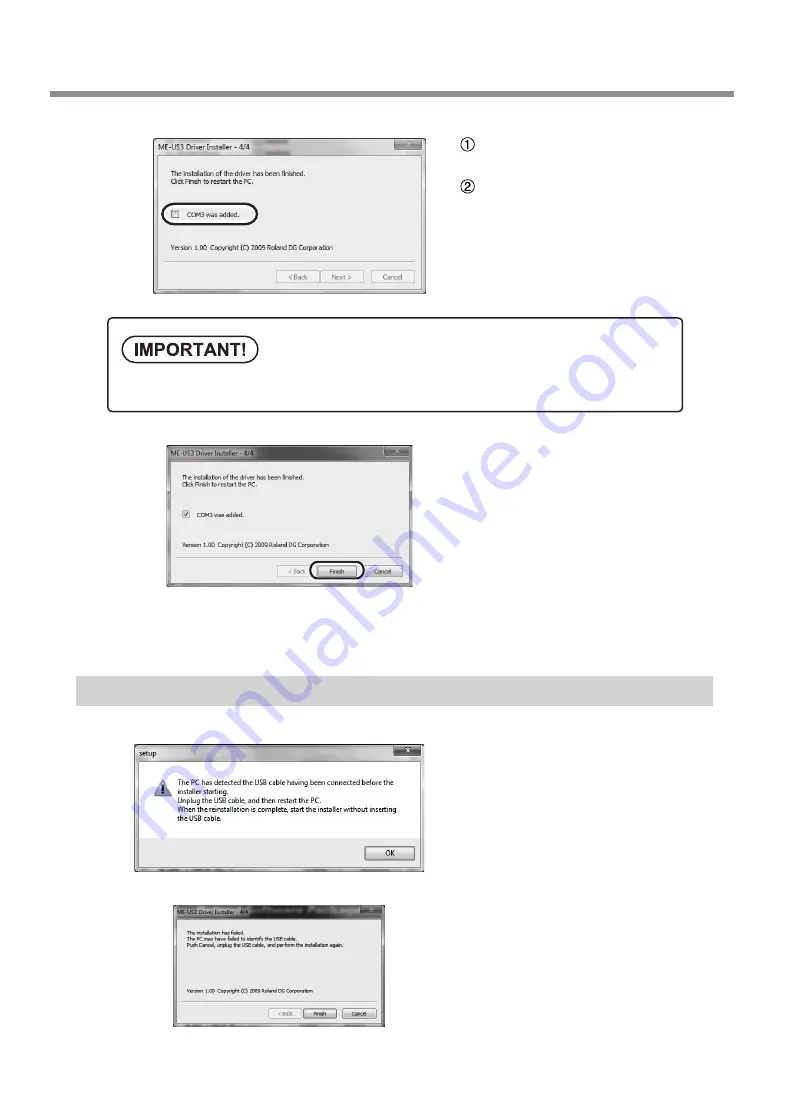
Select the "COMx was added." check 

box.

Make a note of "COMx."

"COMx" ("x" varies depending on the com-
puter being used) has newly been added 
to the printer port being used.

Click [Finish].

The computer is restarted automatically. 
(To restart later, click [Cancel].) The installa-
tion of the ME-US3 driver finishes after the 

computer restarts.

Install the Windows-based driver for the modeling/engraving machine to connect this cable to.

For the installation procedure, see the explanation of how to install the corresponding driver.

Responding to an Error Message

If a message such as those shown on the 
left appears during installation, follow the 
on-screen instructions and perform the in-
stallation again.

Be sure to make a note of the "COMx" ("x" varies depending on the computer being used) dis-
played on this screen. You will have to select this port when installing the Windows-based driver.

Summary of Contents for ME-US3

Page 1: ...Minimum required CPU for the operating system Memory Minimum amount of required RAM for the operating system Optical drive CD ROM drive Port USB port Free hard disk space re quired for installation 3...

Page 2: ......

Page 3: ...I Included Items I System Requirements I Contents 1 Installation Procedure 2 Procedure Overview 2 Installing the ME US3 Driver 2 Responding to an Error Message 4 Troubleshooting 5 Cutting Data Was De...

Page 4: ...administrator or as an Administrators account Insert the Roland Software Package CD ROM into the disk drive CD ROM DVD RW etc of the computer When the automatic playback window appears click Run menu...

Page 5: ...The installation begins If the User Account Control window appears click Yes If the window shown on the left ap pears connect the USB plug of this ca ble to the computer Do not connect multiple model...

Page 6: ...Install the Windows based driver for the modeling engraving machine to connect this cable to For the installation procedure see the explanation of how to install the corresponding driver Responding t...

Page 7: ...her of the usage methods listed above the cutting data may be deleted during cutting Change the computer settings Procedure In the Start menu search box enter Device Manager Click Device Manager The D...

Page 8: ...6 Troubleshooting Select the Serial Printer check box under Miscellaneous Options Click OK Close the Device Manager window This completes the changes to the computer settings...

Reviews: