


5-5
VENICE 2U | Hardware Guide | Version 1.2
Rohde & Schwarz DVS GmbH
Maintenance
Hard Disk Maintenance
Step 1: Removing the Hard Disk
The hard disks that are accessible at the front of the system are con-
nected to the system with the help of disk carriers. They can be re-
moved easily, even when the system is running (hot-swappable).
To remove a hard disk from the system perform the following:
1.
If appropriate, stop all accesses to the hard disk array of your sys-
tem, for example, by exiting the video system software and sever-
ing the network connections.
2.
Fold down the faceplate of the system (see section “The Front of
the System” on page 2-6).
3.
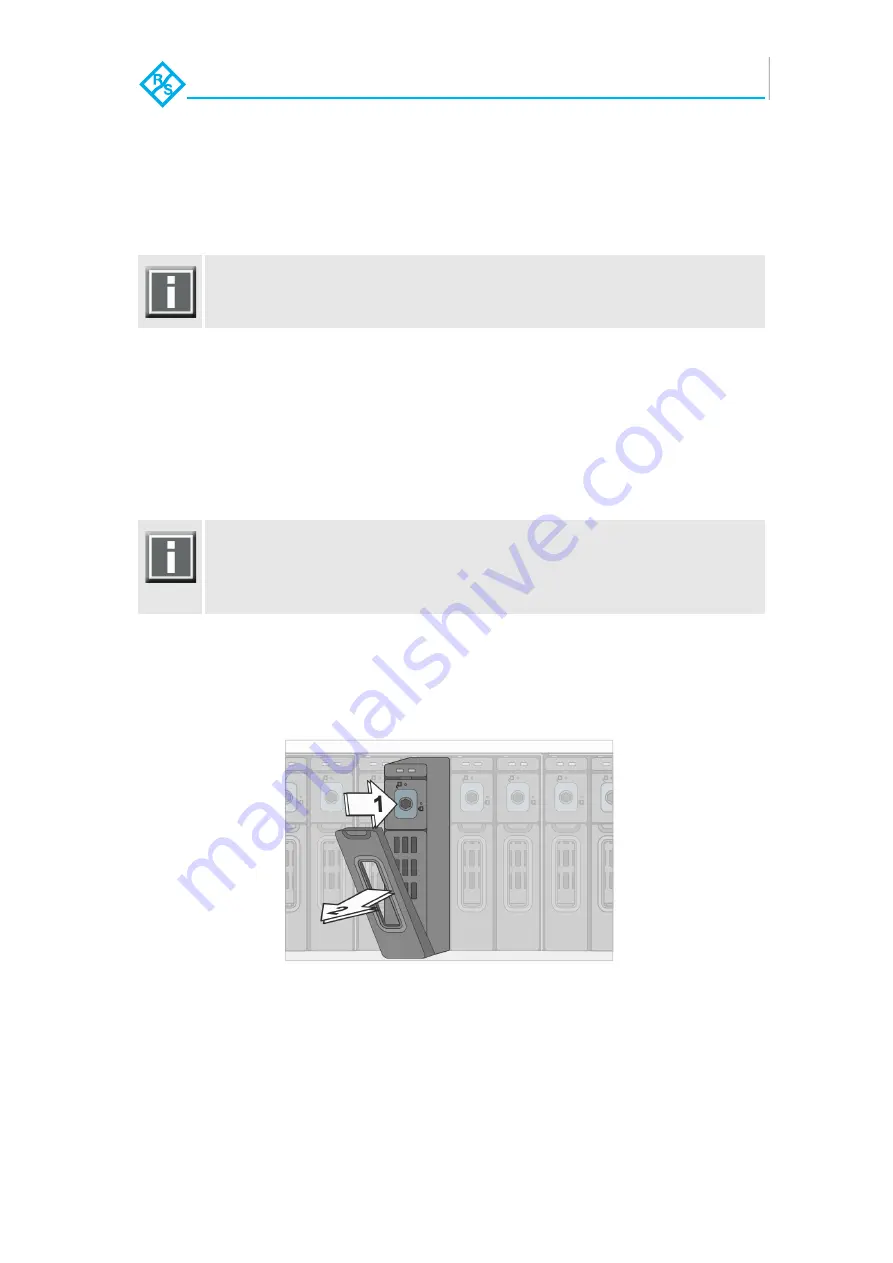
Then, unlatch the disk carrier of the defective hard disk by press-
ing the opener of the disk carrier (1).
This will cause the lever to come out of the disk carrier so that it pro-
trudes from the rest of the disk carriers.
4.
Take the lever and pull the hard disk carrier out of the hard disk
array (2):
Figure 5-2: Pulling out the lever
This takes the hard disk installed in the disk carrier out of the system’s
interfaces inside.
5.
Once the interface connections inside the system are severed,
you can pull the disk carrier out of the system.
Now the hard disk is removed from the system and it has to be replaced
in the next step.
For an overview of a disk carrier as well as further information about it
see section “Hard Disk Array” on page 2-7 and section “System Disk Ar-
ray” on page 2-12.
If you press the opener but it does not move and the lever does not
come out of the disk carrier, it might still be locked. Use a hex key to turn
the lock a quarter turn left in the direction of the open padlock symbol.
Once you feel a slight resistance, the disk carrier should be unlocked.


