Li-ion battery pack and charger
DC Power Supply and Battery Operation
12
Installation Manual 1321.3937.02 ─ 02
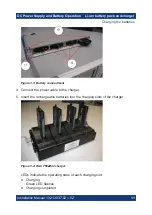
Green LED remains lit
● Fault
Red LED lights up
6. When charging is complete, you can remove the rechargeable batteries from
the charger. The LCD on the front of the rechargeable battery indicates the
charge level in increments of 20 %.
7. Disconnect the charger from the power supply.
8. Insert the rechargeable batteries into the battery pack. Make sure the tab
sticks out of the housing to ensure the correct polarity.
9. Close the flap on the front.
10. Secure the flap using the two knurled screws.
3.3
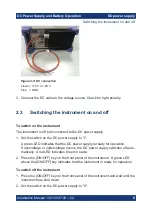
Switching the instrument on and off
To switch on the instrument
The instrument is off but connected to the DC power supply.
1. Set the switch on the battery pack to "I".
2. Set the switch on the DC power supply to "I".
A green LED indicates that the DC power supply is ready for operation.
If overvoltage or undervoltage occurs, the DC power supply switches off auto-
matically. A red LED indicates the error state.
3. Press the [ON/OFF] key on the front panel of the instrument. A green LED
above the [ON/OFF] key indicates that the instrument is ready for operation.
To switch off the instrument
1. Press the [ON/OFF] key on the front panel of the instrument and wait until the
instrument has shut down.
2. Set the switch on the DC power supply to "0".
3. Set the switch on the battery pack to "0".
Switching the instrument on and off


