12
Installation Guide
Install Precautions
• This unit should be install by a qualified technician or service personnel.
• This product is designed to operate with a 12V DC, grounded battery system.
• Disconnect the ground wire from the battery terminal before connecting this unit to
the electrical system.
• Use proper insulation and fastening materials to prevent electrical short-circuiting.
• Do not connect the red wire of this product directly to the battery terminal. Remember
to connect the red wire of this product to the ACC of the ignition key switch. Failure to
do so may result in draining of the battery charge prematurely.
• Do not install this product at a position that may cause injuries to the passenger(s)
during an accident.
• Due to different car specifications, please ensure that the display monitor is suitably
located.
• Do not install this product at a declining angle exceeding 30°.
• Do not install screws over plane surface which may affect monitor ejector retract
function.
Install Instructions (all units)
• To prevent short circuits, remove key from the ignition and disconnect the
RED (+12V) cable from battery terminal.
1. Disconnect the original dome light.
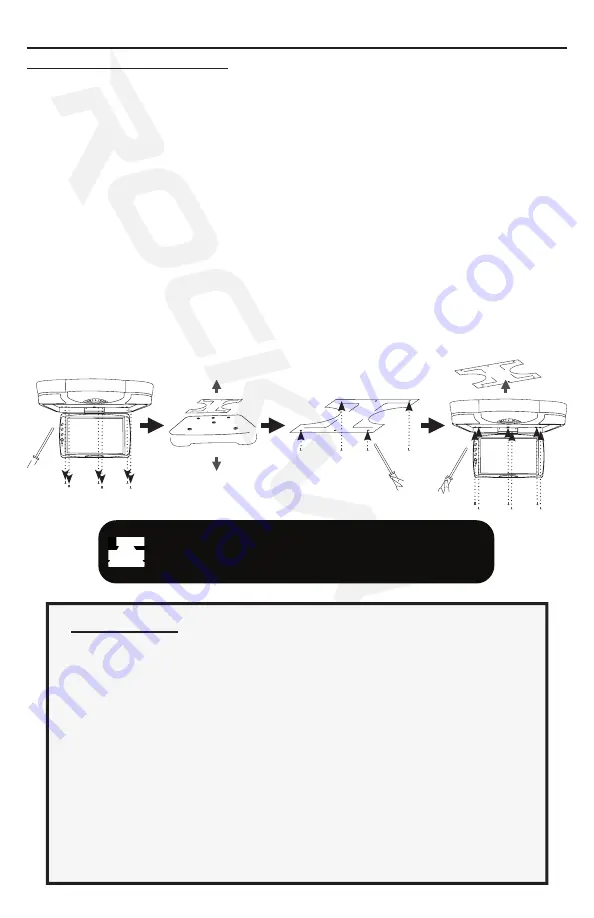
2. Detach metal mounting plate from Rockville unit. Release the screen from its
locked position to access the necessary screws and set them aside.
3. Attach the metal mounting plate to the roof using the screws provided. Make
sure screws attach to interior roof liner.
4. Connect ground wire harness in the following order:
Ground wire (black)
ACC wire (red)
5. Attach the unit to the metal mounting plate using the screws removed in step 3.
• Connection may vary depending on vehicle make and model. Rockville recom-
mends that the installation of this product be performed by an MECP-Certi-
fied professional installer.
WARNING:
• Be careful not to screw and puncture the exterior roof.
• Use only the screws supplied.
!
Summary of Contents for RVD13-HD
Page 13: ...13 Installation Notes...


