


Installation and operation manual – remote control
11
4. The set temperature can be changed at any time by turning
the
knob.
5. You can display the set temperature by pressing the
key.
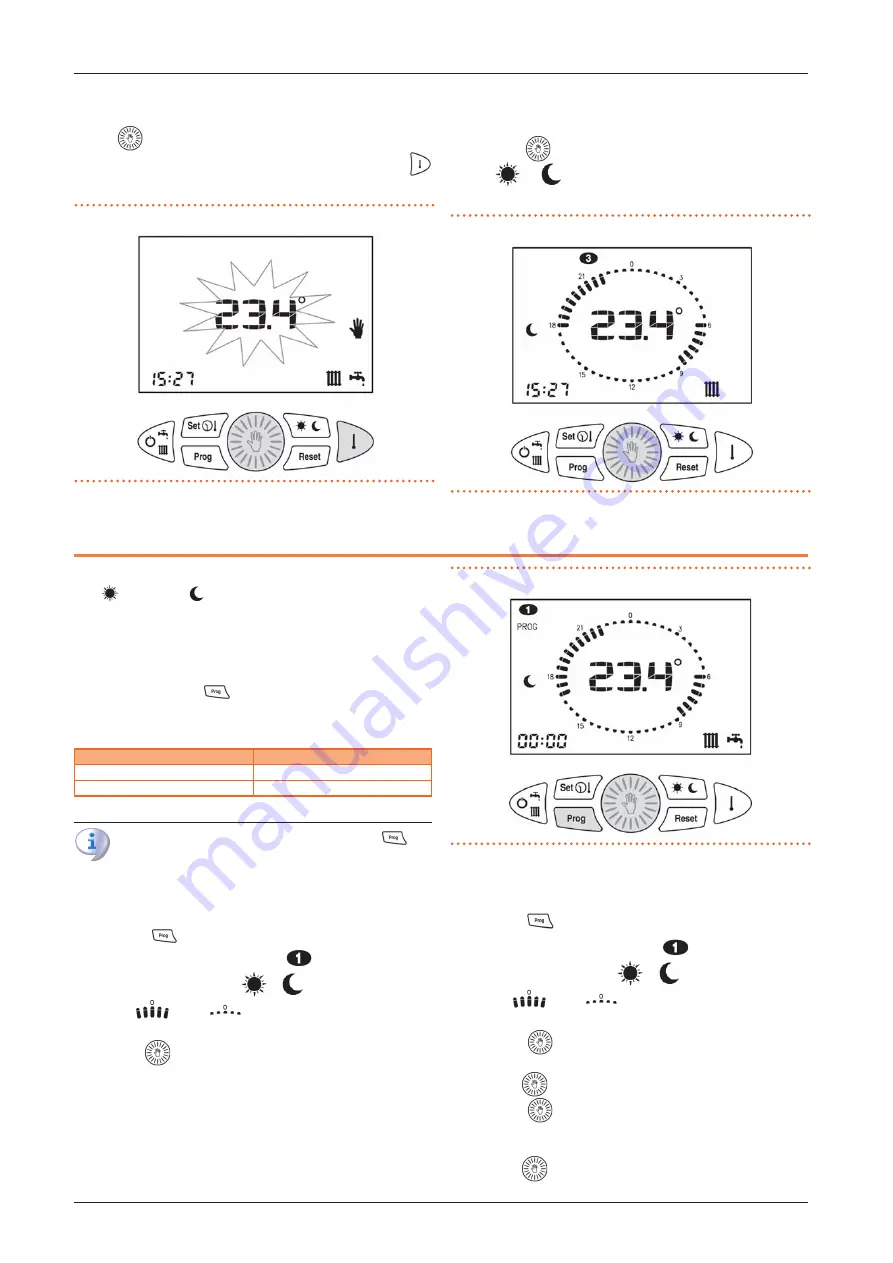
Figure 9.1
Manual operation: setting the desired temperature
9.2
AUTOMATIC OPERATION
1. Press the
key until the heating clock face is displayed.
2. The
or
icon is lit to indicate which temperature lev-
el is currently set.
Figure 9.2
Heating clock display and night temperature icon
10 WEEKLY HEATING PROGRAM
The room temperature can be set to two independent levels:
day (
) and night (
) whose distribution throughout the day
is managed by the weekly heating program.
The remote control contains a standard room temperature man-
agement program that can be viewed and freely modified by the
user.
The display/modification mode of the heating program is acti-
vated by pressing the
key and is identified by the activa-
tion of the PROG icon at the top left of the display.
Table 10.1
Identification icon of the heating program operation
Function
Identification icon
heating program display
PROG not flashing
change heating program
PROG flashing
Once the changes have been made, press the
key
again to exit the programming mode.
10.1
HEATING PROGRAM DISPLAY
1. Press the
key.
2. The display shows the PROG and
icons to indicate the
first day of the week. The
/
and time switch icons
are on
or off
at the day/night level associated
with the displayed time (Figure 10.1
3. Turn the
knob to scroll through the times of the day and
switch between the days.
Figure 10.1
Heating program selection
10.2
CHANGE HEATING PROGRAM
1. Press the
key.
2. The display shows the PROG and
icons to indicate the
first day of the week. The
/
and time switch icons
are on
or off
at the day/night level associated
with the displayed time (Figure 10.1
p. 11).
3. Press the
key to switch to the program editing mode:
the PROG icon and the day of the week flash.
4. Turn the
knob to select the desired day.
5. Press the
knob to confirm the selected day and move
to the time. The day of the week stops flashing and the time
starts flashing.
6. Turn the
knob to select the desired time.