background image


Connection with receicer: 


PIN-Belegung am CC3D 

– Empfänger: 


1-3  

= Throttle (black/red/white 

= Roll (blue) 

= Pitch (yellow) 

6  

= Yaw / Rudder (green) 

= AUX 1 (yellow) 

8  

= AUX 2 (black) 


In- and Output from CC3D Board 


Input  


see Connecting to the receiver or under


https://wiki.openpilot.org/display/WIKI/Copter-+CC3D+-+Atom+HSetup 


Micro-USB-Port 

for connection to PC for configuration via Open Pilot


Main-Port


= Serial Telemetry (Standard), GPS, S-Bus, Spektrum/JR-Satellite 


Flexi-Port


= Serial Telemetry, GPS, Spektrum/JR-Satellite 


Output


= Port 1 Motor front left  


= Port 2 Motor front right 


= Port 3 Motor back right 


= Port 4 Motor back left  


= Port 5 BEC Power or Aux1 


= Port 6 BEC Power or Aux2 


Safety Note: All settings please remove propellers. Never make with mounted propellers settings on control 
system! 
 
Connecting CC3D Board with the motors

 ( in ARF-Version ETB250-ARF already done )   


Port 1 Motor front left 

(

rotates clockwise

Port 2 Motor front right  

(

rotates counter-clockwise

)


Port 3  Motor back right 

(

rotates clockwise

)


Port 4 Motor back left   

(

rotates counter-clockwise


Important: 

Observe the polarity!


Summary of Contents for ETB250-ARF

Page 1: ...Instruction Manual ETB250 ARF ETB250 KIT V1 0...

Page 2: ...mx36mm 4 layer PCB for superior electrical noise reduction and air power Software Support for Windows Mac and Linux Direct USB Support no drivers required a real plug and play device Spektrum Satellit...

Page 3: ...ektrum JR Satellite Flexi Port Serial Telemetry GPS Spektrum JR Satellite Output Port 1 Motor front left Port 2 Motor front right Port 3 Motor back right Port 4 Motor back left Port 5 BEC Power or Aux...

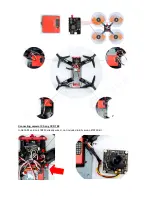
Page 4: ...Connecting camera IC Sony CCD 700 In ARF ARF version ETB250 already wired not included in kit version ETP250 kit...

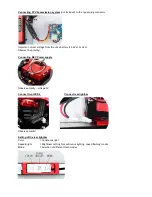
Page 5: ...12 6V at 3s LiPo Observe the polarity Connecting BEC Power supply Observe polarity voltage 5V Connect front LED s Connect rear lightbar Observe polarity Setting of the rear lightbar Color Continuous...

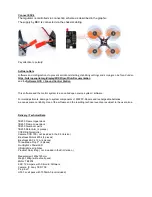
Page 6: ...components of 250FPV Racers and rechargeable batteries we can assume no liability Use of the software and the resulting technical events are subject to the user alone Delivery Technical Data TB250 Fr...

Page 7: ...n Stecken Sie das Ger t immer von der Netzsteckdose ab wenn es nicht ben tzt wird Das gesamte Produkt darf nicht ge ndert bzw umgebaut werden Ein Betrieb unter widrigen Umgebungsbedingungen ist nicht...

Page 8: ...product cannot be used safely any more you must immediately stop using it and secure it against unintended operation Such an assumption can be made if is apparently damaged malfunctions is stored in...

Page 9: ...ato Polvere e gas infiammabile vapori benzina Temperatura ambientale ca 40 C Forti vibrazioni Se si vede che il funzionamento sicuro non pi possibile il dispositivo deve essere messo fuori servizio Si...

Page 10: ...ambiante Verbinden Sie Ihr Ger t niemals gleich mit der Netzsteckdose wenn es von einem kalten in einen warmen Raum gebracht wird D branchez toujours l appareil de la prise courant si elle n est pas u...

Page 11: ...Notitzen...

Page 12: ...Robitronic Electronic GmbH Brunhildengasse 1 1 1150 Wien sterreich Tel 43 0 1 982 09 20 Fax 43 0 1 982 09 21 www robitronic com...

Reviews: