37
Set up UPnP access on a Windows PC - cont.
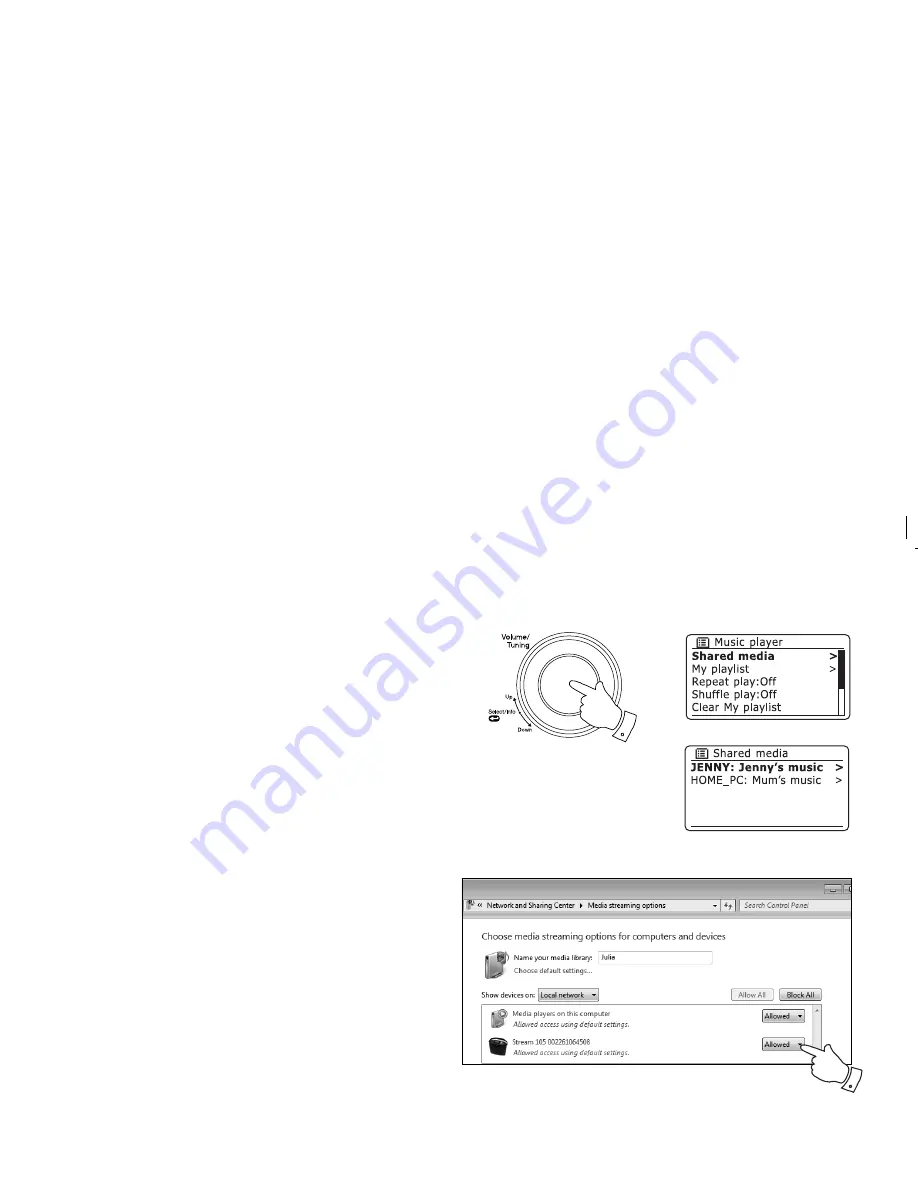
4. Rotate the
Tuning/Select
control
until
'Shared media'
is highlighted
and press the control to select. The radio will scan for all available
UPnP servers. It may take a few seconds for the radio to complete its
scan. The radio will display
'<Empty>'
if no UPnP servers are found.
5. After scanning, select your UPnP server using the
Tuning/Select
control. If you allowed automatic connection previously, your radio
should now connect and you may skip to the next page.
If you did not permit automatic connections, your radio will then normally
display
'Unauthorised'
at this stage.
6. Your PC may prompt you that there has been a connection to your
UPnP server. Whether prompted or not, in order that the radio may
access the music
fi
les, you will need to click the
'Library'
tab in WMP 12
and select the
'Stream…'
item to open the
'Media Streaming'
window.
Select
'Automatically allow devices to play my media' then select
'Automatically allow all computer and media devices'
.
Alternatively
select
'More Streaming options'
to enable sharing on a
'per device' basis.
7. In the
'More streaming options'
window, the radio will be listed as a
blocked device. Click on the button shown to select
'Allowed'
.
Note: If you are using Microsoft's Windows'
fi
rewall software, this
should be correctly con
fi
gured by WMP 12. If you are using third party
fi
rewall software you may need to manually con
fi
gure it to allow your
unit and WMP 12 to communicate (see the 'Troubleshooting' section
on page 67).
8. On the radio, select the named server again using the
Tuning/Select
control. If WMP 12 is now able to communicate with your radio you
will be presented with some media selection options on the display.
Allowing a device to connect to Windows Media Player 12
7
4,5,8


