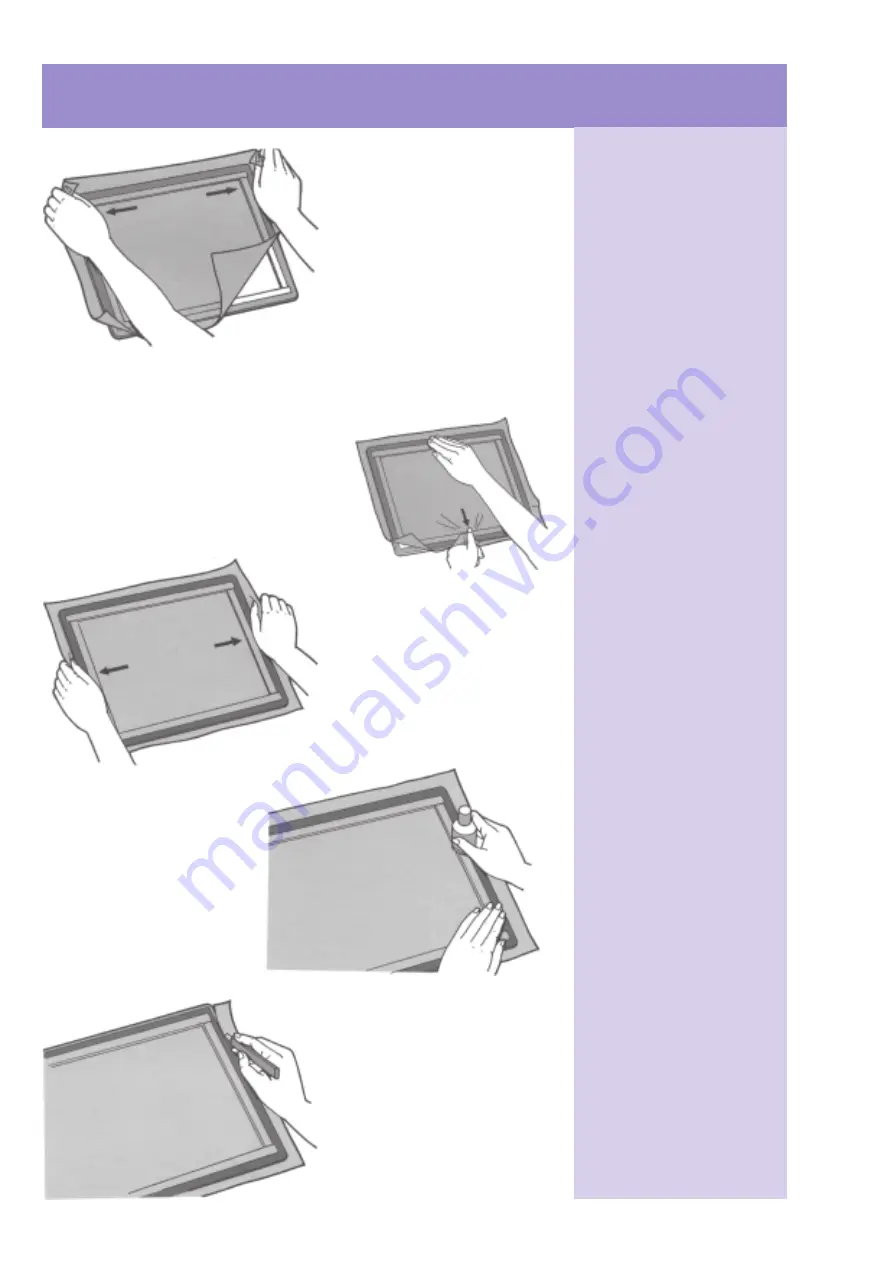
2. With the rough surface
facing down, attach the screen
to the frame. Start with one of
the two longer sides.
3. In the same way, fix the
middle of the opposite side, and
then attach the whole side while holding the
screen tight.
4. Now fix the two shorter sides, making
sure that you hold the screen
tight.
5. Once you have finished
attaching the screen so that
there are no wrinkles or slack in
the screen surface, rub the
edges with the bottom of a
correction fluid bottle or similar
hard object to make sure that
the screen is securely fixed.
6. Trim off any excess screen
around the outside of the frame.
l
When planning the size of the
screen, make it slightly larger than
the frame, as this will make mount-
ing easier.
l
Avoid over-stretching the screen -
you will not when this has been
done as plastic frame will bend
l
Do not use mechanical framing
devices
l
Over tension will reduce the print
life of the screen - remember the
mesh is already pre-tensioned
l
It is best to fix the middle first, then
start at one side and move to the
other.
l
Wrinkles or slack in the screen will
blur printed images.
l
Covering the trimmed areas with
tape will reinforce the screen.


